DummyHead

  • Home

  • Tags30

  • Categories16

  • Archives32

如何掌握所有语言

Posted on 2019-06-14 | Comments:

对的,我这里要讲的不是如何掌握一种程序语言,而是所有的……

语言的特性总结得挺好, 虽然比较啰里啰嗦.

很多编程初学者至今还在给我写信请教,问我该学习什么程序语言,怎么学习。由于我知道如何掌握“所有”的程序语言,总是感觉这种该学“一种”什么语言的问题比较低级,所以一直没来得及回复他们 :P 可是逐渐的,我发现原来不只是小白们有这个问题,就连美国大公司的很多资深工程师,其实也没搞明白。

今天我有动力了,想来统一回答一下这个搁置已久的“初级问题”。类似的话题貌似曾经写过,然而现在我想把它重新写一遍。因为在跟很多人交流之后,我对自己头脑中的(未转化为语言的)想法,有了更精准的表达。

如果你存在以下的种种困惑,那么这篇文章也许会对你有所帮助:

  1. 你是编程初学者,不知道该选择什么程序语言来入门。
  2. 你是资深的程序员或者团队领导,对新出现的种种语言感到困惑,不知道该“投资”哪种语言。
  3. 你的团队为使用哪种程序语言争论不休,发生各种宗教斗争。
  4. 你追逐潮流采用了某种时髦的语言,结果两个月之后发现深陷泥潭,痛苦不堪……

虽然我已经不再过问这些世事,然而无可置疑的现实是,程序语言仍然是很重要的话题,这个情况短时间内不会改变。程序员的岗位往往会要求熟悉某些语言,甚至某些奇葩的公司要求你“深入理解 OOP 或者 FP 设计模式”。对于在职的程序员s,程序语言至今仍然是可以争得面红耳赤的宗教话题。它的宗教性之强,以至于我在批评和调侃某些语言(比如 Go 语言)的时候,有些人会本能地以为我是另外一种语言(比如 Java)的粉丝。

显然我不可能是任何一种语言的粉丝,我甚至不是 Yin 语言的粉丝 ;) 对于任何从没见过的语言,我都是直接拿起来就用,而不需要经过学习的过程。看了这篇文章,也许你会明白我为什么可以达到这个效果。理解了这里面的东西,每个程序员都应该可以做到这一点。嗯,但愿吧。

重视语言特性,而不是语言

很多人在乎自己或者别人是否“会”某种语言,对“发明”了某种语言的人倍加崇拜,为各种语言的孰优孰劣争得面红耳赤。这些问题对于我来说都是不存在的。虽然我写文章批评过不少语言的缺陷,在实际工作中我却很少跟人争论这些。如果有其它人在我身边争论,我甚至会戴上耳机,都懒得听他们说什么 ;) 为什么呢?我发现归根结底的原因,是因为我重视的是“语言特性”,而不是整个的“语言”。我能用任何语言写出不错的代码,就算再糟糕的语言也差不了多少。

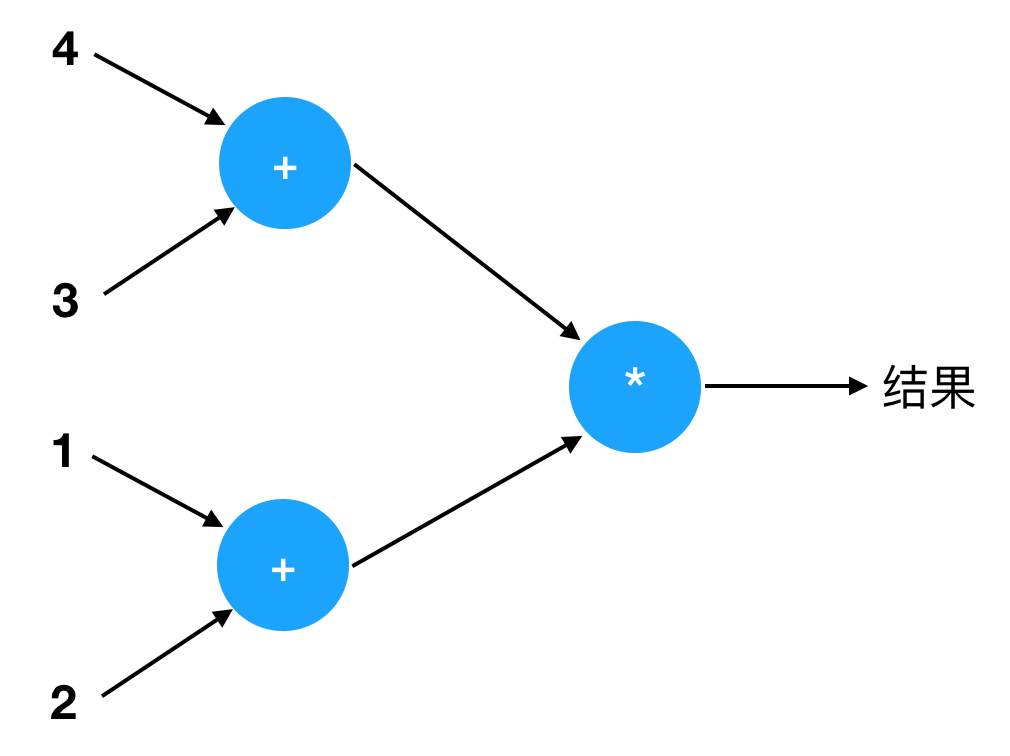
任何一种“语言”,都是各种“语言特性”的组合。打个比方吧,一个程序语言就像一台电脑。它的牌子可能叫“联想”,或者“IBM”,或者“Dell”,或者“苹果”。那么,你可以说苹果一定比 IBM 好吗?你不能。你得看看它里面装的是什么型号的处理器,有多少个核,主频多少,有多少 L1 cache,L2 cache……,有多少内存和硬盘,显示器分辨率有多大,显卡是什么 GPU,网卡速度,等等各种“配置”。有时候你还得看各个组件之间的兼容性。

这些配置对应到程序语言里面,就是所谓“语言特性”。举一些语言特性的例子:

  • 变量定义
  • 算术运算
  • for 循环语句,while 循环语句
  • 函数定义,函数调用
  • 递归
  • 静态类型系统
  • 类型推导
  • lambda 函数
  • 面向对象
  • 垃圾回收
  • 指针算术
  • goto 语句

这些语言特性,就像你在选择一台电脑的时候,看它里面是什么配置。选电脑的时候,没有人会说 Dell 一定是最好的,他们只会说这个型号里面装的是 Intel 的 i7 处理器,这个比 i5 的好,DDR3 的内存 比 DDR2 的快这么多,SSD 比磁盘快很多,ATI 的显卡是垃圾…… 如此等等。

程序语言也是一样的道理。对于初学者来说,其实没必要纠结到底要先学哪一种语言,再学哪一种。曾经有人给我发信问这种问题,纠结了好几个星期,结果一个语言都还没开始学。有这纠结的时间,其实都可以把他纠结过的语言全部掌握了。

初学者往往不理解,每一种语言里面必然有一套“通用”的特性。比如变量,函数,整数和浮点数运算,等等。这些是每个通用程序语言里面都必须有的,一个都不能少。你只要通过“某种语言”学会了这些特性,掌握这些特性的根本概念,就能随时把这些知识应用到任何其它语言。你为此投入的时间基本不会浪费。所以初学者纠结要“先学哪种语言”,这种时间花的很不值得,还不如随便挑一个语言,跳进去。

如果你不能用一种语言里面的基本特性写出好的代码,那你换成另外一种语言也无济于事。你会写出一样差的代码。我经常看到有些人 Java 代码写得相当乱,相当糟糕,却骂 Java 不好,雄心勃勃要换用 Go 语言。这些人没有明白,是否能写出好的代码在于人,而不在于语言。如果你的心中没有清晰简单的思维模型,你用任何语言表述出来都是一堆乱麻。如果你 Java 代码写得很糟糕,那么你写 Go 语言代码也会一样糟糕,甚至更差。

很多初学者不了解,一个高明的程序员如果开始用一种新的程序语言,他往往不是去看这个语言的大部头手册或者书籍,而是先有一个需要解决的问题。手头有了问题,他可以用两分钟浏览一下这语言的手册,看看这语言大概长什么样。然后,他直接拿起一段例子代码来开始修改捣鼓,想法把这代码改成自己正想解决的问题。在这个简短的过程中,他很快的掌握了这个语言,并用它表达出心里的想法。

在这个过程中,随着需求的出现,他可
能会问这样的问题:

  • 这个语言的“变量定义”是什么语法,需要“声明类型”吗,还是可以用“类型推导”?
  • 它的“类型”是什么语法?是否支持“泛型”?泛型的 “variance” 如何表达?
  • 这个语言的“函数”是什么语法,“函数调用”是什么语法,可否使用“缺省参数”?
  • ……

注意到了吗?上面每一个引号里面的内容,都是一种语言特性(或者叫概念)。这些概念可以存在于任何的语言里面,虽然语法可能不一样,它们的本质都是一样的。比如,有些语言的参数类型写在变量前面,有些写在后面,有些中间隔了一个冒号,有些没有。

这些实际问题都是随着写实际的代码,解决手头的问题,自然而然带出来的,而不是一开头就抱着语言手册看得仔仔细细。因为掌握了语言特性的人都知道,自己需要的特性,在任何语言里面一定有对应的表达方式。如果没有直接的方式表达,那么一定有某种“绕过方式”。如果有直接的表达方式,那么它只是语法稍微有所不同而已。所以,他是带着问题找特性,就像查字典一样,而不是被淹没于大部头的手册里面,昏昏欲睡一个月才开始写代码。

掌握了通用的语言特性,剩下的就只剩某些语言“特有”的特性了。研究语言的人都知道,要设计出新的,好的,无害的特性,是非常困难的。所以一般说来,一种好的语言,它所特有的新特性,终究不会超过一两种。如果有个语言号称自己有超过 5 种新特性,那你就得小心了,因为它们带来的和可能不是优势,而是灾难!

同样的道理,最好的语言研究者,往往不是某种语言的设计者,而是某种关键语言特性的设计者(或者支持者)。举个例子,著名的计算机科学家 Dijkstra 就是“递归”的强烈支持者。现在的语言里面都有递归,然而你可能不知道,早期的程序语言是不支持递归的。直到 Dijkstra 强烈要求 Algol 60 委员会加入对递归的支持,这个局面才改变了。Tony Hoare 也是语言特性设计者。他设计了几个重要的语言特性,却没有设计过任何语言。另外大家不要忘了,有个语言专家叫王垠,他是早期 union type 的支持者和实现者,也是 checked exception 特性的支持者,他在自己的博文里指出了 checked exception 和 union type 之间的关系 :P

很多人盲目的崇拜语言设计者,只要听到有人设计(或者美其民曰“发明”)了一个语言,就热血沸腾,佩服的五体投地。他们却没有理解,其实所有的程序语言,不过是像 Dell,联想一样的“组装机”。语言特性的设计者,才是像 Intel,AMD,ARM,Qualcomm 那样核心技术的创造者。

合理的入门语言

所以初学者要想事半功倍,就应该从一种“合理”的,没有明显严重问题的语言出发,掌握最关键的语言特性,然后由此把这些概念应用到其它语言。哪些是合理的入门语言呢?我个人觉得这些语言都可以用来入门:

  • Scheme
  • C
  • Java
  • Python
  • JavaScript

那么相比之下,我不推荐用哪些语言入门呢?

  • Shell
  • PowerShell
  • AWK
  • Perl
  • PHP
  • Basic
  • Go
  • Rust

总的说来,你不应该使用所谓“脚本语言”作为入门语言,特别是那些源于早期 Unix 系统的脚本语言工具。PowerShell 虽然比 Unix 的 Shell 有所进步,然而它仍然没有摆脱脚本语言的根本问题——他们的设计者不知道他们自己在干什么 :P

采用脚本语言学编程,一个很严重的问题就是使得学习者抓不住关键。脚本语言往往把一些系统工具性质的东西(比如正则表达式,Web 概念)加入到语法里面,导致初学者为它们浪费太多时间,却没有理解编程最关键的概念:变量,函数,递归,类型……

不推荐 Go 语言的原因类似,虽然 Go 语言不算脚本语言,然而他的设计者显然不明白自己在干什么。所以使用 Go 语言来学编程,你不能专注于最关键,最好的语言特性。关于 Go 语言的各种毛病,你可以参考这篇文章。

同样的,我不觉得 Rust 适合作为入门语言。Rust 花了太大精力来夸耀它的“新特性”,而这些新特性不但不是最关键的部分,而且很多是有问题的。初学者过早的关注这些特性,不仅学不会最关键的编程思想,而且可能误入歧途。关于 Rust 的一些问题,你可以参考这篇文章。

掌握关键语言特性,忽略次要特性

为了达到我之前提到的融会贯通,一通百通的效果,初学者应该专注于语言里面最关键的特性,而不是被次要的特性分心。

举个夸张点的例子。我发现很多编程培训班和野鸡大学的编程入门课,往往一来就教学生如何使用 printf 打印“Hello World!”,进而要他们记忆 printf 的各种“格式字符”的意义,要他们实现各种复杂格式的打印输出,甚至要求打印到文本文件里,然后再读出来……

可是殊不知,这种输出输入操作其实根本不算是语言的一部分,而且对于掌握编程的核心概念来说,都是次要的。有些人的 Java 课程进行了好几个星期,居然还在布置各种 printf 的作业。学生写出几百行的 printf,却不理解变量和函数是什么,甚至连算术语句和循环语句都不知道怎么用!这就是为什么很多初学者感觉编程很难,我连 %d,%f,%.2f 的含义都记不住,还怎么学编程!

然而这些野鸡大学的“教授”头衔是如此的洗脑,以至于被他们教过的学生(比如我女朋友)到我这里请教,居然骂我净教一些没用的东西,学了连 printf 的作业都没法完成 :P 你别跟我讲 for 循环,函数什么的了…… 可不可以等几个月,等我背熟了 printf 的用法再学那些啊?

所以你就发现一旦被差劲的老师教过,这个程序员基本就毁了。就算遇到好的老师,他们也很难纠正过来。

当然这是一个夸张的例子,因为 printf 根本不算是语言特性,但这个例子从同样的角度说明了次要肤浅的语言特性带来的问题。

这里举一些次要语言特性的例子:

  • C 语言的语句块,如果里面只有一条语句,可以不打花括号。
  • Go 语言的函数参数类型如果一样可以合并在一起写,比如 func foo(s string, x, y, z int, c bool) { ... }
  • Perl 把正则表达式作为语言的一种特殊语法
  • JavaScript 语句可以在某些时候省略句尾的分号
  • Haskell 和 ML 等语言的 currying

自己动手实现语言特性

在基本学会了各种语言特性,能用它们来写代码之后,下一步的进阶就是去实现它们。只有实现了各种语言特性,你才能完全地拥有它们,成为它们的主人。否则你就只是它们的使用者,你会被语言的设计者牵着鼻子走。

有个大师说得好,完全理解一种语言最好的方法就是自己动手实现它,也就是自己写一个解释器来实现它的语义。但我觉得这句话应该稍微修改一下:完全理解一种“语言特性”最好的方法就是自己亲自实现它。

注意我在这里把“语言”改为了“语言特性”。你并不需要实现整个语言来达到这个目的,因为我们最终使用的是语言特性。只要你自己实现了一种语言特性,你就能理解这个特性在任何语言里的实现方式和用法。

举个例子,学习 SICP 的时候,大家都会亲自用 Scheme 实现一个面向对象系统。用 Scheme 实现的面向对象系统,跟 Java,C++,Python 之类的语言语法相去甚远,然而它却能帮助你理解任何这些 OOP 语言里面的“面向对象”这一概念,它甚至能帮助你理解各种面向对象实现的差异。

这种效果是你直接学习 OOP 语言得不到的,因为在学习 Java,C++,Python 之类语言的时候,你只是一个用户,而用 Scheme 自己动手实现了 OO 系统之后,你成为了一个创造者。

类似的特性还包括类型推导,类型检查,惰性求值,如此等等。我实现过几乎所有的语言特性,所以任何语言在我的面前,都是可以被任意拆卸组装的玩具,而不再是凌驾于我之上的神圣。

总结

写了这么多,重要的话重复三遍:语言特性,语言特性,语言特性,语言特性!不管是初学者还是资深程序员,应该专注于语言特性,而不是纠结于整个的“语言品牌”。只有这样才能达到融会贯通,拿起任何语言几乎立即就会用,并且写出高质量的代码。

解谜计算机科学

Posted on 2019-06-14 | Comments:

要掌握一个学科的精髓,不能从细枝末节开始。人脑的能力很大程度上受限于信念。一个人不相信自己的时候,他就做不到本来可能的事。信心是很重要的,信心却容易被挫败。如果只见树木不见森林,人会失去信心,以为要到猴年马月才能掌握一个学科。

精辟, 信心是万物之始.
将表达式纳入到考虑的范围. 计算图, 模型, 符号

所以我们不从“树木”开始,而是引导读者一起来探索这背后的“森林”,把计算机科学最根本的概念用浅显的例子解释,让读者领会到它们的本质。把这些概念稍作发展,你就得到逐渐完整的把握。你一开头就掌握着整个学科,而且一直掌握着它,只不过增添更多细节而已。这就像画画,先勾勒出轮廓,一遍遍的增加细节,日臻完善,却不失去对大局的把握。

一般计算机专业的学生学了很多课程,可是直到毕业都没能回答一个基础问题:什么是计算?这一章会引导你去发现这个问题的答案。不要小看这基础的问题,它经常是解决现实问题的重要线索。世界上有太多不理解它的人,他们走了很多的弯路,掉进很多的坑,制造出过度复杂或者有漏洞的理论和技术。

接下来,我们就来理解几个关键的概念,由此接触到计算的本质。

手指算术

每个人都做过计算,只是大部分人都没有理解自己在做什么。回想一下幼儿园(大概四岁)的时候,妈妈问你:“帮我算一下,4+3 等于几?” 你掰了一会手指,回答:7。当你掰手指的时候,你自己就是一台简单的计算机。

不要小看了这手指算术,它蕴含着深刻的原理。计算机科学植根于这类非常简单的过程,而不是复杂的高等数学。

现在我们来回忆一下这个过程。这里应该有一段动画,但现阶段还没有。请你对每一步发挥一下想象力,增加点“画面感”。

  1. 当妈妈问你“4+3 等于几”的时候,她是一个程序员,你是一台计算机。计算机得到程序员的输入:4,+,3。
  2. 听到妈妈的问题之后,你拿出两只手,左手伸出四个指头,右手伸l出三个指头。
  3. 接着你开始自己的计算过程。一根根地数那些竖起来的手指,每数一根你就把它弯下去,表示它已经被数过了。你念道:“1,2,3,4,5,6,7。”
  4. 现在已经没有手指伸着,所以你把最后数到的那个数作为答案:7!整个计算过程就结束了。

符号和模型

这里的幼儿园手指算术包含着深刻的哲学问题,现在我们来初步体会一下这个问题。

当妈妈说“帮我算 4+3”的时候,4,+,3,三个字符传到你耳朵里,它们都是符号(symbol)。符号是“表面”的东西:光是盯着“4”和“3”这两个阿拉伯数字的曲线,一个像旗子,一个像耳朵,你是不能做什么的。你需要先用脑子把它们转换成对应的“模型”(model)。这就是为什么你伸出两只手,一只手表示 4,另一只表示 3。

这两只手的手势是“可操作”的。比如,你把左手再多弯曲一个手指,它就变成“3”。你再伸开一根手指,它就变成“5”。所以手指是一个相当好的机械模型,它是可以动,可操作的。把符号“4”和“3”转换成手指模型之后,你就可以开始计算了。

你怎么知道“4”和“3”对应什么样的手指模型呢?因为妈妈以前教过你。十根手指,对应着 1 到 10 十个数。这就是为什么人都用十进制数做算术。

我们现在没必要深究这个问题。我只是提示你,分清“符号”和“模型”是重要的。

计算图

在计算机领域,我们经常用一些抽象的图示来表达计算的过程,这样就能直观地看到信息的流动和转换。这种图示看起来是一些形状用箭头连接起来。我在这里把它叫做“计算图”。

对于以上的手指算术 4 + 3,我们可以用下图来表示它:

img

图中的箭头表示信息的流动方向。说到“流动”,你可以想象一下水的流动。首先我们看到数字 4 和 3 流进了一个圆圈,圆圈里有一个“+”号。这个圆圈就是你,一个会做手指加法的小孩。妈妈给你两个数 4 和 3,你现在把它们加起来,得到 7 作为结果。

注意圆圈的输入和输出方向是由箭头决定的,我们可以根据需要调整那些箭头的位置,只要箭头的连接关系和方向不变就行。它们不一定都是从左到右,也可能从右到左或者从上到下,但“出入关系”都一样:4 和 3 进去,结果 7 出来。比如它还可以是这样:

img

我们用带加号的圆圈表示一个“加法器”。顾名思义,加法器可以帮我们完成加法。在上个例子里,你就是一个加法器。我们也可以用其他装置作为加法器,比如一堆石头,一个算盘,某种电子线路…… 只要它能做加法就行。

具体要怎么做加法,就像你具体如何掰手指,很多时候我们是不关心的,我们只需要知道这个东西能做加法就行。圆圈把具体的加法操作给“抽象化”了,这个蓝色的圆圈可以代表很多种东西。抽象(abstraction)是计算机科学至关重要的思维方法,它帮助我们进行高层面的思考,而不为细节所累。

表达式

计算机科学当然不止 4 + 3 这么简单,但它的基本元素确实是如此简单。我们可以创造出很复杂的系统,然而归根结底,它们只是在按某种顺序计算像 4 + 3 这样的东西。

4 + 3 是一个很简单的表达式(expression)。你也许没听说过“表达式”这个词,但我们先不去定义它。我们先来看一个稍微复杂一些的表达式:

1
2 * (4 + 3)

这个表达式比 4 + 3 多了一个运算,我们把它叫做“复合表达式”。这个表达式也可以用计算图来表示:

img

你知道它为什么是这个样子吗?它表示的意思是,先计算 4 + 3,然后把结果(7)传送到一个“乘法器”,跟 2 相乘,得到最后的结果。那正好就是 2 * (4 + 3) 这个表达式的含义,它的结果应该是 14。

为什么要先计算 4 + 3 呢?因为当我们看到乘法器 2 * ... 的时候,其中一个输入(2)是已知的,而另外一个输入必须通过加法器的输出得到。加法器的结果是由 4 和 3 相加得到的,所以我们必须先计算 4 + 3,然后才能与 2 相乘。

小学的时候,你也许学过:“括号内的内容要先计算”。其实括号只是“符号层”的东西,它并不存在于计算图里面。我这里讲的“计算图”,其实才是本质的东西。数学的括号一类的东西,都只是表象,它们是符号或者叫“语法”。从某种意义上讲,计算图才是表达式的本质或者“模型”,而“2 * (4 + 3)”这串符号,只是对计算图的一种表示或者“编码”(coding)。

这里我们再次体会到了“符号”和“模型”的差别。符号是对模型的“表示”或者“编码”。我们必须从符号得到模型,才能进行操作。这种从符号到模型的转换过程,在计算机科学里叫做“语法分析”(parsing)。我们会在后面的章节理解这个过程。

我们现在来给表达式做一个初步的定义。这并不是完整的定义,但你应该试着理解这种定义的方式。稍后我们会逐渐补充这个定义,逐渐完善。

定义(表达式):表达式可以是如下几种东西。

  1. 数字是一个表达式。比如 1,2,4,15,……
  2. 表达式 + 表达式。两个表达式相加,也是表达式。
  3. 表达式 - 表达式。两个表达式相减,也是表达式。
  4. 表达式 * 表达式。两个表达式相乘,也是表达式。
  5. 表达式 / 表达式。两个表达式相除,也是表达式。

注意,由于我们之前讲过的符号和模型的差别,为了完全忠于我们的本质认识,这里的“表达式 + 表达式”虽然看起来是一串符号,它必须被想象成它所对应的模型。当你看到“表达式”的时候,你的脑子里应该浮现出它对应的计算图,而不是一串符号。这个计算图的画面大概是这个样子,其中左边的大方框里可以是任意两个表达式。

img

是不是感觉这个定义有点奇怪?因为在“表达式”的定义里,我们用到了“表达式”自己。这种定义叫做“递归定义”。所谓递归(recursion),就是在一个东西的定义里引用这个东西自己。看上去很奇怪,好像绕回去了一样。递归是一个重要的概念,我们会在将来深入理解它。

现在我们可以来验证一下,根据我们的定义,2 * (4 + 3) 确实是一个表达式:

  • 首先根据第一种形式,我们知道 4 是表达式,因为它是一个数字。3 也是表达式,因为它是一个数字。
  • 所以 4 + 3 是表达式,因为 + 的左右都是表达式,它满足表达式定义的第二种形式。
  • 所以 2 * (4 + 3) 是表达式,因为 * 的左右都是表达式,它满足表达式定义的第四种形式。

并行计算

考虑这样一个表达式:

1
(4 + 3) * (1 + 2)

它对应一个什么样的计算图呢?大概是这样:

img

如果妈妈只有你一个小孩,你应该如何用手指算出它的结果呢?你大概有两种办法。

第一种办法:先算出 4+3,结果是 7。然后算出 1+2,结果是 3。然后算 7*3,结果是 21。

第二种办法:先算出 1+2,结果是 3。然后算出 4+3,结果是 7。然后算 7*3,结果是 21。

注意到没有,你要么先算 4+3,要么先算 1+2,你不能同时算 4+3 和 1+2。为什么呢?因为你只有两只手,所以算 4+3 的时候你就没法算 1+2,反之也是这样。总之,你妈妈只有你一个加法器,所以一次只能做一个加法。

现在假设你还有一个妹妹,她跟你差不多年纪,她也会手指算术。妈妈现在就多了一些办法来计算这个表达式。她可以这样做:让你算 4+3,不等你算完,马上让妹妹算 1+2。等到你们的结果(7 和 3)都出来之后,让你或者妹妹算 7*3。

发现没有,在某一段时间之内,你和妹妹同时在做加法计算。这种时间上重叠的计算,叫做并行计算(parallel computing)。

你和妹妹同时计算,得到结果的速度可能会比你一个人算更快。如果你妈妈还有其它几个孩子,计算复杂的式子就可能快很多,这就是并行计算潜在的好处。所谓“潜在”的意思是,这种好处不一定会实现。比如,如果你的妹妹做手指算数的速度比你慢很多,你做完了 4+3,只好等着她慢慢的算 1+2。这也许比你自己依次算 4+3 和 1+2 还要慢。

即使妹妹做算术跟你一样快,这里还有个问题。你和妹妹算出结果 7 和 3 之后,得把结果传递给下一个计算 7*3 的那个人(也许是你,也许是你妹妹)。这种“通信”会带来时间的延迟,叫做“通信开销”。如果你们其中一个说话慢,这比起一个人来做计算可能还要慢。

如何根据计算单元能力的不同和通信开销的差异,来最大化计算的效率,降低需要的时间,就成为了并行计算领域研究的内容。并行计算虽然看起来是一个“博大精深”的领域,可是你如果理解了我这里说的那点东西,就很容易理解其余的内容。

变量和赋值

如果你有一个复杂的表达式,比如

1
(5 - 3) * (4 + (2 * 3 - 5) * 6)

由于它有比较多的嵌套,人的眼睛是难以看清楚的,它要表达的意义也会难懂。这时候,你希望可以用一些“名字”来代表中间结果,这样表达式就更容易理解。

打个比方,这就像你有一个亲戚,他是你妈妈的表姐的女儿的丈夫。你不想每次都称他“我妈妈的表姐的女儿的丈夫”,所以你就用他的名字“叮当”来指代他,一下子就简单了。

我们来看一个例子。之前的复合表达式

1
2 * (4 + 3)

其实可以被转换为等价的,含有变量的代码:

1
2
3
4
{
a = 4 + 3 // 变量 a 得到 4+3 的值
2 * a // 代码块的值
}

其中 a 是一个名字。a = 4 + 3 是一个“赋值语句”,它的意思是:用 a 来代表 4 + 3 的值。这种名字,计算机术语叫做变量(variable)。

这段代码的意思可以简单地描述为:计算 4 + 3,把它的结果表示为 a,然后计算 2 * a作为最后的结果。

有些东西可能扰乱了你的视线。两根斜杠 // 后面一直到行末的文字叫做“注释”,是给人看的说明文字。它们对代码的逻辑不产生作用,执行的时候可以忽略。许多语言都有类似这种注释,它们可以帮助阅读的人,但是会被机器忽略。

这段代码执行过程会是这样:先计算 4 + 3 得到 7,用 a 记住这个中间结果 7。接着计算 2 * a ,也就是计算 2 * 7,所以最后结果是 14。很显然,这跟 2 * (4 + 3) 的结果是一样的。

a 叫做一个变量,它是一个符号,可以用来代表任意的值。除了 a,你还有许多的选择,比如 b, c, d, x, y, foo, bar, u21… 只要它不会被误解成其它东西就行。

如果你觉得这里面的“神奇”成分太多,那我们现在来做更深一层的理解……

再看一遍上面的代码。这整片代码叫做一个“代码块”(block),或者叫一个“序列”(sequence)。这个代码块包括两条语句,分别是 a = 4 + 3 和 2 * a。代码块里的语句会从上到下依次执行。所以我们先执行 a = 4 + 3,然后执行 2 * a。

最后一条语句 2 * a 比较特别,它是这个代码块的“值”,也就是最后结果。之前的语句都是在为生成这个最后的值做准备。换句话说,这整个代码块的值就是 2 * a 的值。不光这个例子是这样,这是一个通用的原理:代码块的最后一条语句,总是这个代码块的值。

我们在代码块的前后加上花括号 {...} 进行标注,这样里面的语句就不会跟外面的代码混在一起。这两个花括号叫做“边界符”。我们今后会经常遇到代码块,它存在于几乎所有的程序语言里,只是语法稍有不同。比如有些语言可能用括号 (...) 或者 BEGIN...END来表示边界,而不是用花括号。

这片代码已经有点像常用的编程语言了,但我们暂时不把它具体化到某一种语言。我不想固化你的思维方式。在稍后的章节,我们会把这种抽象的表达法对应到几种常见的语言,这样一来你就能理解几乎所有的程序语言。

另外还有一点需要注意,同一个变量可以被多次赋值。它的值会随着赋值语句而改变。举个例子:

1
2
3
4
5
6
{
a = 4 + 3
b = a
a = 2 * 5
c = a
}

这段代码执行之后,b 的值是 7,而 c 的值是 10。你知道为什么吗?因为 a = 4 + 3 之后,a 的值是 7。b = a 使得 b 得到值 7。然后 a = 2 * 5 把 a 的值改变了,它现在是 10。所以 c = a 使得 c 得到 10。

对同一个变量多次赋值虽然是可以的,但通常来说这不是一种好的写法,它可能引起程序的混淆,应该尽量避免。只有当变量表示的“意义”相同的时候,你才应该对它重复赋值。

编译

一旦引入了变量,我们就可以不用复合表达式。因为你可以把任意复杂的复合表达式拆开成“单操作算术表达式”(像 4 + 3 这样的),使用一些变量记住中间结果,一步一步算下去,得到最后的结果。

举一个复杂点的例子,也就是这一节最开头的那个表达式:

1
(5 - 3) * (4 + (2 * 3 - 5) * 6)

它可以被转化为一串语句:

1
2
3
4
5
6
7
8
{
a = 2 * 3
b = a - 5
c = b * 6
d = 4 + c
e = 5 - 3
e * d
}

最后的表达式 e * d,算出来就是原来的表达式的值。你观察一下,是不是每个操作都非常简单,不包含嵌套的复合表达式?你可以自己验算一下,它确实算出跟原表达式一样的结果。

在这里,我们自己动手做了“编译器”(compiler)的工作。通常来说,编译器是一种程序,它的任务是把一片代码“翻译”成另外一种等价形式。这里我们没有写编译器,可是我们自己做了编译器的工作。我们手动地把一个嵌套的复合表达式,编译成了一系列的简单算术语句。

这些语句的结果与原来的表达式完全一致。这种保留原来语义的翻译过程,叫做编译(compile)。

我们为什么需要编译呢?原因有好几种。我不想在这里做完整的解释,但从这个例子我们可以看到,编译之后我们就不再需要复杂的嵌套表达式了。我们只需要设计很简单的,只会做单操作算术的机器,就可以算出复杂的嵌套的表达式。实际上最后这段代码已经非常接近现代处理器(CPU)的汇编代码(assembly)。我们只需要多加一些转换,它就可以变成机器指令。

我们暂时不写编译器,因为你还缺少一些必要的知识。这当然也不是编译技术的所有内容,它还包含另外一些东西。但从这一开头,你就已经初步理解了编译器是什么,你只需要在将来加深这种理解。

函数

到目前为止,我们做的计算都是在已知的数字之上,而在现实的计算中我们往往有一些未知数。比如我们想要表达一个“风扇控制器”,有了它之后,风扇的转速总是当前气温的两倍。这个“当前气温”就是一个未知数。

我们的“风扇控制器”必须要有一个“输入”(input),用于得到当前的温度 t,它是一个温度传感器的读数。它还要有一个输出,就是温度的两倍。

那么我们可以用这样的方式来表达我们的风扇控制器:

1
t -> t*2

不要把这想成任何一种程序语言,这只是我们自己的表达法。箭头 -> 的左边表示输入,右边表示输出,够简单吧。

你可以把 t 想象成从温度传感器出来的一根电线,它连接到风扇控制器上,风扇控制器会把它的输入(t)乘以 2。这个画面像这个样子:

img

我们谈论风扇控制器的时候,其实不关心它的输入是哪里来的,输出到哪里去。如果我们把温度传感器和风扇从画面里拿掉,就变成这个样子:

img

这幅图才是你需要认真理解的函数的计算图。你发现了吗,这幅图画正好对应了之前的风扇控制器的符号表示:t -> t*2。看到符号就想象出画面,你就得到了符号背后的模型。

像 t -> t*2 这样具有未知数作为输入的构造,我们把它叫做函数(function)。其中 t 这个符号,叫做这个函数的参数。

参数,变量和电线

你可能发现了,函数的参数和我们之前了解的“变量”是很类似的,它们都是一个符号。之前我们用了 a, b, c, d, e 现在我们有一个 t,这些名字我们都是随便起的,只要它们不要重复就好。如果名字重复的话,可能会带来混淆和干扰。

其实参数和变量这两种概念不只是相似,它们的本质就是一样的。如果你深刻理解它们的相同本质,你的脑子就可以少记忆很多东西,而且它可能帮助你对代码做出一些有趣而有益的转化。在上一节你已经看到,我用“电线”作为比方来帮助你理解参数。你也可以用同样的方法来理解变量。

比如我们之前的变量 a:

1
2
3
4
{
a = 4 + 3
2 * a
}

它可以被想象成什么样的画面呢?

img

我故意把箭头方向画成从右往左,这样它就更像上面的代码。从这个图画里,你也许可以看到变量 a 和风扇控制器图里的参数 t,其实没有任何本质差别。它们都表示一根电线,那根电线进入乘法器,将会被乘以 2,然后输出。如果你把这些都看成是电路,那么变量 a 和参数 t 都代表一根电线而已。

然后你还发现一个现象,那就是你可以把 a 这个名字换成任何其它名字(比如 b),而这幅图不会产生实质的改变。

img

这说明什么问题呢?这说明以下的代码(把 a 换成了 b)跟之前的是等价的:

1
2
3
4
{
b = 4 + 3
2 * b
}

根据几乎一样的电线命名变化,你也可以对之前的函数得到一样的结论:t -> t*2 和 u -> u*2,和 x -> x*2 都是一回事。

名字是很重要的东西,但它们具体叫什么,对于机器并没有实质的意义,只要它们不要相互混淆就可以。但名字对于人是很重要的,因为人脑没有机器那么精确。不好的变量和参数名会导致代码难以理解,引起程序员的混乱和错误。所以通常说来,你需要给变量和参数起好的名字。

什么样的名字好呢?我会在后面集中讲解。

有名字的函数

既然变量可以代表“值”,那么一个自然的想法,就是让变量代表函数。所以就像我们可以写

1
a = 4 + 3

我们似乎也应该可以写

1
f = t -> t*2

对的,你可以这么做。f = t->t*2 还有一个更加传统的写法,就像数学里的函数写法:

1
f(t) = t*2

请仔细观察 t 的位置变化。我们在函数名字的右边写一对括号,在里面放上参数的名字。

注意,你不可以只写

1
f = t*2

你必须明确的指出函数的参数是什么,否则你就不会明白函数定义里的 t 是什么东西。明确指出 t 是一个“输入”,你才会知道它是函数的输入,是一个未知数,而不是在函数外面定义的其它变量。

这个看似简单的道理,很多数学家都不明白,所以他们经常这样写书:

有一个函数 y = x*2

这是错误的,因为他没有明确指出“x 是函数 y 的参数”。如果这句话之前他们又定义过 x,你就会疑惑这是不是之前那个 x。很多人就是因为这些糊里糊涂的写法而看不懂数学书。这不怪他们,只怪数学家自己对于语言不严谨。

函数调用

有了函数,我们可以给它起名字,可是我们怎么使用它的值呢?

由于函数里面有未知数(参数),所以你必须告诉它这些未知数,它里面的代码才会执行,给你结果。比如之前的风扇控制器函数

1
f(t) = t*2

它需要一个温度作为输入,才会给你一个输出。于是你就这样给它一个输入:

1
f(2)

你把输入写在函数名字后面的括号里。那么你就会得到输出:4。也就是说 f(2) 的值是 4。

如果你没有调用一个函数,函数体是不会被执行的。因为它不知道未知数是什么,所以什么事也做不了。那么我们定义函数的时候,比如

1
f(t) = t*2

当看到这个定义的时候,机器应该做什么呢?它只是记录下:有这么一个函数,它的参数是 t,它需要计算 t*2,它的名字叫 f。但是机器不会立即计算 t*2,因为它不知道 t 是多少。

分支

直到现在,我们的代码都是从头到尾,闷头闷脑地执行,不问任何问题。我们缺少一种“问问题”的方法。比如,如果我想表达这样一个“食物选择器”:如果气温低于 22 度,就返回 “hotpot” 表示今天吃火锅,否则返回 “ice cream” 表示今天吃冰激凌。

我们可以把它图示如下:

img

中间这种判断结构叫做“分支”(branching),它一般用菱形表示。为什么叫分支呢?你想象一下,代码就像一条小溪,平时它沿着一条路线流淌。当它遇到一个棱角分明的大石头,就分成两个支流,分开流淌。

我们的判断条件 t < 22 就像一块大石头,我们的“代码流”碰到它就会分开成两支,分别做不同的事情。跟溪流不同的是,这种分支不是随机的,而是根据条件来决定,而且分支之后只有一支继续执行,而另外一边不会被执行。

我们现在看到的都是图形化表示的模型,为了书写方便,现在我们要从符号的层面来表示这个模型。我们需要一种符号表示法来表达分支,我们把它叫做 if(如果)。我们的饮料选择器代码可以这样写:

1
2
3
4
5
6
7
8
t -> if (t < 22) 
{
"hotpot"
}
else
{
"ice cream"
}

它是一个函数,输入是一个温度。if 后面的括号里放我们的判断条件。后面接着条件成立时执行的代码块,然后是一个 else,然后是条件不成立时执行的代码。它说:如果温度低于 22 度,我们就吃火锅,否则就吃冰激凌。

其中的 else 是一个特殊的符号,它表示“否则”。看起来不知道为什么 else 要在那里?对的,它只是一个装饰品。我们已经有足够的表达力来分辨两个分支,不过有了 else 似乎更加好看一些。很多语言里面都有 else 这个标记词在那里,所以我也把它放在那里。

这只是一个最简单的例子,其实那两个代码块里面不止可以写一条语句。你可以有任意多的语句,就像这样:

1
2
3
4
5
6
7
8
9
10
11
12
t ->
if (t < 22)
{
a = 4 + 3
b = a * 2
"hotpot"
}
else
{
x = "ice cream"
x
}

这段代码和之前是等价的,你知道为什么吗?

字符串

上面一节出现了一种我们之前没见过的东西,我为了简洁而没有介绍它。这两个分支的结果,也就是加上引号的 “hotpot” 和 “ice cream”,它们并不是数字,也不是其它语言构造,而是一种跟数字处于几乎同等地位的“数据类型”,叫做字符串(string)。字符串是我们在计算机里面表示人类语言的基本数据类型。

关于字符串,在这里我不想讲述更加细节的内容,我把对它的各种操作留到以后再讲,因为虽然字符串对于应用程序很重要,它却并不是计算机科学最关键最本质的内容。

很多计算机书籍一开头就讲很多对字符串的操作,导致初学者费很大功夫去做很多打印字符串的练习,结果几个星期之后还没学到“函数”之类最根本的概念。这是非常可惜的。

布尔值

我们之前的 if 语句的条件 t < 22 其实也是一个表达式,它叫做“布尔表达式”。你可以把小于号 < 看成是跟加法一类的“操作符”。它的输入是两个数值,输出是一个“布尔值”。什么是布尔值呢?布尔值只有两个:true 和 false,也就是“真”和“假”。

举个例子,如果 t 的值是 15,那么 t < 22 是成立的,那么它的值就是 true。如果 t 的值是 23,那么 t < 22 就不成立,那么它的值就是 false。是不是很好理解呢?

我们为什么需要“布尔值”这种东西呢?因为它的存在可以简化我们的思维。对于布尔值也有一些操作,这个我也不在这一章赘述,放到以后细讲。

计算的要素

好了,现在你已经掌握了计算机科学的几乎所有基本要素。每一个编程语言都包括这些构造:

  1. 基础的数值。比如整数,字符串,布尔值等。(基础的数据类型, 不属于语言的范畴
  2. 表达式。包括基本的算术表达式,嵌套的表达式。()
  3. 变量和赋值语句。
  4. 分支语句。
  5. 函数和函数调用。
    (变量, 函数, 控制豫剧 ,表达式)

你也许可以感觉到,我是把这些构造按照“从小到大”的顺序排列的。这也许可以帮助你的理解。

现在你可以回想一下你对它们的印象。每当学习一种新的语言或者系统,你只需要在里面找到对应的构造,而不需要从头学习。这就是掌握所有程序语言的秘诀。这就像学开车一样,一旦你掌握了油门,刹车,换挡器,方向盘,速度表的功能和用法,你就学会了开所有的汽车,不管它是什么型号的汽车。

我们在这一章不仅理解了这些要素,而且为它们定义了一种我们自己的“语言”。显然这个语言只能在我们的头脑里运行,因为我们没有实现这个语言的系统。在后面的章节,我会逐渐的把我们这种语言映射到现有的多种语言里面,然后你就能掌握这些语言了。

但是请不要以为掌握了语言就学会了编程或者学会了计算机科学。掌握语言就像学会了各种汽车部件的工作原理。几分钟之内,初学者就能让车子移动,转弯,停止。可是完了之后你还需要学习交通规则,你需要许许多多的实战练习和经验,掌握各种复杂情况下的策略,才能成为一个合格的驾驶员。如果你想成为赛车手,那就还需要很多倍的努力。

但是请不要被我这些话吓到了,你没有那么多的竞争者。现在的情况是,世界上就没有很多合格的计算机科学驾驶员,更不要说把车开得流畅的赛车手。绝大部分的“程序员”连最基本的引擎,油门,刹车,方向盘的工作原理都不明白,思维方式就不对,所以根本没法独自上路,一上路就出车祸。很多人把过错归结在自己的车身上,以为换一辆车马上就能成为好的驾驶员。这是一种世界范围的计算机教育的失败。

在后面的章节,我会引导你成为一个合格的驾驶员,随便拿一辆车就能开好。

什么是计算

现在你掌握了计算所需要的基本元素,可是什么是计算呢?我好像仍然没有告诉你。这是一个很哲学的问题,不同的人可能会告诉你不同的结果。我试图从最广义的角度来告诉你这个问题的答案。

当你小时候用手指算 4+3,那是计算。如果后来你学会了打算盘,你用算盘算 4+3,那也是计算。后来你从我这里学到了表达式,变量,函数,调用,分支语句…… 在每一新的构造加入的过程中,你都在了解不同的计算。

所以从最广义来讲,计算就是“机械化的信息处理”。所谓机械化,你可以用手指算,可以用算盘,可以用计算器,或者计算机。这些机器里面可以有代码,也可以没有代码,全是电子线路,甚至可以是生物活动或者化学反应。不同的机器也可以有不同的计算功能,不同的速度和性能……

有这么多种计算的事实不免让人困惑,总害怕少了点什么,其实你可以安心。如果你掌握了上一节的“计算要素”,那么你就掌握了几乎所有类型的计算系统所需要的东西。你在后面所需要做的只是加深这种理解,并且把它“对应”到现实世界遇到的各种计算机器里面。

为什么你可以相信计算机科学的精华就只有这些呢?因为计算就是处理信息,信息有它诞生的位置(输入设备,固定数值),它传输的方式(赋值,函数调用,返回值),它被查看的地方(分支)。你想不出对于信息还有什么其它的操作,所以你就很安心的相信了,这就是计算机科学这种“棋类游戏”的全部规则。

14 Working with Source Code

Posted on 2019-06-13 | Edited on 2019-06-15 | Comments:

Intro

Source code here refers to any plain text collection of computer instructions, possibly with comments, written using a human-readable programming language. Org can manage source code in an Org document when the source code is identified with begin and end markers. Working with source code begins with identifying source code blocks. A source code block can be placed almost anywhere in an Org document; it is not restricted to the preamble [pri’æmb(ə)l] or the end of the document. However, Org cannot manage a source code block if it is placed inside an Org comment or within a fixed width section.

Here is an example source code block in the Emacs Lisp language:

1
2
3
4
5
#+BEGIN_SRC emacs-lisp
(defun org-xor (a b)
"Exclusive or."
(if a (not b) b))
#+END_SRC

Org can manage the source code in the block delimited by ‘#+BEGIN_SRC’ … ‘#+END_SRC’ in several ways that can simplify housekeeping tasks essential to modern source code maintenance. Org can edit, format, extract, export, and publish source code blocks. Org can also compile and execute a source code block, then capture the results. The Org mode literature sometimes refers to source code blocks as live code blocks because they can alter the content of the Org document or the material that it exports. Users can control how live they want each source code block by tweaking the header arguments (see [Using Header A for compiling, execution, extraction, and exporting.

Source code blocks are one of many Org block types, which also include “center”, “comment”, “dynamic”, “example”, “export”, “quote”, “special”, and “verse”. This section pertains to blocks between ‘#+BEGIN_SRC’ and ‘#+END_SRC’.

For editing and formatting a source code block, Org uses an appropriate Emacs major mode that includes features specifically designed for source code in that language.

Org can extract one or more source code blocks and write them to one or more source files—a process known as tangling in literate programming terminology.

For exporting and publishing, Org’s back-ends can format a source code block appropriately, often with native syntax highlighting.

For executing and compiling a source code block, the user can configure Org to select the appropriate compiler. Org provides facilities to collect the result of the execution or compiler output, insert it into the Org document, and/or export it. In addition to text results, Org can insert links to other data types, including audio, video, and graphics. Org can also link a compiler error message to the appropriate line in the source code block.

An important feature of Org’s management of source code blocks is the ability to pass variables, functions, and results to one another using a common syntax for source code blocks in any language. Although most literate programming facilities are restricted to one language or another, Org’s language-agnostic approach lets the literate programmer match each programming task with the appropriate computer language and to mix them all together in a single Org document. This interoperability among languages explains why Org’s source code management facility was named Org Babel by its originators, Eric Schulte and Dan Davison.

Org mode fulfills the promise of easy verification and maintenance of publishing reproducible research by keeping text, data, code, configuration settings of the execution environment, the results of the execution, and associated narratives, claims, references, and internal and external links in a single Org document.

Details of Org’s facilities for working with source code are described in the following sections.

• Structure of Code Blocks: Code block syntax described.
• Using Header Arguments: Different ways to set header arguments.
• Environment of a Code Block: Arguments, sessions, working directory…
• Evaluating Code Blocks: Place results of evaluation in the Org buffer.
• Results of Evaluation: Choosing a results type, post-processing…
• Exporting Code Blocks: Export contents and/or results.
• Extracting Source Code: Create pure source code files.
• Languages: List of supported code block languages.
• Editing Source Code: Language major-mode editing.
• Noweb Reference Syntax: Literate programming in Org mode.
• Library of Babel: Use and contribute to a library of useful code blocks.
• Key bindings and Useful Functions: Work quickly with code blocks.

14.1 Structure of Code Blocks

Org offers two ways to structure source code in Org documents: in a source code block, and directly inline. Both specifications are shown below.

A source code block conforms to this structure:

1
2
3
4
#+NAME: <name>
#+BEGIN_SRC <language> <switches> <header arguments>
<body>
#+END_SRC

Do not be put-off by having to remember the source block syntax. Org mode offers a command for wrapping existing text in a block (see Structure Templates). Org also works with other completion systems in Emacs, some of which predate Org and have custom domain-specific languages for defining templates. Regular use of templates reduces errors, increases accuracy, and maintains consistency.

An inline code block conforms to this structure:

1
src_<language>{<body>}

or

1
src_<language>[<header arguments>]{<body>}

1) ‘#+NAME: ’

Optional. Names the source block so it can be called, like a function, from other source blocks or inline code to evaluate or to capture the results. Code from other blocks, other files, and from table formulas (see The Spreadsheet) can use the name to reference a source block. This naming serves the same purpose as naming Org tables. Org mode requires unique names. For duplicate names, Org mode’s behavior is undefined.

2) ‘#+BEGIN_SRC’ … ‘#+END_SRC’

Mandatory. They mark the start and end of a block that Org requires. The ‘#+BEGIN_SRC’ line takes additional arguments, as described next.

3) ‘’

Mandatory. It is the identifier of the source code language in the block. See Languages, for identifiers of supported langua
ges.

4) ‘’

Optional. Switches provide finer control of the code execution, export, and format (see the discussion of switches in Literal Examples).

5) ‘

’

Optional. Heading arguments control many aspects of evaluation, export and tangling of code blocks (see Using Header Arguments). Using Org’s properties feature, header arguments can be selectively applied to the entire buffer or specific sub-trees of the Org document.

6) ‘’
^
Source code in the dialect of the specified language identifier.

14.2 Using Header Arguments

Org comes with many header arguments common to all languages. New header arguments are added for specific languages as they become available for use in source code blocks. A header argument is specified with an initial colon followed by the argument’s name in lowercase.

Since header arguments can be set in several ways, Org prioritizes them in case of overlaps or conflicts by giving local settings a higher priority. Header values in function calls, for example, override header values from global defaults.

1.System-wide header arguments

System-wide values of header arguments can be specified by customizing the org-babel-default-header-args variable, which defaults to the following values:

1
2
3
4
5
:session    => "none"
:results => "replace"
:exports => "code"
:cache => "no"
:noweb => "no"

The example below sets ‘:noweb’ header arguments to ‘yes’, which makes Org expand ‘:noweb’ references by default.

1
2
3
(setq org-babel-default-header-args
(cons '(:noweb . "yes")
(assq-delete-all :noweb org-babel-default-header-args)))

Each language can have separate default header arguments by customizing the variable org-babel-default-header-args:<LANG>, where is the name of the language. For details, see the language-specific online documentation at https://orgmode.org/worg/org-contrib/babel/.

2.Header arguments in Org mode properties

For header arguments applicable to the buffer, use ‘PROPERTY’ keyword anywhere in the Org file (see Property Syntax).

The following example makes all the R code blocks execute in the same session. Setting ‘:results’ to ‘silent’ ignores the results of executions for all blocks, not just R code blocks; no results inserted for any block.

1
2
#+PROPERTY: header-args:R  :session *R*
#+PROPERTY: header-args :results silent

Header arguments set through Org’s property drawers (see Property Syntax) apply at the sub-tree level on down. Since these property drawers can appear anywhere in the file hierarchy, Org uses outermost call or source block to resolve the values. Org ignores org-use-property-inheritance setting.

In this example, ‘:cache’ defaults to ‘yes’ for all code blocks in the sub-tree.

1
2
3
4
 sample header
:PROPERTIES:
:header-args: :cache yes
:END:

Properties defined through org-set-property function, bound to C-c C-x p, apply to all active languages. They override properties set in org-babel-default-header-args.

Language-specific header arguments are also read from properties ‘header-args:’ where is the language identifier. For example,

1
2
3
4
5
6
7
8
9
Heading
:PROPERTIES:
:header-args:clojure: :session *clojure-1*
:header-args:R: :session *R*
:END:
Subheading
:PROPERTIES:
:header-args:clojure: :session *clojure-2*
:END:

would force separate sessions for Clojure blocks in ‘Heading’ and ‘Subheading’, but use the same session for all R blocks. Blocks in ‘Subheading’ inherit settings from ‘Heading’.

3.Code block specific header arguments

Header arguments are most commonly set at the source code block level, on the ‘#+BEGIN_SRC’ line. Arguments set at this level take precedence over those set in the org-babel-default-header-args variable, and also those set as header properties.

In the following example, setting ‘:results’ to ‘silent’ makes it ignore results of the code execution. Setting ‘:exports’ to ‘code’ exports only the body of the code block to HTML or LaTeX.

1
2
3
4
#+NAME: factorial
#+BEGIN_SRC haskell :results silent :exports code :var n=0
fac 0 = 1
#+END_SRC

The same header arguments in an inline code block:

1
src_haskell[:exports both]{fac 5}

Code block header arguments can span multiple lines using ‘#+HEADER:’ on each line. Note that Org currently accepts the plural spelling of ‘#+HEADER:’ only as a convenience for backward-compatibility. It may be removed at some point.

Multi-line header arguments on an unnamed code block:

1
2
3
4
5
6
7
#+HEADER: :var data1=1
#+BEGIN_SRC emacs-lisp :var data2=2
(message "data1:%S, data2:%S" data1 data2)
#+END_SRC

#+RESULTS:
: data1:1, data2:2

Multi-line header arguments on a named code block:

1
2
3
4
5
6
7
8
#+NAME: named-block
#+HEADER: :var data=2
#+BEGIN_SRC emacs-lisp
(message "data:%S" data)
#+END_SRC

#+RESULTS: named-block
: data:2
  • Header arguments in function calls

Header arguments in function calls are the most specific and override all other settings in case of an overlap. They get the highest priority. Two ‘#+CALL:’ examples are shown below. For the complete syntax of ‘CALL’ keyword, see Evaluating Code Blocks.

In this example, ‘:exports results’ header argument is applied to the evaluation of the ‘#+CALL:’ line.

1
#+CALL: factorial(n=5) :exports results

In this example, ‘:session special’ header argument is applied to the evaluation of ‘factorial’ code block.

1
#+CALL: factorial[:session special](n=5)

14.3 Environment of a Code Block

1.Passing arguments

Use ‘var’ for passing arguments to source code blocks. The specifics of variables in code blocks vary by the source language and are covered in the language-specific documentation. The syntax for ‘var’, however, is the same for all languages. This includes declaring a variable, and assigning a default value.

The following syntax is used to pass arguments to code blocks using the ‘var’ header argument.

1
:var NAME=ASSIGN

NAME is the name of the variable bound in the code block body. ASSIGN is a literal value, such as a string, a number, a reference to a table, a list, a literal example, another code block—with or without arguments—or the results of evaluating a code block.

Here are examples of passing values by reference:

  1. table

    A table named with a ‘NAME’ keyword.

    1
    2
    3
    4
    5
    6
    7
    8
    9
    10
    11
    12
    #+NAME: example-table
    | 1 |
    | 2 |
    | 3 |
    | 4 |

    #+NAME: table-length
    #+BEGIN_SRC emacs-lisp :var table=example-table
    (length table)
    #+END_SRC

    #+RESULTS: table-length

    When passing a table, you can treat specially the row, or the column, containing labels for the columns, or the rows, in the table.The ‘colnames’ header argument accepts ‘yes’, ‘no’, or ‘nil’ values. The default value is ‘nil’: if an input table has column names—because the second row is a horizontal rule—then Org removes the column names, processes the table, puts back the column names, and then writes the table to the results block. Using ‘yes’, Org does the same to the first row, even if the initial table does not contain any horizontal rule. When set to ‘no’, Org does not pre-process column names at all.

    1
    2
    3
    4
    5
    6
    7
    8
    9
    10
    11
    12
    13
    14
    #+NAME: less-cols
    | a |
    |---|
    | b |
    | c |

    #+BEGIN_SRC python :var tab=less-cols :colnames nil
    return [[val + '*' for val in row] for row in tab]
    #+END_SRC
    #+RESULTS:
    | a |
    |----|
    | b* |
    | c* |

    Similarly, the ‘rownames’ header argument can take two values: ‘yes’ or ‘no’. When set to ‘yes’, Org removes the first column, processes the table, puts back the first column, and then writes the table to the results block. The default is ‘no’, which means Org does not pre-process the first column. Note that Emacs Lisp code blocks ignore ‘rownames’ header argument because of the ease of table-handling in Emacs.

    1
    2
    3
    4
    5
    6
    7
    8
    9
    #+NAME: with-rownames
    | one | 1 | 2 | 3 | 4 | 5 |
    | two | 6 | 7 | 8 | 9 | 10 |
    #+BEGIN_SRC python :var tab=with-rownames :rownames yes
    return [[val + 10 for val in row] for row in tab]
    #+END_SRC
    #+RESULTS:
    | one | 11 | 12 | 13 | 14 | 15 |
    | two | 16 | 17 | 18 | 19 | 20 |
  2. list

    A simple named list.

    1
    2
    3
    4
    5
    6
    7
    8
    9
    10
    #+NAME: example-list
    - simple
    - not
    - nested
    - list
    #+BEGIN_SRC emacs-lisp :var x=example-list
    (print x)c
    #+END_SRC
    #+RESULTS:
    | simple | list |

    Note that only the top level list items are passed along. Nested list items are ignored.

  3. code block without arguments

    A code block name, as assigned by ‘NAME’ keyword from the example above, optionally followed by parentheses.

    1
    2
    3
    4
    5
    6
    #+BEGIN_SRC emacs-lisp :var length=table-length()
    (* 2 length)
    #+END_SRC

    #+RESULTS:
    : 8
  4. code block with arguments

    A code block name, as assigned by ‘NAME’ keyword, followed by parentheses and optional arguments passed within the parentheses.

    1
    2
    3
    4
    5
    6
    7
    8
    9
    10
    11
    12
    13
    #+NAME: double
    #+BEGIN_SRC emacs-lisp :var input=8
    (* 2 input)
    #+END_SRC

    #+RESULTS: double
    : 16
    #+NAME: squared
    #+BEGIN_SRC emacs-lisp :var input=double(input=1)
    (* input input)
    #+END_SRC
    #+RESULTS: squared
    : 4
  5. literal example

    A literal example block named with a ‘NAME’ keyword.

    1
    2
    3
    4
    5
    6
    7
    8
    9
    10
    11
    12
    13
    14
    #+NAME: literal-example
    #+BEGIN_EXAMPLE
    A literal example
    on two lines
    #+END_EXAMPLE

    #+NAME: read-literal-example
    #+BEGIN_SRC emacs-lisp :var x=literal-example
    (concatenate #'string x " for you.")
    #+END_SRC

    #+RESULTS: read-literal-example
    : A literal example
    : on two lines for you.

Indexing variable values enables referencing portions of a variable. Indexes are 0 based with negative values counting backwards from the end. If an index is separated by commas then each subsequent section indexes as the next dimension. Note that this indexing occurs before other table-related header arguments are applied, such as ‘hlines’, ‘colnames’ and ‘rownames’. The following example assigns the last cell of the first row the table ‘example-table’ to the variable ‘data’:

1
2
3
4
5
6
7
8
9
10
11
12
#+NAME: example-table
| 1 | a |
| 2 | b |
| 3 | c |
| 4 | d |

#+BEGIN_SRC emacs-lisp :var data=example-table[0,-1]
data
#+END_SRC

#+RESULTS:
: a

Two integers separated by a colon reference a range of variable values. In that case the entire inclusive range is referenced. For example the following assigns the middle three rows of ‘example-table’ to ‘data’.

1
2
3
4
5
6
7
8
9
10
11
12
13
14
15
#+NAME: example-table
| 1 | a |
| 2 | b |
| 3 | c |
| 4 | d |
| 5 | 3 |

#+BEGIN_SRC emacs-lisp :var data=example-table[1:3]
data
#+END_SRC

#+RESULTS:
| 2 | b |
| 3 | c |
| 4 | d |

To pick the entire range, use an empty index, or the single character ‘*’. ‘0:-1’ does the same thing. Example below shows how to reference the first column only.

1
2
3
4
5
6
7
8
9
10
11
12
#+NAME: example-table
| 1 | a |
| 2 | b |
| 3 | c |
| 4 | d |

#+BEGIN_SRC emacs-lisp :var data=example-table[,0]
data
#+END_SRC

#+RESULTS:
| 1 | 2 | 3 | 4 |

Index referencing can be used for tables and code blocks. Index referencing can handle any number of dimensions. Commas delimit multiple dimensions, as shown below.

1
2
3
4
5
6
7
8
9
10
11
12
13
#+NAME: 3D
#+BEGIN_SRC emacs-lisp
'(((1 2 3) (4 5 6) (7 8 9))
((10 11 12) (13 14 15) (16 17 18))
((19 20 21) (22 23 24) (25 26 27)))
#+END_SRC

#+BEGIN_SRC emacs-lisp :var data=3D[1,,1]
data
#+END_SRC

#+RESULTS:
| 11 | 14 | 17 |

Note that row names and column names are not removed prior to variable indexing. You need to take them into account, even when ‘colnames’ or ‘rownames’ header arguments remove them.

Emacs lisp code can also set the values for variables. To differentiate a value from Lisp code, Org interprets any value starting with ‘(’, ‘[’, ‘’’ or ‘`’ as Emacs Lisp code. The result of evaluating that code is then assigned to the value of that variable. The following example shows how to reliably query and pass the file name of the Org mode buffer to a code block using headers. We need reliability here because the file’s name could change once the code in the block starts executing.

1
2
3
#+BEGIN_SRC sh :var filename=(buffer-file-name) :exports both
wc -w $filename
#+END_SRC

Note that values read from tables and lists are not mistakenly evaluated as Emacs Lisp code, as illustrated in the following example.

1
2
3
4
5
6
7
8
9
10
#+NAME: table
| (a b c) |

#+HEADER: :var data=table[0,0]
#+BEGIN_SRC perl
$data
#+END_SRC

#+RESULTS:
: (a b c)

2.Using sessions

Two code blocks can share the same environment. The ‘session’ header argument is for running multiple source code blocks under one session. Org runs code blocks with the same session name in the same interpreter process.

1) ‘none’

Default. Each code block gets a new interpreter process to execute. The process terminates once the block is evaluated.

2) STRING

Any string besides ‘none’ turns that string into the name of that session. For example, ‘:session STRING’ names it ‘STRING’. If ‘session’ has no value, then the session name is derived from the source language identifier. Subsequent blocks with the same source code language use the same session. Depending on the language, state variables, code from other blocks, and the overall interpreted environment may be shared. Some interpreted languages support concurrent sessions when subsequent source code language blocks change session names.

Only languages that provide interactive evaluation can have session support. Not all languages provide this support, such as C and ditaa. Even languages, such as Python and Haskell, that do support interactive evaluation impose limitations on allowable language constructs that can run interactively. Org inherits those limitations for those code blocks running in a session.

3.Choosing a working directory

The ‘dir’ header argument specifies the default directory during code block execution. If it is absent, then the directory associated with the current buffer is used. In other words, supplying ‘:dir PATH’ temporarily has the same effect as changing the current directory with M-x cd PATH, and then not setting ‘dir’. Under the surface, ‘dir’ simply sets the value of the Emacs variable default-directory.

For example, to save the plot file in the ‘Work/’ folder of the home directory—notice tilde is expanded:

1
2
3
#+BEGIN_SRC R :file myplot.png :dir ~/Work
matplot(matrix(rnorm(100), 10), type="l")
#+END_SRC

To evaluate the code block on a remote machine, supply a remote directory name using Tramp syntax. For example:

1
2
3
#+BEGIN_SRC R :file plot.png :dir /scp:dand@yakuba.princeton.edu:
plot(1:10, main=system("hostname", intern=TRUE))
#+END_SRC

Org first captures the text results as usual for insertion in the Org file. Then Org also inserts a link to the remote file, thanks to Emacs Tramp. Org constructs the remote path to the file name from ‘dir’ and default-directory, as illustrated here:

1
[[file:/scp:dand@yakuba.princeton.edu:/home/dand/plot.png][plot.png]]

When ‘dir’ is used with ‘session’, Org sets the starting directory for a new session. But Org does not alter the directory of an already existing session.

Do not use ‘dir’ with ‘:exports results’ or with ‘:exports both’ to avoid Org inserting incorrect links to remote files. That is because Org does not expand default directory to avoid some underlying portability issues.

4.Inserting headers and footers

The ‘prologue’ header argument is for appending to the top of the code block for execution, like a reset instruction. For example, you may use ‘:prologue “reset”’ in a Gnuplot code block or, for every such block:

1
2
(add-to-list 'org-babel-default-header-args:gnuplot
'((:prologue . "reset")))

Likewise, the value of the ‘epilogue’ header argument is for appending to the end of the code block for execution.

14.4 Evaluating Code Blocks

A note about security: With code evaluation comes the risk of harm. Org safeguards by prompting for user’s permission before executing any code in the source block. To customize this safeguard, or disable it, see Code Evaluation Security.

1.How to evaluate source code

Org captures the results of the code block evaluation and inserts them in the Org file, right after the code block. The insertion point is after a newline and the ‘RESULTS’ keyword. Org creates the ‘RESULTS’ keyword if one is not already there.

By default, Org enables only Emacs Lisp code blocks for execution. See Languages to enable other languages.

Org provides many ways to execute code blocks. C-c C-c or C-c C-v e with the point on a code block141 calls the org-babel-execute-src-block function, which executes the code in the block, collects the results, and inserts them in the buffer.

By calling a named code block142 from an Org mode buffer or a table. Org can call the named code blocks from the current Org mode buffer or from the “Library of Babel” (see Library of Babel).

The syntax for ‘CALL’ keyword is:

1
2
#+CALL: <name>(<arguments>)
#+CALL: <name>[<inside header arguments>](<arguments>) <end header arguments>

The syntax for inline named code blocks is:

1
2
... call_<name>(<arguments>) ...
... call_<name>[<inside header arguments>](<arguments>)[<end header arguments>] ...

When inline syntax is used, the result is wrapped based on the variable org-babel-inline-result-wrap, which by default is set to "=%s=" to produce verbatim text suitable for markup.

  1. ‘’

    This is the name of the code block (see Structure of Code Blocks) to be evaluated in the current document. If the block is located in another file, start ‘’ with the file name followed by a colon. For example, in order to execute a block named ‘clear-data’ in ‘file.org’, you can write the following:

    1
    2
    #+CALL: file.org:clear-data()
    #这一点太神奇了.
  2. ‘’

    Org passes arguments to the code block using standard function call syntax. For example, a ‘#+CALL:’ line that passes ‘4’ to a code block named ‘double’, which declares the header argument ‘:var n=2’, would be written as:

    #+CALL: double(n=4)

    Note how this function call syntax is different from the header argument syntax.

  3. ‘’

    Org passes inside header arguments to the named code block using the header argument syntax. Inside header arguments apply to code block evaluation. For example, ‘[:results output]’ collects results printed to stdout during code execution of that block. Note how this header argument syntax is different from the function call syntax.

  4. ‘’

    End header arguments affect the results returned by the code block. For example, ‘:results html’ wraps the results in a ‘#+BEGIN_EXPORT html’ block before inserting the results in the Org buffer.

2.Limit code block evaluation

The ‘eval’ header argument can limit evaluation of specific code blocks and ‘CALL’ keyword. It is useful for protection against evaluating untrusted code blocks by prompting for a confirmation.

  1. ‘never’ or ‘no’

    Org never evaluates the source code.

  2. ‘query’

    Org prompts the user for permission to evaluate the source code.

  3. ‘never-export’ or ‘no-export’

    Org does not evaluate the source code when exporting, yet the user can evaluate it interactively.

  4. ‘query-export’

    Org prompts the user for permission to evaluate the source code during export.

If ‘eval’ header argument is not set, then Org determines whether to evaluate the source code from the org-confirm-babel-evaluate variable (see Code Evaluation Security).

3.Cache results of evaluation

The ‘cache’ header argument is for caching results of evaluating code blocks. Caching results can avoid re-evaluating a code block that have not changed since the previous run. To benefit from the cache and avoid redundant evaluations, the source block must have a result already present in the buffer, and neither the header arguments—including the value of ‘var’ references—nor the text of the block itself has changed since the result was last computed. This feature greatly helps avoid long-running calculations. For some edge cases, however, the cached results may not be reliable.

The caching feature is best for when code blocks are pure functions, that is functions that return the same value for the same input arguments (see Environment of a Code Block), and that do not have side effects, and do not rely on external variables other than the input arguments. Functions that depend on a timer, file system objects, and random number generators are clearly unsuitable for caching.

A note of warning: when ‘cache’ is used in a session, caching may cause unexpected results.

When the caching mechanism tests for any source code changes, it does not expand Noweb style references (see Noweb Reference Syntax). For reasons why, see http://thread.gmane.org/gmane.emacs.orgmode/79046.

The ‘cache’ header argument can have one of two values: ‘yes’ or ‘no’.

1) ‘no’

Default. No caching of results; code block evaluated every time.

2) ‘yes’

Whether to run the code or return the cached results is determined by comparing the SHA1 hash value of the combined code block and arguments passed to it. This hash value is packed on the ‘#+RESULTS:’ line from previous evaluation. When hash values match, Org does not evaluate the code block. When hash values mismatch, Org evaluates the code block, inserts the results, recalculates the hash value, and updates ‘#+RESULTS:’ line.

In this example, both functions are cached. But ‘caller’ runs only if the result from ‘random’ has changed since the last run.

1
2
3
4
5
6
7
8
9
10
11
12
13
14
15
#+NAME: random
#+BEGIN_SRC R :cache yes
runif(1)
#+END_SRC

#+RESULTS[a2a72cd647ad44515fab62e144796432793d68e1]: random
0.4659510825295

#+NAME: caller
#+BEGIN_SRC emacs-lisp :var x=random :cache yes
x
#+END_SRC

#+RESULTS[bec9c8724e397d5df3b696502df3ed7892fc4f5f]: caller
0.254227238707244

4.Footnotes

  • (141)

The option org-babel-no-eval-on-ctrl-c-ctrl-c can be used to remove code evaluation from the C-c C-c key binding.

  • (142)

Actually, the constructs ‘call_()’ and ‘src_{}’ are not evaluated when they appear in a keyword (see In-buffer Settings).

14.5 Results of Evaluation

How Org handles results of a code block execution depends on many header arguments working together. The primary determinant, however, is the ‘results’ header argument. It accepts four classes of options. Each code block can take only one option per class:

1) collection

For how the results should be collected from the code block;

2) type

For which type of result the code block will return; affects how Org processes and inserts results in the Org buffer;

3) format

For the result; affects how Org processes and inserts results in the Org buffer;

4) handling

For processing results after evaluation of the code block;

1.Collection

Collection options specify the results. Choose one of the options; they are mutually exclusive.

  • ‘value’

    Default. Functional mode. Org gets the value by wrapping the code in a function definition in the language of the source block. That is why when using ‘:results value’, code should execute like a function and return a value. For languages like Python, an explicit return statement is mandatory when using ‘:results value’. Result is the value returned by the last statement in the code block.When evaluating the code block in a session (see Environment of a Code Block), Org passes the code to an interpreter running as an interactive Emacs inferior process. Org gets the value from the source code interpreter’s last statement output. Org has to use language-specific methods to obtain the value. For example, from the variable _ in Python and Ruby, and the value of .Last.value in R.

  • ‘output’

    Scripting mode. Org passes the code to an external process running the interpreter. Org returns the contents of the standard output stream as text results.

    When using a session, Org passes the code to the interpreter running as an interactive Emacs inferior process. Org concatenates any text output from the interpreter and returns the collection as a result.

    Note that this collection is not the same as that would be collected from stdout of a non-interactive interpreter running as an external process. Compare for example these two blocks:

    1
    2
    3
    4
    5
    6
    7
    8
    #+BEGIN_SRC python :results output
    print('hello')
    2
    print "bye"
    #+END_SRC
    #+RESULTS:
    : hello
    : bye

    In the above non-session mode, the “2” is not printed; so it does not appear in results.

    1
    2
    3
    4
    5
    6
    7
    8
    9
    #+BEGIN_SRC python :results output :session
    print "hello"
    2
    print "bye"
    #+END_SRC
    #+RESULTS:
    : hello
    : 2
    : bye

    In the above session, the interactive interpreter receives and prints “2”. Results show that.

2. Type

Type tells what result types to expect from the execution of the code block. Choose one of the options; they are mutually exclusive. The default behavior is to automatically determine the result type.

  • ‘table’

  • ‘vector’

    Interpret the results as an Org table. If the result is a single value, create a table with one row and one column. Usage example: ‘:results value table’.
    In-between each table row or below the table headings, sometimes results have horizontal lines, which are also known as “hlines”. The ‘hlines’ argument with the default ‘no’ value strips such lines from the input table. For most code, this is desirable, or else those ‘hline’ symbols raise unbound variable errors. A ‘yes’ accepts such lines, as demonstrated in the following example.

    1
    2
    3
    4
    5
    6
    7
    8
    9
    10
    11
    12
    13
    14
    15
    16
    17
    18
    19
    20
    21
    22
    23
    24
    25
    #+NAME: many-cols
    | a | b | c |
    |---+---+---|
    | d | e | f |
    |---+---+---|
    | g | h | i |
    #+NAME: no-hline
    #+BEGIN_SRC python :var tab=many-cols :hlines no
    return tab
    #+END_SRC
    #+RESULTS: no-hline
    | a | b | c |
    | d | e | f |
    | g | h | i |

    #+NAME: hlines
    #+BEGIN_SRC python :var tab=many-cols :hlines yes
    return tab
    #+END_SRC
    #+RESULTS: hlines
    | a | b | c |
    |---+---+---|
    | d | e | f |
    |---+---+---|
    | g | h | i |
  • ‘list’

    Interpret the results as an Org list. If the result is a single value, create a list of one element.

  • ‘scalar’

  • ‘verbatim’ [vɜ:’beɪtɪm]

    Interpret literally and insert as quoted text. Do not create a table. Usage example: ‘:results value verbatim’.

  • ‘file’

    Interpret as a filename. Save the results of execution of the code block to that file, then insert a link to it. You can control both the filename and the description associated to the link.Org first tries to generate the filename from the value of the ‘file’ header argument and the directory specified using the ‘output-dir’ header arguments. If ‘output-dir’ is not specified, Org assumes it is the current directory.

    1
    2
    3
    #+BEGIN_SRC asymptote :results value file :file circle.pdf :output-dir img/
    size(2cm); draw(unitcircle);
    #+END_SRC

    If ‘file’ is missing, Org generates the base name of the output file from the name of the code block, and its extension from the ‘file-ext’ header argument. In that case, both the name and the extension are mandatory143.

    1
    2
    3
    4
    5
    #+name: circle
    #+BEGIN_SRC asymptote :results value file :file-ext pdf
    size(2cm);
    draw(unitcircle);
    #+END_SRC

    The ‘file-desc’ header argument defines the description (see Link Format) for the link. If ‘file-desc’ has no value, Org uses the generated file name for both the “link” and “description” parts of the link.By default, Org assumes that a table written to a file has TAB-delimited output. You can choose a different separator with the ‘sep’ header argument.

3.Format

Format pertains to the type of the result returned by the code block. Choose one of the options; they are mutually exclusive. The default follows from the type specified above.

  • ‘code’

    Result enclosed in a code block. Useful for parsing. Usage example: ‘:results value code’.

  • ‘drawer’

    Result wrapped in a ‘RESULTS’ drawer. Useful for containing ‘raw’ or ‘org’ results for later scripting and automated processing. Usage example: ‘:results value drawer’.

  • ‘html’

    Results enclosed in a ‘BEGIN_EXPORT html’ block. Usage example: ‘:results value html’.

  • ‘latex’

    Results enclosed in a ‘BEGIN_EXPORT latex’ block. Usage example: ‘:results value latex’.

  • ‘link’

  • ‘graphics’

    Result is a link to the file specified in ‘:file’ header argument. However, unlike plain ‘:file’, nothing is written to the disk. The block is used for its side-effects only, as in the following example:

    1
    2
    3
    #+begin_src shell :results link :file "download.tar.gz"
    wget -c "http://example.com/download.tar.gz"
    #+end_src
  • ‘org’

    Results enclosed in a ‘BEGIN_SRC org’ block. For comma-escape, either TAB in the block, or export the file. Usage example: ‘:results value org’.

  • ‘pp’

    Result converted to pretty-print source code. Enclosed in a code block. Languages supported: Emacs Lisp, Python, and Ruby. Usage example: ‘:results value pp’.

  • ‘raw’

    Interpreted as raw Org mode. Inserted directly into the buffer. Aligned if it is a table. Usage example: ‘:results value raw’.

The ‘wrap’ header argument unconditionnally marks the results block by appending strings to ‘#+BEGIN_’ and ‘#+END_’. If no string is specified, Org wraps the results in a ‘#+BEGIN_results’ … ‘#+END_results’ block. It takes precedent over the ‘results’ value listed above. E.g.,

1
2
3
4
5
6
7
8
#+BEGIN_SRC emacs-lisp :results html :wrap EXPORT markdown
"<blink>Welcome back to the 90's</blink>"
#+END_SRC

#+RESULTS:
#+BEGIN_EXPORT markdown
<blink>Welcome back to the 90's</blink>
#+END_EXPORT

4.Handling

Handling options after collecting the results.

  • ‘silent’

    Do not insert results in the Org mode buffer, but echo them in the minibuffer. Usage example: ‘:results output silent’.

  • ‘replace’

    Default. Insert results in the Org buffer. Remove previous results. Usage example: ‘:results output replace’.

  • ‘append’

    Append results to the Org buffer. Latest results are at the bottom. Does not remove previous results. Usage example: ‘:results output append’.

  • ‘prepend’

    Prepend results to the Org buffer. Latest results are at the top. Does not remove previous results. Usage example: ‘:results output prepend’.

5.Post-processing

The ‘post’ header argument is for post-processing results from block evaluation. When ‘post’ has any value, Org binds the results to *this* variable for easy passing to ‘var’ header argument specifications (see Environment of a Code Block). That makes results available to other code blocks, or even for direct Emacs Lisp code execution.

The following two examples illustrate ‘post’ header argument in action. The first one shows how to attach an ‘ATTR_LATEX’ keyword using ‘post’.

1
2
3
4
5
6
7
8
9
10
11
12
13
14
15
16
17
18
19
20
#+NAME: attr_wrap
#+BEGIN_SRC sh :var data="" :var width="\\textwidth" :results output
echo "#+ATTR_LATEX: :width $width"
echo "$data"
#+END_SRC

#+HEADER: :file /tmp/it.png
#+BEGIN_SRC dot :post attr_wrap(width="5cm", data=*this*) :results drawer
digraph{
a -> b;
b -> c;
c -> a;
}
#+end_src

#+RESULTS:
:RESULTS:
#+ATTR_LATEX :width 5cm
[[file:/tmp/it.png]]
:END:

The second example shows use of ‘colnames’ header argument in ‘post’ to pass data between code blocks.

1
2
3
4
5
6
7
8
9
10
11
12
13
14
15
16
17
18
19
20
#+NAME: round-tbl
#+BEGIN_SRC emacs-lisp :var tbl="" fmt="%.3f"
(mapcar (lambda (row)
(mapcar (lambda (cell)
(if (numberp cell)
(format fmt cell)
cell))
row))
tbl)
#+end_src

#+BEGIN_SRC R :colnames yes :post round-tbl[:colnames yes](*this*)
set.seed(42)
data.frame(foo=rnorm(1))
#+END_SRC

#+RESULTS:
| foo |
|-------|
| 1.371 |

Footnotes

  • (143)

Due to the way this header argument is implemented, it implies “:results file”. Therefore if it is set for multiple blocks at once (by a subtree or buffer property for example), all blocks are forced to produce file results. This is seldom desired behavior, so it is recommended to set this header only on a per-block basis. It is possible that this aspect of the implementation might change in the future.

14.6 Exporting Code Blocks

It is possible to export the code of code blocks, the results of code block evaluation, both the code and the results of code block evaluation, or none. Org defaults to exporting code for most languages. For some languages, such as ditaa, Org defaults to results. To export just the body of code blocks, see Literal Examples. To selectively export sub-trees of an Org document, see Exporting.

The ‘exports’ header argument is to specify if that part of the Org file is exported to, say, HTML or LaTeX formats.

  • ‘code’

    The default. The body of code is included into the exported file. Example: ‘:exports code’.

  • ‘results’

    The results of evaluation of the code is included in the exported file. Example: ‘:exports results’.

  • ‘both’

    Both the code and results of evaluation are included in the exported file. Example: ‘:exports both’.

  • ‘none’

    Neither the code nor the results of evaluation is included in the exported file. Whether the code is evaluated at all depends on other options. Example: ‘:exports none’.

To stop Org from evaluating code blocks to speed exports, use the header argument ‘:eval never-export’ (see Evaluating Code Blocks). To stop Org from evaluating code blocks for greater security, set the org-export-use-babel variable to nil, but understand that header arguments will have no effect.

Turning off evaluation comes in handy when batch processing. For example, markup languages for wikis, which have a high risk of untrusted code. Stopping code block evaluation also stops evaluation of all header arguments of the code block. This may not be desirable in some circumstances. So during export, to allow evaluation of just the header arguments but not any code evaluation in the source block, set ‘:eval never-export’ (see Evaluating Code Blocks).

Org never evaluates code blocks in commented sub-trees when exporting (see Comment Lines). On the other hand, Org does evaluate code blocks in sub-trees excluded from export (see Export Settings).

14.7 Extracting Source Code

Extracting source code from code blocks is a basic task in literate programming. Org has features to make this easy. In literate programming parlance, documents on creation are woven with code and documentation, and on export, the code is tangled for execution by a computer. Org facilitates weaving and tangling for producing, maintaining, sharing, and exporting literate programming documents. Org provides extensive customization options for extracting source code.

When Org tangles code blocks, it expands, merges, and transforms them. Then Org recomposes them into one or more separate files, as configured through the options. During this tangling process, Org expands variables in the source code, and resolves any Noweb style references (see Noweb Reference Syntax).

1.Header arguments

The ‘tangle’ header argument specifies if the code block is exported to source file(s).

  • ‘yes’

    Export the code block to source file. The file name for the source file is derived from the name of the Org file, and the file extension is derived from the source code language identifier. Example: ‘:tangle yes’.

  • ‘no’

    The default. Do not extract the code in a source code file. Example: ‘:tangle no’.

  • FILENAME

    Export the code block to source file whose file name is derived from any string passed to the ‘tangle’ header argument. Org derives the file name as being relative to the directory of the Org file’s location. Example: ‘:tangle FILENAME’.

The ‘mkdirp’ header argument creates parent directories for tangled files if the directory does not exist. ‘yes’ enables directory creation and ‘no’ inhibits directory creation.

The ‘comments’ header argument controls inserting comments into tangled files. These are above and beyond whatever comments may already exist in the code block.

  • ‘no’

    The default. Do not insert any extra comments during tangling.

  • ‘link’

    Wrap the code block in comments. Include links pointing back to the place in the Org file from where the code was tangled.

  • ‘yes’

    Kept for backward compatibility; same as ‘link’.

  • ‘org’

    Nearest headline text from Org file is inserted as comment. The exact text that is inserted is picked from the leading context of the source block.

  • ‘both’

    Includes both ‘link’ and ‘org’ options.

  • ‘noweb’

    Includes ‘link’ option, expands Noweb references (see Noweb Reference Syntax), and wraps them in link comments inside the body of the code block.

The ‘padline’ header argument controls insertion of newlines to pad source code in the tangled file.

  • ‘yes’

    Default. Insert a newline before and after each code block in the tangled file.

  • ‘no’

    Do not insert newlines to pad the tangled code blocks.

The ‘shebang’ header argument can turn results into executable script files. By setting it to a string value—for example, ‘:shebang “#!/bin/bash”’—Org inserts that string as the first line of the tangled file that the code block is extracted to. Org then turns on the tangled file’s executable permission.

The ‘tangle-mode’ header argument specifies what permissions to set for tangled files by set-file-modes. For example, to make a read-only tangled file, use ‘:tangle-mode (identity #o444)’. To make it executable, use ‘:tangle-mode (identity #o755)’. It also overrides executable permission granted by ‘shebang’. When multiple source code blocks tangle to a single file with different and conflicting ‘tangle-mode’ header arguments, Org’s behavior is undefined.

By default Org expands code blocks during tangling. The ‘no-expand’ header argument turns off such expansions. Note that one side-effect of expansion by org-babel-expand-src-block also assigns values (see Environment of a Code Block) to variables. Expansions also replace Noweb references with their targets (see Noweb Reference Syntax). Some of these expansions may cause premature assignment, hence this option. This option makes a difference only for tangling. It has no effect when exporting since code blocks for execution have to be expanded anyway.

2.Functions

  • org-babel-tangle

    Tangle the current file. Bound to C-c C-v t.With prefix argument only tangle the current code block.

  • org-babel-tangle-file

    Choose a file to tangle. Bound to C-c C-v f.

3.Hooks

  • org-babel-post-tangle-hook

    This hook is run from within code files tangled by org-babel-tangle, making it suitable for post-processing, compilation, and evaluation of code in the tangled files.

4.Jumping between code and Org

Debuggers normally link errors and messages back to the source code. But for tangled files, we want to link back to the Org file, not to the tangled source file. To make this extra jump, Org uses org-babel-tangle-jump-to-org function with two additional source code block header arguments:

  1. Set ‘padline’ to true—this is the default setting.
  2. Set ‘comments’ to ‘link’, which makes Org insert links to the Org file.

14.8 Languages

Code blocks in the following languages are supported.

Language Identifier Language Identifier
Asymptote ‘asymptote’ Lua ‘lua’
Awk ‘awk’ MATLAB ‘matlab’
C ‘C’ Mscgen ‘mscgen’
C++ ‘C++’144 OCaml ‘ocaml’
Clojure ‘clojure’ Octave ‘octave’
CSS ‘css’ Org mode ‘org’
D ‘D’145 Oz ‘oz’
ditaa ‘ditaa’ Perl ‘perl’
Emacs Calc ‘calc’ Plantuml ‘plantuml’
Emacs Lisp ‘emacs-lisp’ Processing.js ‘processing’
Fortran ‘fortran’ Python ‘python’
Gnuplot ‘gnuplot’ R ‘R’
GNU Screen ‘screen’ Ruby ‘ruby’
Graphviz ‘dot’ Sass ‘sass’
Haskell ‘haskell’ Scheme ‘scheme’
Java ‘java’ Sed ‘sed’
Javascript ‘js’ shell ‘sh’
LaTeX ‘latex’ SQL ‘sql’
Ledger ‘ledger’ SQLite ‘sqlite’
Lilypond ‘lilypond’ Vala ‘vala’
Lisp ‘lisp’

Additional documentation for some languages is at https://orgmode.org/worg/org-contrib/babel/languages.html.

By default, only Emacs Lisp is enabled for evaluation. To enable or disable other languages, customize the org-babel-load-languages variable either through the Emacs customization interface, or by adding code to the init file as shown next.

In this example, evaluation is disabled for Emacs Lisp, and enabled for R.

1
2
3
4
(org-babel-do-load-languages
'org-babel-load-languages
'((emacs-lisp . nil)
(R . t)))

Note that this is not the only way to enable a language. Org also enables languages when loaded with require statement. For example, the following enables execution of Clojure code blocks:

1
(require 'ob-clojure)

14.9 Editing Source Code

Use C-c ‘ to edit the current code block. It opens a new major-mode edit buffer containing the body of the source code block, ready for any edits. Use C-c ‘ again to close the buffer and return to the Org buffer.

C-x C-s saves the buffer and updates the contents of the Org buffer. Set org-edit-src-auto-save-idle-delay to save the base buffer after a certain idle delay time. Set org-edit-src-turn-on-auto-save to auto-save this buffer into a separate file using Auto-save mode.

While editing the source code in the major mode, the Org Src minor mode remains active. It provides these customization variables as described below. For even more variables, look in the customization group org-edit-structure.

  • org-src-lang-modes

    If an Emacs major-mode named <LANG>-mode exists, where is the language identifier from code block’s header line, then the edit buffer uses that major mode. Use this variable to arbitrarily map language identifiers to major modes.

  • org-src-window-setup

    For specifying Emacs window arrangement when the new edit buffer is created.

  • org-src-preserve-indentation

    Default is nil. Source code is indented. This indentation applies during export or tangling, and depending on the context, may alter leading spaces and tabs. When non-nil, source code is aligned with the leftmost column. No lines are modified during export or tangling, which is very useful for white-space sensitive languages, such as Python.

  • org-src-ask-before-returning-to-edit-buffer

    When nil, Org returns to the edit buffer without further prompts. The default prompts for a confirmation.

Set org-src-fontify-natively to non-nil to turn on native code fontification in the Org buffer. Fontification of code blocks can give visual separation of text and code on the display page. To further customize the appearance of org-block for specific languages, customize org-src-block-faces. The following example shades the background of regular blocks, and colors source blocks only for Python and Emacs Lisp languages.

1
2
3
4
5
6
7
(require 'color)
(set-face-attribute 'org-block nil :background
(color-darken-name
(face-attribute 'default :background) 3))

(setq org-src-block-faces '(("emacs-lisp" (:background "#EEE2FF"))
("python" (:background "#E5FFB8"))))

14.10 Noweb Reference Syntax

Org supports named blocks in Noweb146 style syntax:

1
<<CODE-BLOCK-ID>>

Org can replace the construct with the source code, or the results of evaluation, of the code block identified as CODE-BLOCK-ID.

The ‘noweb’ header argument controls expansion of Noweb syntax references. Expansions occur when source code blocks are evaluated, tangled, or exported.

  • ‘no’

    Default. No expansion of Noweb syntax references in the body of the code when evaluating, tangling, or exporting.

  • ‘yes’

    Expansion of Noweb syntax references in the body of the code block when evaluating, tangling, or exporting.

  • ‘tangle’

    Expansion of Noweb syntax references in the body of the code block when tangling. No expansion when evaluating or exporting.

  • ‘no-export’

    Expansion of Noweb syntax references in the body of the code block when evaluating or tangling. No expansion when exporting.

  • ‘strip-export’

    Expansion of Noweb syntax references in the body of the code block when expanding prior to evaluating or tangling. Removes Noweb syntax references when exporting.

  • ‘eval’

    Expansion of Noweb syntax references in the body of the code block only before evaluating.

In the following example,

1
2
3
4
5
6
7
8
9
#+NAME: initialization
#+BEGIN_SRC emacs-lisp
(setq sentence "Never a foot too far, even.")
#+END_SRC

#+BEGIN_SRC emacs-lisp :noweb yes
<<initialization>>
(reverse sentence)
#+END_SRC

the second code block is expanded as

1
2
3
4
#+BEGIN_SRC emacs-lisp :noweb yes
(setq sentence "Never a foot too far, even.")
(reverse sentence)
#+END_SRC

Noweb insertions honor prefix characters that appear before the Noweb syntax reference. This behavior is illustrated in the following example. Because the ‘<>’ Noweb reference appears behind the SQL comment syntax, each line of the expanded Noweb reference is commented. With:

1
2
3
4
5
#+NAME: example
#+BEGIN_SRC text
this is the
multi-line body of example
#+END_SRC

this code block:

1
2
3
#+BEGIN_SRC sql :noweb yes
---<<example>>
#+END_SRC

expands to:

1
2
3
4
#+BEGIN_SRC sql :noweb yes
---this is the
---multi-line body of example
#+END_SRC

Since this change does not affect Noweb replacement text without newlines in them, inline Noweb references are acceptable.

This feature can also be used for management of indentation in exported code snippets. With:

1
2
3
4
5
6
7
8
9
#+NAME: if-true
#+BEGIN_SRC python :exports none
print('do things when true')
#+end_src

#+name: if-false
#+begin_src python :exports none
print('do things when false')
#+end_src

this code block:

1
2
3
4
5
6
#+begin_src python :noweb yes :results output
if true:
<<if-true>>
else:
<<if-false>>
#+end_src

expands to:

1
2
3
4
if true:
print('do things when true')
else:
print('do things when false')

When expanding Noweb style references, Org concatenates code blocks by matching the reference name to either the code block name or, if none is found, to the ‘noweb-ref’ header argument.

For simple concatenation, set this ‘noweb-ref’ header argument at the sub-tree or file level. In the example Org file shown next, the body of the source code in each block is extracted for concatenation to a pure code file when tangled.

1
2
3
4
5
6
7
8
9
10
11
12
13
14
15
16
17
18
19
20
21
22
#+BEGIN_SRC sh :tangle yes :noweb yes :shebang #!/bin/sh
<<fullest-disk>>
#+END_SRC
- the mount point of the fullest disk
:PROPERTIES:
:header-args: :noweb-ref fullest-disk
:END:

- query all mounted disks
#+BEGIN_SRC sh
df \
#+END_SRC

- strip the header row
#+BEGIN_SRC sh
|sed '1d' \
#+END_SRC

- output mount point of fullest disk
#+BEGIN_SRC sh
|awk '{if (u < +$5) {u = +$5; m = $6}} END {print m}'
#+END_SRC

By default a newline separates each noweb reference concatenation. To change this newline separator, edit the ‘noweb-sep’ header argument.

Eventually, Org can include the results of a code block rather than its body. To that effect, append parentheses, possibly including arguments, to the code block name, as shown below.

1
<<code-block-name(optional arguments)>>

Note that when using the above approach to a code block’s results, the code block name set by ‘NAME’ keyword is required; the reference set by ‘noweb-ref’ does not work in that case.

Here is an example that demonstrates how the exported content changes when Noweb style references are used with parentheses versus without. With:

1
2
3
4
#+NAME: some-code
#+BEGIN_SRC python :var num=0 :results output :exports none
print(num*10)
#+END_SRC

this code block:

1
2
3
#+BEGIN_SRC text :noweb yes
<<some-code>>
#+END_SRC

expands to:

1
print(num*10)

Below, a similar Noweb style reference is used, but with parentheses, while setting a variable ‘num’ to 10:

1
2
3
#+BEGIN_SRC text :noweb yes
<<some-code(num=10)>>
#+END_SRC

Note that now the expansion contains the results of the code block ‘some-code’, not the code block itself:

1
100

  • Footnotes

  • (146)

For Noweb literate programming details, see http://www.cs.tufts.edu/~nr/noweb/.

14.11 Library of Babel

The “Library of Babel” is a collection of code blocks. Like a function library, these code blocks can be called from other Org files. A collection of useful code blocks is available on Worg. For remote code block evaluation syntax, see Evaluating Code Blocks.

For any user to add code to the library, first save the code in regular code blocks of an Org file, and then load the Org file withorg-babel-lob-ingest, which is bound to C-c C-v i.

14.12 Key bindings and Useful Functions

Many common Org mode key sequences are re-bound depending on the context.

Active key bindings in code blocks:

Key binding Function
C-c C-c org-babel-execute-src-block
C-c C-o org-babel-open-src-block-result
M-UP org-babel-load-in-session
M-DOWN org-babel-pop-to-session

Active key bindings in Org mode buffer:

Key binding Function
C-c C-v p or C-c C-v C-p org-babel-previous-src-block
C-c C-v n or C-c C-v C-n org-babel-next-src-block
C-c C-v e or C-c C-v C-e org-babel-execute-maybe
C-c C-v o or C-c C-v C-o org-babel-open-src-block-result
C-c C-v v or C-c C-v C-v org-babel-expand-src-block
C-c C-v u or C-c C-v C-u org-babel-goto-src-block-head
C-c C-v g or C-c C-v C-g org-babel-goto-named-src-block
C-c C-v r or C-c C-v C-r org-babel-goto-named-result
C-c C-v b or C-c C-v C-b org-babel-execute-buffer
C-c C-v s or C-c C-v C-s org-babel-execute-subtree
C-c C-v d or C-c C-v C-d org-babel-demarcate-block
C-c C-v t or C-c C-v C-t org-babel-tangle
C-c C-v f or C-c C-v C-f org-babel-tangle-file
C-c C-v c or C-c C-v C-c org-babel-check-src-block
C-c C-v j or C-c C-v C-j org-babel-insert-header-arg
C-c C-v l or C-c C-v C-l org-babel-load-in-session
C-c C-v i or C-c C-v C-i org-babel-lob-ingest
C-c C-v I or C-c C-v C-I org-babel-view-src-block-info
C-c C-v z or C-c C-v C-z org-babel-switch-to-session-with-code
C-c C-v a or C-c C-v C-a org-babel-sha1-hash
C-c C-v h or C-c C-v C-h org-babel-describe-bindings
C-c C-v x or C-c C-v C-x org-babel-do-key-sequence-in-edit-buffer

14.13 Batch Execution

Org mode features, including working with source code facilities can be invoked from the command line. This enables building shell scripts for batch processing, running automated system tasks, and expanding Org mode’s usefulness.

The sample script shows batch processing of multiple files using org-babel-tangle.

1
2
3
4
5
6
7
8
9
10
#!/bin/sh
## Tangle files with Org mode
#
emacs -Q --batch --eval "
(progn
(require 'ob-tangle)
(dolist (file command-line-args-left)
(with-current-buffer (find-file-noselect file)
(org-babel-tangle))))
" "$@"

Emacs Ipython Notebook

Posted on 2019-06-13 | Comments:

The Emacs IPython Notebook (EIN) package provides a Jupyter Notebook client and integrated REPL (like SLIME) in Emacs. EIN improves notebook editing by allowing you to use Emacs. It also expose IPython features such as code evaluation, object inspection and code completion. These features can be accessed anywhere in Emacs and improve Python code editing and reading in general in Emacs.

Highlighted features:

  • Copy/paste cells in and between notebooks.
  • Console integration: You can easily connect to a kernel via a console application. This enables you to start debugging in the same kernel. It is even possible to connect a console over ssh 1.
  • An IPython kernel can be “connected” to a buffer. This enables you to evaluate buffer/region using same kernel as notebook. Notebook goodies such as tooltip help, help browser and code completion are available in these buffers. 2
  • Jump to definition (go to the definition by executing M-. over an object).
  • Execute code from an org-mode source block in a running kernel.

Other notebook features:

  • Inline images
  • Auto/manual-completion
  • Popup (tooltip) help
  • Syntax highlighting in each cell type (Python/Markdown/ReST/HTML)
  • Help browser (opens when executing function?)
  • Traceback viewer
  • Integration with the emacs debugger

Links:

  • Online Documentation
  • Wiki
  • Screenshots
  • Tips
  • Downloads
  • Repository at GitHub
  • Issue Tracker at GitHub

  • 1 You need to setup ein:console-args properly

  • 2 Use the command ein:connect-to-notebook-command.

Quick try

The fastest way to get EIN running in this modern age is to download from MELPA or, if you are a spacemacs user, through installing the ipython-notebook layer. Using zeroein is no longer supported, though in theory it should still work.

If you are installing from MELPA and have issues with some functions not being available after emacs starts, try adding the following to your emacs init file:

1
2
3
4
(package-initialize)
(require 'ein)
(require 'ein-notebook)
(require 'ein-subpackages)

Requirements

  • EMACS 25.3, 26.x, or 27

  • Jupyter Notebook 4.x or higher

  • IPython 5.8 or higher.

  • Tornado 4.0.2 or higher.

  • websocket.el >= 1.7

  • request.el >= 0.3

  • request-deferred.el >= 0.2

  • dash >= 2.13

  • s >= 1.11

  • auto-complete.el >= 1.4: You need to configure subpackage ein-ac to enable this feature.

  • skewer-mode >= 1.6.2: Skewer mode gives EIN the ability to execute dynamic javascript in the note book.

  • (optional) Jupyterhub_ 0.8 or higher: EIN supports logging in to Jupyterhub servers using PAM authentication, though this only works with v0.8, which currently is the development version of Jupyterhub.

  • (optional) markdown-mode

  • (optional) python-mode: It should work with either python.el or python-mode.el. python.el is required to use the ein:console-open command.

  • (optional) smartrep.el: This package enables you to omit typing prefix keys (e.g., C-c C-n C-n C-n ... instead of C-cC-n C-c C-n C-c C-n ...). You need to configure subpackage ein-smartrep to enable this feature.

  • (optional) jedi.el: Python auto-completion for emacs using jedi. In your emacs initialization file add

    (setq ein:completion-backend 'ein:use-ac-jedi-backend)

Also, EIN heavily relies on standard Emacs libraries including EWOC, EIEIO and json.el.

  • 3

    See Gotchas and caveats > python-mode.el.

Install

Warning

As EIN relies on many packages and it will not work properly with outdated versions, installing it using el-get or MELPA is highly recommended.

Using el-get

If you use developmental version of el-get installation is simple. Emacs IPython Notebook is registered as package ein. See the el-get website for more information.

Note

If you get error “Cannot open load file: request” that means you have an older version of el-get. You can fix this problem by either (1) installing request.el manually, (2) using the latest recipe, or (3) updating el-get to its master.

You can get the latest recipe here:

  • https://github.com/dimitri/el-get/blob/master/recipes/ein.rcp
  • https://github.com/dimitri/el-get/blob/master/recipes/request.rcp

See issue 98 for more information.

Using package.el (MELPA)

You can install EIN using package.el when the MELPA package repository is added to its setting. See MELPA website for more information.

Manual install

Put Emacs lisp ein*.el files and the Python file ein_remote_safe.py in a directory defined in your load-path.

You should byte compile EIN, especially when using MuMaMo, otherwise editing large notebook will be very slow. You can use the following command to compile EIN. If you don’t specify all the optional packages, there will be compiler warning but that is OK as long as you don’t use that optional package.

1
2
3
4
5
6
7
8
9
10
emacs -Q -batch -L .          \  # don't forget the dot!
-L PATH/TO/websocket/ \
-L PATH/TO/requests/ \
-L PATH/TO/nxhtml/util/ \ # optional (for MuMaMo)
-L PATH/TO/auto-complete/ \ # optional
-L PATH/TO/popup/ \ # optional (for auto-complete)
-L PATH/TO/fuzzy/ \ # optional (for auto-complete)
-L PATH/TO/smartrep/ \ # optional
-L PATH/TO/rst-mode/ \ # optional
-f batch-byte-compile *.el

Setup

Here is the minimal configuration. See customization_ for more details.

1
2
3
(require 'ein)
(require 'ein-notebook)
(require 'ein-subpackages)

Usage

  1. Start the Jupyter notebook server from the terminal or call M-x ein:run or M-x ein:jupyter-server-start from emacs. Note starting the notebook server from emacs will automatically call ein:jupyter-server-login-and-open, making steps 2 and 3 below unnecessary!
  2. If you have token or password authentication enabled then you will need to call M-x ein:login and enter the appropriate password. Assuming authentication works the notebooklist buffer will automatically open.
  3. In the notebook list buffer, you can open notebooks by selecting the [Open] buttons. See the notebook section for operations and commands available in the notebook buffer.

Commands/Keybinds

Running a Jupyter Notebook Server from Emacs

Using the commands below you start a jupyter notebook session from within emacs (i.e. no need to drop to the terminal shell and call jupyter notebook). EIN will also try to determine the access url and token authentication for the running server and automatically log you in.

Note that the below work best with current (> v4.3.1) versions of jupyter.

  • function (ein:jupyter-server-startserver-cmd-path notebook-directory &optional no-login-p login-callback**port)

    Start SERVER-CMD_PATH with ‘–notebook-dir’ NOTEBOOK-DIRECTORY. Login after connection established unless NO-LOGIN-P is set. LOGIN-CALLBACK takes two arguments, the buffer created by ein:notebooklist-open–finish, and the url-or-port argument of ein:notebooklist-open.This command opens an asynchronous process running the jupyter notebook server and then tries to detect the url and password to generate automatic calls to ‘ein:notebooklist-login’ and ‘ein:notebooklist-open’.With C-u prefix arg, it will prompt the user for the path to the jupyter executable first. Else, it will try to use the value of ‘ein:last-jupyter-command*’ or the value of the customizable variable ‘ein:jupyter-default-server-command’.Then it prompts the user for the path of the root directory containing the notebooks the user wants to access.The buffer named by ‘ein:jupyter-server-buffer-name’ will contain the log of the running jupyter server.

  • function (ein:runserver-cmd-path notebook-directory &optional no-login-p login-callback port)

    Start SERVER-CMD_PATH with ‘–notebook-dir’ NOTEBOOK-DIRECTORY. Login after connection established unless NO-LOGIN-P is set. LOGIN-CALLBACK takes two arguments, the buffer created by ein:notebooklist-open–finish, and the url-or-port argument of ein:notebooklist-open.This command opens an asynchronous process running the jupyter notebook server and then tries to detect the url and password to generate automatic calls to ‘ein:notebooklist-login’ and ‘ein:notebooklist-open’.With C-u prefix arg, it will prompt the user for the path to the jupyter executable first. Else, it will try to use the value of ‘ein:last-jupyter-command*’ or the value of the customizable variable ‘ein:jupyter-default-server-command’.Then it prompts the user for the path of the root directory containing the notebooks the user wants to access.The buffer named by ‘ein:jupyter-server-buffer-name’ will contain the log of the running jupyter server.

  • function (ein:jupyter-server-stop&optional force log)

  • function (ein:jupyter-server-login-and-open&optional callback)

    Log in and open a notebooklist buffer for a running jupyter notebook server.Determine if there is a running jupyter server (started via a call to ‘ein:jupyter-server-start’) and then try to guess if token authentication is enabled. If a token is found use it to generate a call to ‘ein:notebooklist-login’ and once authenticated open the notebooklist buffer via a call to ‘ein:notebooklist-open’.

  • variable ein:jupyter-default-server-command

    The default command to start a jupyter notebook server.Changing this to jupyter-notebook requires customizing ein:jupyter-server-use-subcommand to nil.

  • variable ein:jupyter-server-use-subcommand

    Users of “jupyter-notebook” (as opposed to “jupyter notebook”) need to Omit.

  • variable ein:jupyter-default-notebook-directory

    If you are tired of always being queried for the location of the notebook directory, you can set it here for future calls toein:jupyter-server-start

  • variable ein:jupyter-server-args

    Add any additional command line options you wish to include with the call to the jupyter notebook.

  • variable ein:jupyter-server-buffer-name

    The name of the buffer for the jupyter notebook server session.

Notebook list

You can start notebook by M-x ein:notebooklist-open and enter the port or URL of the IPython notebook server.

  • function (ein:notebooklist-openurl-or-port callback)

    This is now an alias for ein:notebooklist-login

  • function (ein:notebooklist-new-notebookurl-or-port kernelspec &optional callback no-pop retry)

  • function ein:notebooklist-open-notebook-global
  • function (ein:notebooklist-loginurl-or-port callback &optional cookie-plist)

    Deal with security before main entry of ein:notebooklist-open.CALLBACK takes two arguments, the buffer created by ein:notebooklist-open–success and the url-or-port argument of ein:notebooklist-open.

  • function ein:junk-new

  • function (ein:notebooklist-enable-keepalive&optional url-or-port)

    Enable periodic calls to the notebook server to keep long running sessions from expiring. By long running we mean sessions to last days, or weeks. The frequency of the refresh (which is very similar to a call to ‘ein:notebooklist-open‘) is controlled by ‘ein:notebooklist-keepalive-refresh-time‘, and is measured in terms of hours. If ‘ein:enable-keepalive’ is non-nil this will automatically be called during calls to ‘ein:notebooklist-open‘.

  • function ein:notebooklist-disable-keepalive

    Disable the notebooklist keepalive calls to the jupyter notebook server.

Keymap for ein:notebooklist-mode.

  • <remap> <self-insert-command>` undefined`

  • -` negative-argument`

  • 0` digit-argument`

  • 1` digit-argument`

  • 2` digit-argument`

  • 3` digit-argument`

  • 4` digit-argument`

  • 5` digit-argument`

  • 6` digit-argument`

  • 7` digit-argument`

  • 8` digit-argument`

  • 9` digit-argument`

  • q` quit-window`

  • SPC` scroll-up-command`

  • S-SPC` scroll-down-command`

  • DEL` scroll-down-command`

  • ?` describe-mode`

  • h` describe-mode`

  • >` end-of-buffer`

  • <` beginning-of-buffer`

  • g` revert-buffer`

  • TAB` widget-forward`

  • C-M-i` widget-backward`

  • <S-tab>` widget-backward`

  • <backtab>` widget-backward`

  • C-c C-r` ein:notebooklist-reload`

Reload current Notebook list.

  • C-c C-f` ein:file-open`

  • C-c C-o` ein:notebook-open`

  • p` ein:notebooklist-prev-item`

  • n` ein:notebooklist-next-item`

Notebook

The following keybindings are available in notebook buffers. Modified notebooks are saved automatically with a frequency dependenant on the setting of ein:notebook-autosave-frequency. If ein:notebook-create-checkpoint-on-save is True than a checkpoint will also be generated in the Jupyter server every time the notebook is saved. A notebook can be returned to a previous checkpoint via ein:notebook-restore-to-checkpoint. Checkpoints can also be manually created via ein:notebook-create-checkpoint.

  • C-c i` ein:inspect-object`

  • C-c '` ein:edit-cell-contents`

  • C-c C-c` ein:worksheet-execute-cell`

  • C-c C-'` ein:worksheet-turn-on-autoexec`

  • C-c C-e` ein:worksheet-toggle-output`

  • C-c C-v` ein:worksheet-set-output-visibility-all`

  • C-c C-l` ein:worksheet-clear-output`

  • C-c C-S-l` ein:worksheet-clear-all-output`

  • C-c C-;` ein:shared-output-show-code-cell-at-point`

  • C-c C-k` ein:worksheet-kill-cell`

  • C-c M-w` ein:worksheet-copy-cell`

  • C-c M-{` ein:notebook-worksheet-move-prev`

  • C-c M-}` ein:notebook-worksheet-move-next`

  • C-c M-+` ein:notebook-worksheet-insert-prev`

  • C-c C-w` ein:worksheet-copy-cell`

  • C-c C-y` ein:worksheet-yank-cell`

  • C-c C-a` ein:worksheet-insert-cell-above`

    • C-c C-b` ein:worksheet-insert-cell-below`
  • C-c C-t` ein:worksheet-toggle-cell-type`

  • C-c S` ein:worksheet-toggle-slide-type`

  • C-c C-u` ein:worksheet-change-cell-type`

  • C-c C-s` ein:worksheet-split-cell-at-point`

  • C-c C-m` ein:worksheet-merge-cell`

  • C-c C-n` ein:worksheet-goto-next-input`

  • C-c C-p` ein:worksheet-goto-prev-input`

  • C-c <up>` ein:worksheet-move-cell-up`

  • C-c <down>` ein:worksheet-move-cell-down`

  • C-c C-h` ein:pytools-request-tooltip-or-help`

  • C-c C-i` ein:completer-complete`

  • C-c C-$` ein:tb-show`

  • C-c C-x C-l` ein:notebook-toggle-latex-fragment`

  • C-c C-x C-r` ein:notebook-restart-session-command`

  • C-c C-r` ein:notebook-reconnect-session-command`

  • C-c C-z` ein:notebook-kernel-interrupt-command`

  • C-c C-q` ein:notebook-kill-kernel-then-close-command`

  • C-c C-#` ein:notebook-close`

  • C-c C-f` ein:file-open`

  • C-c C-o` ein:notebook-open`

  • C-c C-.` ein:pytools-jump-to-source-command`

Jump to the source code of the object at point. When the prefix argument ‘‘C-u‘‘ is given, open the source code in the other window. You can explicitly specify the object by selecting it.

  • C-c C-,` ein:pytools-jump-back-command`

Go back to the point where ‘ein:pytools-jump-to-source-command’ is executed last time. When the prefix argument ‘‘C-u‘‘ is given, open the last point in the other window.

  • C-c C-/` ein:notebook-scratchsheet-open`

  • C-c !` ein:worksheet-rename-sheet`

  • C-c {` ein:notebook-worksheet-open-prev-or-last`

  • C-c }` ein:notebook-worksheet-open-next-or-first`

  • C-c +` ein:notebook-worksheet-insert-next`

  • C-c -` ein:notebook-worksheet-delete`

  • C-c 1` ein:notebook-worksheet-open-1th`

  • C-c 2` ein:notebook-worksheet-open-2th`

  • C-c 3` ein:notebook-worksheet-open-3th`

  • C-c 4` ein:notebook-worksheet-open-4th`

  • C-c 5` ein:notebook-worksheet-open-5th`

  • C-c 6` ein:notebook-worksheet-open-6th`

  • C-c 7` ein:notebook-worksheet-open-7th`

  • C-c 8` ein:notebook-worksheet-open-8th`

  • C-c 9` ein:notebook-worksheet-open-last`

  • M-RET` ein:worksheet-execute-cell-and-goto-next`

  • M-.` ein:pytools-jump-to-source-command`

Jump to the source code of the object at point. When the prefix argument ‘‘C-u‘‘ is given, open the source code in the other window. You can explicitly specify the object by selecting it.

  • M-,` ein:pytools-jump-back-command`

Go back to the point where ‘ein:pytools-jump-to-source-command’ is executed last time. When the prefix argument ‘‘C-u‘‘ is given, open the last point in the other window.

  • M-p` ein:worksheet-previous-input-history`

  • M-n` ein:worksheet-next-input-history`

  • <M-S-return>` ein:worksheet-execute-cell-and-insert-below`

  • <C-up>` ein:worksheet-goto-prev-input`

  • <C-down>` ein:worksheet-goto-next-input`

  • <M-up>` ein:worksheet-move-cell-up`

  • <M-down>` ein:worksheet-move-cell-down`

  • C-:` ein:shared-output-eval-string`

  • C-x C-s` ein:notebook-save-notebook-command`

  • C-x C-w` ein:notebook-rename-command`

  • function (ein:worksheet-execute-all-cellws)

    Execute all cells in the current worksheet buffer.

  • function (ein:worksheet-delete-cellws cell &optional focus)

    Delete a cell. (WARNING: no undo!) This command has no key binding because there is no way to undo deletion. Use kill to play on the safe side.If you really want use this command, you can do something like this (but be careful when using it!):(define-key ein:notebook-mode-map "\C-c\C-d" ’ein:worksheet-delete-cell)

  • function ein:junk-rename

  • function (ein:iexec-mode&optional arg)

    Instant cell execution minor mode. Code cell at point will be automatically executed after any change in its input area.

  • function (ein:notebook-create-checkpointnotebook)

    Create checkpoint for current notebook based on most recent save.

  • function (ein:notebook-restore-to-checkpointnotebook checkpoint)

    Restore notebook to previous checkpoint saved on the Jupyter server. Note that if there are multiple checkpoints the user will be prompted on which one to use.

  • function (ein:notebook-enable-autosavesnotebook)

    Enable automatic, periodic saving for notebook.

  • function (ein:notebook-disable-autosavesnotebook)

    Disable automatic, periodic saving for current notebook.

Polymode in the Notebook

EIN now provides proper multi-major mode support in notebook buffers using polymode_. To use simply set ein:polymodeto t and restart emacs.

  • variable ein:polymode

    When enabled ein will use polymode to provide multi-major mode support in a notebook buffer, otherwise ein’s custom and outdated multi-major mode support will be used. Emacs must be restarted after changing this setting!

Advanced Editing

Worksheet cells can be edited in a manner similar to source blocks in Org buffers. Use C-c ' to edit the contents of the current cell. You can execute the contents of the buffer and the results will be sent to the output of the cell being edited.

  • C-c '` ein:edit-cell-exit`

Close the EIN source edit buffer, saving contents back to the original notebook cell, unless being called via ‘ein:edit-cell-abort’.

  • C-c C-k` ein:edit-cell-abort`

Abort editing the current cell, contents will revert to previous value.

  • C-c C-c` ein:edit-cell-save-and-execute`

Save, then execute the countents of the EIN source edit buffer and place results (if any) in output of original notebook cell.

  • C-c C-x` ein:edit-cell-view-traceback`

Jump to traceback, if there is one, for current edit.

  • C-x C-s` ein:edit-cell-save`

Save contents of EIN source edit buffer back to original notebook cell.

  • function ein:edit-cell-contents
  • function ein:edit-cell-exit

    Close the EIN source edit buffer, saving contents back to the original notebook cell, unless being called via ‘ein:edit-cell-abort’.

  • function ein:edit-cell-abort

    Abort editing the current cell, contents will revert to previous value.

  • function ein:edit-cell-save

    Save contents of EIN source edit buffer back to original notebook cell.

  • function ein:edit-cell-save-and-execute

    Save, then execute the countents of the EIN source edit buffer and place results (if any) in output of original notebook cell.

Connected buffer

You can connect any buffer (though typically a buffer that contains a Python file) to an opened notebook and use the kernel of that notebook to execute code, inspect objects, auto-complete code, jump to the other source, etc. Once the buffer is connected to the notebook, minor mode ein:connect-mode is enabled and the following keybinds are available.

  • C-c C-c` ein:connect-run-or-eval-buffer`

Run buffer using the ‘‘%run‘‘ magic command or eval whole buffer if the prefix ‘‘C-u‘‘ is given. Variable ‘ein:connect-run-command’ sets the command to run. You can change the command and/or set the options. See also: ‘ein:connect-run-buffer’, ‘ein:connect-eval-buffer’.

  • C-c C-l` ein:connect-reload-buffer`

Reload buffer using the command set by ‘ein:connect-reload-command’.

  • C-c C-r` ein:connect-eval-region`

  • C-c C-h` ein:pytools-request-tooltip-or-help`

  • C-c C-i` ein:completer-complete`

  • C-c C-z` ein:connect-pop-to-notebook`

  • C-c C-a` ein:connect-toggle-autoexec`

Toggle auto-execution mode of the current connected buffer.When auto-execution mode is on, cells in connected notebook will be automatically executed whenever run, eval or reload command 3 is called in this buffer.4Namely, one of‘ein:connect-run-buffer’‘ein:connect-eval-buffer’‘ein:connect-run-or-eval-buffer’‘ein:connect-reload-buffer’Note that you need to set cells to run in the connecting buffer or no cell will be executed. Use the ‘ein:worksheet-turn-on-autoexec’ command in notebook to change the cells to run.

  • C-c C-o` ein:console-open`

Open IPython console. To use this function, ‘ein:console-security-dir’ and ‘ein:console-args’ must be set properly. This function works best with the new python.el which is shipped with Emacs 24.2 or later. If you don’t have it, this function opens a “plain” command line interpreter (comint) buffer where you cannot use fancy stuff such as TAB completion. It should be possible to support python-mode.el. Patches are welcome!

  • C-c C-x` ein:tb-show`

  • C-c C-.` ein:pytools-jump-to-source-command`

Jump to the source code of the object at point. When the prefix argument ‘‘C-u‘‘ is given, open the source code in the other window. You can explicitly specify the object by selecting it.

  • C-c C-,` ein:pytools-jump-back-command`

Go back to the point where ‘ein:pytools-jump-to-source-command’ is executed last time. When the prefix argument ‘‘C-u‘‘ is given, open the last point in the other window.

  • C-c C-/` ein:notebook-scratchsheet-open`

  • C-:` ein:shared-output-eval-string`

  • M-.` ein:pytools-jump-to-source-command`

Jump to the source code of the object at point. When the prefix argument ‘‘C-u‘‘ is given, open the source code in the other window. You can explicitly specify the object by selecting it.

  • M-,` ein:pytools-jump-back-command`

Go back to the point where ‘ein:pytools-jump-to-source-command’ is executed last time. When the prefix argument ‘‘C-u‘‘ is given, open the last point in the other window.

Other useful commands:

  • function (ein:connect-to-notebook-command&optional not-yet-opened)

    Connect to notebook. When the prefix argument is given, you can choose any notebook on your server including the ones not yet opened. Otherwise, already chose from already opened notebooks.

  • function ein:connect-eval-buffer

    Evaluate the whole buffer. Note that this will run the code inside the ‘‘if name == “main”:‘‘ block.

  • function (ein:connect-run-buffer&optional ask-command)

    Run buffer using ‘‘%run‘‘. Ask for command if the prefix ‘‘C-u‘‘ is given. Variable ‘ein:connect-run-command’ sets the default command.

Shared output buffer

  • function ein:shared-output-pop-to-buffer

    Open shared output buffer.

The map for ein:shared-output-mode-map.

  • C-c C-x` ein:tb-show`

  • C-c C-.` ein:pytools-jump-to-source-command`

Jump to the source code of the object at point. When the prefix argument ‘‘C-u‘‘ is given, open the source code in the other window. You can explicitly specify the object by selecting it.

  • M-.` ein:pytools-jump-to-source-command`

Jump to the source code of the object at point. When the prefix argument ‘‘C-u‘‘ is given, open the source code in the other window. You can explicitly specify the object by selecting it.

Traceback viewer

Tracebacks from the notebook buffer can be difficult to understand. You can open a Traceback viewer by calling ein:notebook-view-traceback.

In the Traceback viewer, following keybinds are available.

Keymap for ein:traceback-mode.

  • RET` ein:tb-jump-to-source-at-point-command`

  • p` ein:tb-prev-item`

  • n` ein:tb-next-item`

PyTools

These commands can be used in the notebook buffer and the connected buffer.

  • function ein:pytools-doctest

    Do the doctest of the object at point.

  • function ein:pytools-whos

    Execute ‘‘%whos‘‘ magic command and popup the result.

  • function (ein:pytools-hierarchy&optional ask)

    Draw inheritance graph of the class at point. hierarchymagic extension is needed to be installed. You can explicitly specify the object by selecting it.

  • function (ein:pytools-pandas-to-sesdataframe)

    View pandas DataFrame in SES (Simple Emacs Spreadsheet). Open a ‘ses-mode’ buffer and import DataFrame object into it.SES is distributed with Emacs since Emacs 22, so you don’t need to install it if you are using newer Emacs.

  • function (ein:pytools-export-bufferbuffer format)

    Export contents of notebook using nbconvert to user-specified format (options will depend on the version of nbconvert available) to a new buffer.Currently EIN/IPython supports exporting to the following formats:HTMLJSON (this is basically the same as opening the ipynb file in a buffer).LatexMarkdownPythonRSTSlides

Misc

  • function helm-ein-kernel-history

    Search kernel execution history then insert the selected one.

  • function helm-ein-notebook-buffers

    Choose opened notebook using helm interface.

  • function anything-ein-kernel-history

    Search kernel execution history then insert the selected one.

  • function anything-ein-notebook-buffers

    Choose opened notebook using anything.el interface.

Org-mode Integration (ob-ein)

Configuration:

1
2
3
4
M-x customize-group RET org-babel
Org Babel Load Languages:
Insert (ein . t)
For example, '((emacs-lisp . t) (ein . t))

Snippet:

1
2
3
4
5
6
#BEGIN_SRC *language* :session localhost :results raw drawer
import numpy, math, matplotlib.pyplot as plt
%matplotlib inline
x = numpy.linspace(0, 2*math.pi)
plt.plot(x, numpy.sin(x))
#+END_SRC
  • Language can be ein-python, ein-r, or ein-julia. The relevant jupyter kernel must be installed before use. Additional languages can be

    configured via:M-x customize-group RET ein Ob Ein Languages

The format for the :session header argument is {url-or-port}/{path-to-notebook}. Just specifying {url-or-port}executes your source block in a single anonymous notebook (this effects an ipython repl in org). You should also specify :results raw drawer for proper rendering inside the org buffer. For example:

1
2
3
4
5
6
7
#+BEGIN_SRC ein-python :session localhost :results raw drawer
import sys

a = 14500
b = a+1000
sys.version
#+END_SRC

If your code block generates an image, like from an matplotlib plot, ein will automatically save to a file in the directory specified by ein:org-inline-image-directory and generate an appropriate inline link. You can also specify the file to save the image to using by the :image argument as in the example below:

1
2
3
4
5
6
7
8
9
#BEGIN_SRC ein :session localhost :results raw drawer :image output.png
import matplotlib.pyplot as plt
import numpy as np

%matplotlib inline
x = np.linspace(0, 1, 100)
y = np.random.rand(100,1)
plt.plot(x,y)
#+END_SRC

To get proper syntax highlighting for non-Python kernels, use the function ein:org-register-lang-mode to define a new ein-based org source language. For example, to get proper syntax highlighting for an R kernel, first call

1
(ein:org-register-lang-mode "ein-R" 'R)

Then org SRC blocks with language “ein-R” will use R syntax highlighting:

1
2
3
#BEGIN_SRC ein-R :session localhost :results raw drawer :image output.png
plot(1:10, 1:10)
#+END_SRC

You can also link to an IPython notebook from org-mode files.

  1. Call org-mode function org-store-link 5 in notebook buffer. You can select a region to specify a position in the notebook.
  2. Go to org-mode file and type C-c C-l (org-insert-link). This will insert a link to the notebook.
  3. Type C-c C-o (org-open-at-point) to open the link at the point of cursor.
  • 5

    See 1.3 Activation in org-mode manual.

Customization

  • variable ein:org-async-p
  • variable ein:org-inline-image-directory
  • function ein:org-register-lang-mode

Support for The Hy Language (EXPERIMENTAL)

New in v0.14, ein has limited support for executing hy code in a notebook running an ipython kernel. Before trying this feature you will need to install hy per the quickstart instructions.

Once you have set up hy in your ipython kernel, open or create a notebook running this kernel and create or go to an empty cell. You will need to change the cell type to hy using ein:worksheet-change-cell-type. Once that is done you can enter hy expressions and they will be correctly evaluated by the kernel!

If you are running a hy kernel you can, of course, write hy expressions in code cells and have the expected results.

Customization

You can customize EIN by typing M-x customize-group RET ein RET. All the configurable variables are listed below.

Subpackages

  • variable ein:completion-backend

    EIN defaults to your individual company-mode or auto-complete-mode configuration. Change this setting to gather completions from the jupyter server:* ein:use-none-backend: local completions only (configured outside EIN) * ein:use-company-backend: company-style remote completions (elpy takes precedence) * ein:use-ac-backend: deprecated auto-complete remote completions

  • variable ein:use-smartrep

    Set to t to use preset smartrep configuration.WarningWhen used with MuMaMo (see ein:notebook-modes), keyboard macro which manipulates cell (add, remove, move, etc.) may start infinite loop (you need to stop it with C-g). Please be careful using this option if you are a heavy keyboard macro user. Using keyboard macro for other commands is fine.

  • variable ein:load-dev

Notebook list

  • variable ein:url-or-port

    List of default url-or-port values. This will be used for completion. So put your IPython servers. You can connect to servers not in this list (but you will need to type every time).

  • variable ein:default-url-or-port

    Default URL or port. This should be your main IPython Notebook server.

  • function (ein:notebooklist-load&optional url-or-port)

    Load notebook list but do not pop-up the notebook list buffer.For example, if you want to load notebook list when Emacs starts, add this in the Emacs initialization file:(add-to-hook ’after-init-hook ’ein:notebooklist-load)or even this (if you want fast Emacs start-up):;; load notebook list if Emacs is idle for 3 sec after start-up (run-with-idle-timer 3 nil #’ein:notebooklist-load)You should setup ‘ein:url-or-port’ or ‘ein:default-url-or-port’ in order to make this code work.See also: ‘ein:connect-to-default-notebook’, ‘ein:connect-default-notebook’.

Notebook

  • variable ein:worksheet-enable-undo

    When non-nil, allow undo of cell inputs only (as opposed towhole-cell operations such as killing, moving, executing cells).Changes to this variable only take effect for newly opened worksheets.

  • variable ein:polymode

    When enabled ein will use polymode to provide multi-major mode support in a notebook buffer, otherwise ein’s custom and outdated multi-major mode support will be used. Emacs must be restarted after changing this setting!

  • variable ein:notebook-modes

    Notebook modes to use (in order of preference).When the notebook is opened, mode in this value is checked one by one and the first usable mode is used.Available modes:ein:notebook-multilang-mode`ein:notebook-mumamo-modeein:notebook-python-modeein:notebook-plain-modeExamples:Use MuMaMo if it is installed. Otherwise, use plain mode. This is the old default setting:(setq ein:notebook-modes ‘(ein:notebook-mumamo-mode ein:notebook-plain-mode)) Avoid using MuMaMo even when it is installed:(setq ein:notebook-modes ‘(ein:notebook-plain-mode)) Use simplepython-modebased notebook mode when MuMaMo is not installed:(setq ein:notebook-modes ‘(ein:notebook-mumamo-mode ein:notebook-python-mode)) `

  • variable ein:notebook-querty-timeout-open

  • variable ein:notebook-querty-timeout-save

    Query timeout for saving notebook. Similar to ein:notebook-querty-timeout-open, but for saving notebook. For global setting and more information, see ein:query-timeout.

  • variable ein:cell-traceback-level

    Number of traceback stack to show. Hidden tracebacks are not discarded. You can view them using [ein:tb-show].

  • variable ein:cell-autoexec-prompt

    String shown in the cell prompt when the auto-execution flag is on. See also ein:connect-aotoexec-lighter.

  • variable ein:junk-notebook-name-template

  • variable ein:iexec-delay

    Delay before executing cell after change in second.

  • variable ein:complete-on-dot

  • variable ein:helm-kernel-history-search-key

    Bind helm-ein-kernel-history to this key in notebook mode.Example:(setq ein:helm-kernel-history-search-key "\M-r")This key will be installed in the ein:notebook-mode-map.

  • variable ein:anything-kernel-history-search-key

    Bind anything-ein-kernel-history to this key in notebook mode.Example:(setq ein:anything-kernel-history-search-key "\M-r")This key will be installed in the ein:notebook-mode-map.

  • variable ein:helm-kernel-history-search-auto-pattern

    Automatically construct search pattern when non-nil.Single space is converted to “”.A backslash followed by a space is converted to a single space.A “” is added at the beginning and end of the pattern.This variable applies to both helm-ein-kernel-history and anything-ein-kernel-history.

  • variable ein:output-type-preference

    Output types to be used in notebook. First output-type found in this list will be used. This variable can be a list or a function returning a list given DATA plist. See also ein:output-type-prefer-pretty-text-over-html.Example: If you prefer HTML type over text type, you can set it as:(setq ein:output-type-preference '(emacs-lisp svg png jpeg html text latex javascript))Note that html comes before text.

  • variable ein:shr-env

    Variables let-bound while calling shr-insert-document.To use default shr setting:(setq ein:shr-env nil)Draw boundaries for table (default):(setq ein:shr-env '((shr-table-horizontal-line ?-) (shr-table-vertical-line ?|) (shr-table-corner ?+)))

  • variable ein:notebook-autosave-frequency

    Sets the frequency (in seconds) at which the notebook is automatically saved, per IPEP15. Set to 0 to disable this feature.Autosaves are automatically enabled when a notebook is opened, but can be controlled manually via ein:notebook-enable-autosave and ein:notebook-disable-autosave.If you wish to change the autosave frequency for the current notebook call ein:notebook-update-autosave-freqency.

  • variable ein:notebook-create-checkpoint-on-save

    If non-nil a checkpoint will be created every time the notebook is saved. Otherwise checkpoints must be created manually via ein:notebook-create-checkpoint.

Console

  • variable ein:console-security-dir

    Security directory setting.Following types are valid:stringUse this value as a path to security directory. Handy when you have only one IPython server.alistAn alist whose element is “(URL-OR-PORT . DIR)”. Key (URL-OR-PORT) can be string (URL), integer (port), ordefault (symbol). The value of default is used when other key does not much. Normally you should have this entry.functionCalled with an argument URL-OR-PORT (integer or string). You can have complex setting using this.

  • variable ein:console-executable

    IPython executable used for console.Example: "/user/bin/ipython". Types same as ein:console-security-dir are valid.

  • variable ein:console-args

    Additional argument when using console.WarningSpace-separated string is obsolete now. Use a list of string as value now.Setting to use IPython profile named “YOUR-IPYTHON-PROFILE”:(setq ein:console-args '("--profile" "YOUR-IPYTHON-PROFILE"))Together with ein:console-security-dir, you can open IPython console connecting to a remote kernel.:(setq ein:console-args '("--ssh" "HOSTNAME")) (setq ein:console-security-dir "PATH/TO/SECURITY/DIR")You can setup ein:console-args per server basis using alist form:(setq ein:console-args '((8888 . '("--profile" "PROFILE")) (8889 . '("--ssh" "HOSTNAME")) (default . '("--profile" "default"))))If you want to use more complex setting, you can set a function to it:(setq ein:console-args (lambda (url-or-port) '("--ssh" "HOSTNAME")))See also: ein:console-security-dir.

Connect

  • variable ein:connect-run-command

    %run magic command used for ein:connect-run-buffer. Types same as ein:console-security-dir are valid.

  • variable ein:connect-reload-command

    Setting for ein:connect-reload-buffer. Same as ein:connect-run-command.

  • variable ein:connect-save-before-run

    Whether the buffer should be saved before ein:connect-run-buffer.

  • variable ein:propagate-connect

    Set to t to connect to the notebook after jumping to a buffer.

  • variable ein:connect-aotoexec-lighter

    String appended to the lighter of ein:connect-mode (ein:c) when auto-execution mode is on. When nil, use the same string as ein:cell-autoexec-prompt.

  • variable ein:connect-default-notebook

    Notebook to be connect when ein:connect-to-default-notebook is called.Example setting to connect to “My_Notebook” in the server at port 8888 when opening any buffer in python-mode:(setq ein:connect-default-notebook "8888/My_Notebook") (add-hook 'python-mode-hook 'ein:connect-to-default-notebook)ein:connect-default-notebook can also be a function without any argument. This function must return a string (notebook path of the form “URL-OR-PORT/NOTEBOOK-NAME”).As ein:connect-to-default-notebook requires notebook list to be loaded, consider using ein:notebooklist-loadto load notebook list if you want to connect to notebook without manually opening notebook list.

  • function ein:connect-to-default-notebook

    Connect to the default notebook specified by ‘ein:connect-default-notebook’. Set this to ‘python-mode-hook’ to automatically connect any python-mode buffer to the notebook.

Misc

  • variable ein:filename-translations

    Convert file paths between Emacs and Python process.This value can take these form:alistIts key specifies URL-OR-PORT and value must be a list of two functions: (TO-PYTHON FROM-PYTHON). Key (URL-OR-PORT) can be string (URL), integer (port), or default (symbol). The value of default is used when other key does not much.functionCalled with an argument URL-OR-PORT (integer or string). This function must return a list of two functions: (TO-PYTHON FROM-PYTHON).Here, the functions TO-PYTHON and FROM-PYTHON are defined as:TO-PYTHONA function which converts a file name (returned by buffer-file-name) to the one Python understands.FROM-PYTHONA function which converts a file path returned by Python process to the one Emacs understands.Use ein:tramp-create-filename-translator to easily generate the pair of TO-PYTHON and FROM-PYTHON.

  • function (ein:tramp-create-filename-translatorremote-host &optional username)

    Generate a pair of TO-PYTHON and FROM-PYTHON for ‘ein:filename-translations’.Usage:(setq ein:filename-translations ‘((8888 . ,(ein:tramp-create-filename-translator "MY-HOSTNAME")))) ;; Equivalently: (setq ein:filename-translations (lambda (url-or-port) (when (equal url-or-port 8888) (ein:tramp-create-filename-translator "MY-HOSTNAME"))))This setting assumes that the IPython server which can be connected using the port 8888 in localhost is actually running in the host named MY-HOSTNAME.Adapted from ‘slime-create-filename-translator’.

  • variable ein:query-timeout

    Default query timeout for HTTP access in millisecond.Setting this to nil means no timeout. If you have curl command line program, it is automatically set to nil as curl is reliable than url-retrieve therefore no need for a workaround (see below).If you do the same operation before the timeout, old operation will NO LONGER be canceled (as it the cookie jar gets clobbered when curl aborts). Instead you will see Race! in debug messages.NoteThis value exists because it looks like url-retrieve occasionally fails to finish (start?) querying. Timeout is used to let user notice that their operation is not finished. It also prevent opening a lot of useless process buffers. You will see them when closing Emacs if there is no timeout.If you know how to fix the problem with url-retrieve, please let me know or send pull request at github! (Related bug report in Emacs bug tracker: http://debbugs.gnu.org/cgi/bugreport.cgi?bug=11469)

  • function (ein:notebook-jump-to-opened-notebooknotebook)

    List all opened notebook buffers and switch to one that the user selects.

Gotchas and caveats

Although EIN mostly works fine, there are some deficits I noticed but have not fixed yet. It seems that they originate from some upstream bugs so there is little I can do in EIN (but I’m not sure – it’s possible that I am misusing the libraries!).

If you know how to fix/workaround them, patches are very welcome.

url-retrieve

While using EIN, probably most of the error messages are about server connections. It looks like the problem is in url-retrieve. But in those cases you don’t lose any notebook data and your IPython kernel is fine. You can just type the command again and it will go fine most of the time. For saving notebook, I implemented code to retry when there is an error comes from url-retrieve to make it even safer.

MuMaMo

When using MuMaMo based notebook mode, you will notice that highlighting outside of the cell input is turned off while you are in the input area. It seems there is a bug in MuMaMo 6.

If you are using smartrep and MuMaMo together, see also the warning in ein:use-smartrep document.

  • 6

    See the relevant bug report I posted: https://bugs.launchpad.net/nxhtml/+bug/1013794

python-mode.el

Using python-mode.el without fisrt byte-compiling can cause a segfault with the MuMaMo based notebook mode.

Also, mumamo-idle-set-major-mode generates the error message (wrong-type-argument listp python-saved-check-command) time to time, making minibuffer bit noisy while editing notebook. See Tips to fix this problem.

Advanced

By telling IPython a little bit about Emacs Lisp, you can execute Emacs Lisp from IPython, just like you can execute Javascript in the web client. See emacslisp.py for more details.

1
2
3
4
5
6
7
In [1]:
%run PATH/TO/emacslisp.py

In [2]:
EmacsLisp('(+ 1 2 3)')
Out [2]:
6

Reporting issues

Please use M-x ein:dev-bug-report-template to write a bug report. It pops up a buffer containing some system information and instruction for bug report.

Logging

Sometime more information than provided in the *Message* buffer is needed to debug.

  1. Execute (ein:log-set-level 'debug) (e.g., M-: (ein:log-set-level 'debug) RET).

  2. Then do some operation which cause the problem.

  3. Go to the log buffer _*ein:log-all* (it starts with a space) and paste the whole buffer to the issue tracker.

    Please enclose the log with three backquotes to make the snippet as a code block, like this:

    1
     

    [verbose] Start logging. @#<buffer ein: 8888/NAME>
    [info] Notebook NAME is ready @#<buffer ein: 8888/NAME>
    [info] Kernel started: 5e4f74d1-ce91-4e7e-9575-9646adea5172 @#

    1
     

    See also: GitHub Flavored Markdown - Introduction

    If it is too long, you can use paste bin service such as gist.

websocket.el

websocket.el has its own logging buffer. Sometime it is useful to see this log. To do this:

  1. (require 'ein-dev)
  2. (setq websocket-debug t) or call ein:dev-start-debug.
  3. Then do the operation which causes the problem.
  4. Go to log buffer using ein:dev-pop-to-debug-shell and ein:dev-pop-to-debug-iopub. These command must be called in the notebook buffer.

Debugging

If you are interested in debugging EIN, you should start by calling the command ein:dev-start-debug. If the bug is websocket related, you may need to run it with a prefix key like this: C-u M-x ein:dev-start-debug RET to get a backtrace. This command sets debug-on-error to t and does some patching to the debugger. This patching is required because printing EWOC objects freezes Emacs otherwise. It also changes log level to report everything the log buffer. You can reset the patch and log level with ein:dev-stop-debug.

Intro to elisp 5. A Few More Complex Functions

Posted on 2019-06-11 | Comments:

In this chapter, we build on what we have learned in previous chapters by looking at more complex functions. The copy-to-buffer function illustrates use of two save-excursionexpressions in one definition, while the insert-buffer function illustrates use of an asterisk in an interactive expression, use of or, and the important distinction between a name and the object to which the name refers.

  • copy-to-buffer: With set-buffer, get-buffer-create.
  • insert-buffer: Read-only, and with or.
  • beginning-of-buffer: Shows goto-char, point-min, and push-mark.
  • Second Buffer Related Review
  • optional Exercise

5.1 The Definition of copy-to-buffer

After understanding how append-to-buffer works, it is easy to understand copy-to-buffer. This function copies text into a buffer, but instead of adding to the second buffer, it replaces all the previous text in the second buffer.

The body of copy-to-buffer looks like this,

1
2
3
4
5
6
7
8
...
(interactive "BCopy to buffer: \nr")
(let ((oldbuf (current-buffer)))
(with-current-buffer (get-buffer-create buffer)
(barf-if-buffer-read-only)
(erase-buffer)
(save-excursion
(insert-buffer-substring oldbuf start end)))))

The copy-to-buffer function has a simpler interactive expression than append-to-buffer.

The definition then says

1
(with-current-buffer (get-buffer-create buffer) ...

First, look at the earliest inner expression; that is evaluated first. That expression starts with get-buffer-create buffer. The function tells the computer to use the buffer with the name specified as the one to which you are copying, or if such a buffer does not exist, to create it. Then, the with-current-buffer function evaluates its body with that buffer temporarily current.

(This demonstrates another way to shift the computer’s attention but not the user’s. The append-to-buffer function showed how to do the same with save-excursion and set-buffer. with-current-buffer is a newer, and arguably easier, mechanism.)

The barf-if-buffer-read-only function sends you an error message saying the buffer is read-only if you cannot modify it.

The next line has the erase-buffer function as its sole contents. That function erases the buffer.

Finally, the last two lines contain the save-excursion expression with insert-buffer-substring as its body. The insert-buffer-substring expression copies the text from the buffer you are in (and you have not seen the computer shift its attention, so you don’t know that that buffer is now called oldbuf).

Incidentally, this is what is meant by “replacement”. To replace text, Emacs erases the previous text and then inserts new text.

In outline, the body of copy-to-buffer looks like this:

1
2
3
4
5
6
(let (bind-oldbuf-to-value-of-current-buffer)
(with-the-buffer-you-are-copying-to
(but-do-not-erase-or-copy-to-a-read-only-buffer)
(erase-buffer)
(save-excursion
insert-substring-from-oldbuf-into-buffer)))

5.2 The Definition of insert-buffer

insert-buffer is yet another buffer-related function. This command copies another buffer into the current buffer. It is the reverse of append-to-buffer or copy-to-buffer, since they copy a region of text from the current buffer to another buffer.

Here is a discussion based on the original code. The code was simplified in 2003 and is harder to understand.

(See New Body for insert-buffer, to see a discussion of the new body.)

In addition, this code illustrates the use of interactive with a buffer that might be read-only and the important distinction between the name of an object and the object actually referred to.

  • insert-buffer code
  • insert-buffer interactive: When you can read, but not write.
  • insert-buffer body: The body has an or and a let.
  • if & or: Using an if instead of an or.
  • Insert or: How the or expression works.
  • Insert let: Two save-excursion expressions.
  • New insert-buffer

The Code for insert-buffer

Here is the earlier code:

1
2
3
4
5
6
7
8
9
10
11
12
13
14
15
(defun insert-buffer (buffer)
"Insert after point the contents of BUFFER.
Puts mark after the inserted text.
BUFFER may be a buffer or a buffer name."
(interactive "*bInsert buffer: ")
(or (bufferp buffer)
(setq buffer (get-buffer buffer)))
(let (start end newmark)
(save-excursion
(save-excursion
(set-buffer buffer)
(setq start (point-min) end (point-max)))
(insert-buffer-substring buffer start end)
(setq newmark (point)))
(push-mark newmark)))

As with other function definitions, you can use a template to see an outline of the function:

1
2
3
4
(defun insert-buffer (buffer)
"documentation..."
(interactive "*bInsert buffer: ")
body...)

5.2.1 The Interactive Expression in insert-buffer

In insert-buffer, the argument to the interactive declaration has two parts, an asterisk, ‘*’, and ‘bInsert buffer: ’.

  • Read-only buffer: When a buffer cannot be modified.
  • b for interactive: An existing buffer or else its name.
A Read-only Buffer

The asterisk is for the situation when the current buffer is a read-only buffer—a buffer that cannot be modified. If insert-buffer is called when the current buffer is read-only, a message to this effect is printed in the echo area and the terminal may beep or blink at you; you will not be permitted to insert anything into current buffer. The asterisk does not need to be followed by a newline to separate it from the next argument.

‘b’ in an Interactive Expression

The next argument in the interactive expression starts with a lower case ‘b’. (This is different from the code for append-to-buffer, which uses an upper-case ‘B’. See The Definition of append-to-buffer.) The lower-case ‘b’ tells the Lisp interpreter that the argument for insert-buffer should be an existing buffer or else its name. (The upper-case ‘B’ option provides for the possibility that the buffer does not exist.) Emacs will prompt you for the name of the buffer, offering you a default buffer, with name completion enabled. If the buffer does not exist, you receive a message that says “No match”; your terminal may beep at you as well.

The new and simplified code generates a list for interactive. It uses the barf-if-buffer-read-only and read-buffer functions with which we are already familiar and the progn special form with which we are not. (It will be described later.)

5.2.2 The Body of the insert-buffer Function

The body of the insert-buffer function has two major parts: an or expression and a let expression. The purpose of the or expression is to ensure that the argument buffer is bound to a buffer and not just the name of a buffer. The body of the let expression contains the code which copies the other buffer into the current buffer.

In outline, the two expressions fit into the insert-buffer function like this:

1
2
3
4
5
6
7
(defun insert-buffer (buffer)
"documentation..."
(interactive "*bInsert buffer: ")
(or ...
...
(let (varlist)
body-of-let... )

To understand how the or expression ensures that the argument buffer is bound to a buffer and not to the name of a buffer, it is first necessary to understand the or function.

Before doing this, let me rewrite this part of the function using if so that you can see what is done in a manner that will be familiar.

5.2.3 insert-buffer With an if Instead of an or

The job to be done is to make sure the value of buffer is a buffer itself and not the name of a buffer. If the value is the name, then the buffer itself must be got.

You can imagine yourself at a conference where an usher is wandering around holding a list with your name on it and looking for you: the usher is bound to your name, not to you; but when the usher finds you and takes your arm, the usher becomes bound to you.

In Lisp, you might describe this situation like this:

1
2
(if (not (holding-on-to-guest))
(find-and-take-arm-of-guest))

We want to do the same thing with a buffer—if we do not have the buffer itself, we want to get it.

Using a predicate called bufferp that tells us whether we have a buffer (rather than its name), we can write the code like this:

1
2
(if (not (bufferp buffer))              ; if-part
(setq buffer (get-buffer buffer))) ; then-part

Here, the true-or-false-test of the if expression is (not (bufferp buffer)); and the then-part is the expression (setq buffer (get-buffer buffer)).

In the test, the function bufferp returns true if its argument is a buffer—but false if its argument is the name of the buffer. (The last character of the function name bufferp is the character ‘p’; as we saw earlier, such use of ‘p’ is a convention that indicates that the function is a predicate, which is a term that means that the function will determine whether some property is true or false. See Using the Wrong Type Object as an Argument.)

The function not precedes the expression (bufferp buffer), so the true-or-false-test looks like this:

1
(not (bufferp buffer))

not is a function that returns true if its argument is false and false if its argument is true. So if (bufferp buffer) returns true, the not expression returns false and vice versa.

Using this test, the if expression works as follows: when the value of the variable buffer is actually a buffer rather than its name, the true-or-false-test returns false and the ifexpression does not evaluate the then-part. This is fine, since we do not need to do anything to the variable buffer if it really is a buffer.

On the other hand, when the value of buffer is not a buffer itself, but the name of a buffer, the true-or-false-test returns true and the then-part of the expression is evaluated. In this case, the then-part is (setq buffer (get-buffer buffer)). This expression uses the get-buffer function to return an actual buffer itself, given its name. The setq then sets the variable buffer to the value of the buffer itself, replacing its previous value (which was the name of the buffer).

5.2.4 The or in the Body

The purpose of the or expression in the insert-buffer function is to ensure that the argument buffer is bound to a buffer and not just to the name of a buffer. The previous section shows how the job could have been done using an if expression. However, the insert-buffer function actually uses or. To understand this, it is necessary to understand how orworks.

An or function can have any number of arguments. It evaluates each argument in turn and returns the value of the first of its arguments that is not nil. Also, and this is a crucial feature of or, it does not evaluate any subsequent arguments after returning the first non-nil value.

The or expression looks like this:

1
2
(or (bufferp buffer)
(setq buffer (get-buffer buffer)))

The first argument to or is the expression (bufferp buffer). This expression returns true (a non-nil value) if the buffer is actually a buffer, and not just the name of a buffer. In the or expression, if this is the case, the or expression returns this true value and does not evaluate the next expression—and this is fine with us, since we do not want to do anything to the value of buffer if it really is a buffer.

On the other hand, if the value of (bufferp buffer) is nil, which it will be if the value of buffer is the name of a buffer, the Lisp interpreter evaluates the next element of the orexpression. This is the expression (setq buffer (get-buffer buffer)). This expression returns a non-nil value, which is the value to which it sets the variable buffer—and this value is a buffer itself, not the name of a buffer.

The result of all this is that the symbol buffer is always bound to a buffer itself rather than to the name of a buffer. All this is necessary because the set-buffer function in a following line only works with a buffer itself, not with the name to a buffer.

Incidentally, using or, the situation with the usher would be written like this:

1
(or (holding-on-to-guest) (find-and-take-arm-of-guest))

5.2.5 The let Expression in insert-buffer

After ensuring that the variable buffer refers to a buffer itself and not just to the name of a buffer, the insert-buffer function continues with a let expression. This specifies three local variables, start, end, and newmark and binds them to the initial value nil. These variables are used inside the remainder of the let and temporarily hide any other occurrence of variables of the same name in Emacs until the end of the let.

The body of the let contains two save-excursion expressions. First, we will look at the inner save-excursion expression in detail. The expression looks like this:

1
2
3
(save-excursion
(set-buffer buffer)
(setq start (point-min) end (point-max)))

The expression (set-buffer buffer) changes Emacs’s attention from the current buffer to the one from which the text will copied. In that buffer, the variables start and end are set to the beginning and end of the buffer, using the commands point-min and point-max. Note that we have here an illustration of how setq is able to set two variables in the same expression. The first argument of setq is set to the value of its second, and its third argument is set to the value of its fourth.

After the body of the inner save-excursion is evaluated, the save-excursion restores the original buffer, but start and end remain set to the values of the beginning and end of the buffer from which the text will be copied.

The outer save-excursion expression looks like this:

1
2
3
4
5
(save-excursion
(inner-save-excursion-expression
(go-to-new-buffer-and-set-start-and-end)
(insert-buffer-substring buffer start end)
(setq newmark (point)))

The insert-buffer-substring function copies the text into the current buffer from the region indicated by start and end in buffer. Since the whole of the second buffer lies between start and end, the whole of the second buffer is copied into the buffer you are editing. Next, the value of point, which will be at the end of the inserted text, is recorded in the variable newmark.

After the body of the outer save-excursion is evaluated, point is relocated to its original place.

However, it is convenient to locate a mark at the end of the newly inserted text and locate point at its beginning. The newmark variable records the end of the inserted text. In the last line of the let expression, the (push-mark newmark) expression function sets a mark to this location. (The previous location of the mark is still accessible; it is recorded on the mark ring and you can go back to it with C-u C-.) Meanwhile, point is located at the beginning of the inserted text, which is where it was before you called the insert function, the position of which was saved by the first save-excursion.

The whole let expression looks like this:

1
2
3
4
5
6
7
8
(let (start end newmark)
(save-excursion
(save-excursion
(set-buffer buffer)
(setq start (point-min) end (point-max)))
(insert-buffer-substring buffer start end)
(setq newmark (point)))
(push-mark newmark))

Like the append-to-buffer function, the insert-buffer function uses let, save-excursion, and set-buffer. In addition, the function illustrates one way to use or. All these functions are building blocks that we will find and use again and again.

5.2.6 New Body for insert-buffer

The body in the GNU Emacs 22 version is more confusing than the original.

It consists of two expressions,

1
2
3
4
5
6
(push-mark
(save-excursion
(insert-buffer-substring (get-buffer buffer))
(point)))

nil

except, and this is what confuses novices, very important work is done inside the push-mark expression.

The get-buffer function returns a buffer with the name provided. You will note that the function is not called get-buffer-create; it does not create a buffer if one does not already exist. The buffer returned by get-buffer, an existing buffer, is passed to insert-buffer-substring, which inserts the whole of the buffer (since you did not specify anything else).

The location into which the buffer is inserted is recorded by push-mark. Then the function returns nil, the value of its last command. Put another way, the insert-buffer function exists only to produce a side effect, inserting another buffer, not to return any value.

5.3 Complete Definition of beginning-of-buffer

The basic structure of the beginning-of-buffer function has already been discussed. (See A Simplified beginning-of-buffer Definition.) This section describes the complex part of the definition.

As previously described, when invoked without an argument, beginning-of-buffer moves the cursor to the beginning of the buffer (in truth, the beginning of the accessible portion of the buffer), leaving the mark at the previous position. However, when the command is invoked with a number between one and ten, the function considers that number to be a fraction of the length of the buffer, measured in tenths, and Emacs moves the cursor that fraction of the way from the beginning of the buffer. Thus, you can either call this function with the key command M-<, which will move the cursor to the beginning of the buffer, or with a key command such as C-u 7 M-< which will move the cursor to a point 70% of the way through the buffer. If a number bigger than ten is used for the argument, it moves to the end of the buffer.

The beginning-of-buffer function can be called with or without an argument. The use of the argument is optional.

  • Optional Arguments
  • beginning-of-buffer opt arg: Example with optional argument.
  • beginning-of-buffer complete

5.3.1 Optional Arguments

Unless told otherwise, Lisp expects that a function with an argument in its function definition will be called with a value for that argument. If that does not happen, you get an error and a message that says ‘Wrong number of arguments’.

However, optional arguments are a feature of Lisp: a particular keyword is used to tell the Lisp interpreter that an argument is optional. The keyword is &optional. (The ‘&’ in front of ‘optional’ is part of the keyword.) In a function definition, if an argument follows the keyword &optional, no value need be passed to that argument when the function is called.

The first line of the function definition of beginning-of-buffer therefore looks like this:

1
(defun beginning-of-buffer (&optional arg)

In outline, the whole function looks like this:

1
2
3
4
5
6
7
8
9
10
11
12
13
(defun beginning-of-buffer (&optional arg)
"documentation..."
(interactive "P")
(or (is-the-argument-a-cons-cell arg)
(and are-both-transient-mark-mode-and-mark-active-true)
(push-mark))
(let (determine-size-and-set-it)
(goto-char
(if-there-is-an-argument
figure-out-where-to-go
else-go-to
(point-min))))
do-nicety

The function is similar to the simplified-beginning-of-buffer function except that the interactive expression has "P" as an argument and the goto-char function is followed by an if-then-else expression that figures out where to put the cursor if there is an argument that is not a cons cell.

(Since I do not explain a cons cell for many more chapters, please consider ignoring the function consp. See How Lists are Implemented, and Cons Cell and List Types.)

The "P" in the interactive expression tells Emacs to pass a prefix argument, if there is one, to the function in raw form. A prefix argument is made by typing the key followed by a number, or by typing C-u and then a number. (If you don’t type a number, C-u defaults to a cons cell with a 4. A lowercase "p" in the interactive expression causes the function to convert a prefix arg to a number.)

The true-or-false-test of the if expression looks complex, but it is not: it checks whether arg has a value that is not nil and whether it is a cons cell. (That is what consp does; it checks whether its argument is a cons cell.) If arg has a value that is not nil (and is not a cons cell), which will be the case if beginning-of-buffer is called with a numeric argument, then this true-or-false-test will return true and the then-part of the if expression will be evaluated. On the other hand, if beginning-of-buffer is not called with an argument, the value of arg will be nil and the else-part of the if expression will be evaluated. The else-part is simply point-min, and when this is the outcome, the whole goto-char expression is (goto-char (point-min)), which is how we saw the beginning-of-buffer function in its simplified form.

Intro elisp 4. A Few Buffer-Related Functions

Posted on 2019-06-11 | Comments:

In this chapter we study in detail several of the functions used in GNU Emacs. This is called a “walk-through”. These functions are used as examples of Lisp code, but are not imaginary examples; with the exception of the first, simplified function definition, these functions show the actual code used in GNU Emacs. You can learn a great deal from these definitions. The functions described here are all related to buffers. Later, we will study other functions.

  • Finding More: How to find more information.
  • simplified-beginning-of-buffer: Shows goto-char, point-min, and push-mark.
  • mark-whole-buffer: Almost the same as beginning-of-buffer.
  • append-to-buffer: Uses save-excursion and insert-buffer-substring.
  • Buffer Related Review: Review.
  • Buffer Exercises

4.1 Finding More Information

In this walk-through, I will describe each new function as we come to it, sometimes in detail and sometimes briefly. If you are interested, you can get the full documentation of any Emacs Lisp function at any time by typing C-h f and then the name of the function (and then ). Similarly, you can get the full documentation for a variable by typing C-h vand then the name of the variable (and then ).

Also, describe-function will tell you the location of the function definition.

Put point into the name of the file that contains the function and press the key. In this case, means push-button rather than “return” or “enter”. Emacs will take you directly to the function definition.

More generally, if you want to see a function in its original source file, you can use the xref-find-definitions function to jump to it. xref-find-definitions works with a wide variety of languages, not just Lisp, and C, and it works with non-programming text as well. For example, xref-find-definitions will jump to the various nodes in the Texinfo source file of this document (provided that you’ve run the etags utility to record all the nodes in the manuals that come with Emacs; see Create Tags Table).

To use the xref-find-definitions command, type M-. (i.e., press the period key while holding down the key, or else type the key and then type the period key), and then, at the prompt, type in the name of the function whose source code you want to see, such as mark-whole-buffer, and then type . (If the command doesn’t prompt, invoke it with an argument: C-u M-.; see Interactive Options.) Emacs will switch buffers and display the source code for the function on your screen10. To switch back to your current buffer, type M-, or C-x b . (On some keyboards, the key is labeled .)

Incidentally, the files that contain Lisp code are conventionally called libraries. The metaphor is derived from that of a specialized library, such as a law library or an engineering library, rather than a general library. Each library, or file, contains functions that relate to a particular topic or activity, such as abbrev.el for handling abbreviations and other typing shortcuts, and help.el for help. (Sometimes several libraries provide code for a single activity, as the various rmail… files provide code for reading electronic mail.) In The GNU Emacs Manual, you will see sentences such as “The C-h p command lets you search the standard Emacs Lisp libraries by topic keywords.”

4.2 A Simplified beginning-of-buffer Definition

The beginning-of-buffer command is a good function to start with since you are likely to be familiar with it and it is easy to understand. Used as an interactive command, beginning-of-buffer moves the cursor to the beginning of the buffer, leaving the mark at the previous position. It is generally bound to M-<.

In this section, we will discuss a shortened version of the function that shows how it is most frequently used. This shortened function works as written, but it does not contain the code for a complex option. In another section, we will describe the entire function. (See Complete Definition of beginning-of-buffer.)

Before looking at the code, let’s consider what the function definition has to contain: it must include an expression that makes the function interactive so it can be called by typing M-x beginning-of-buffer or by typing a keychord such as M-<; it must include code to leave a mark at the original position in the buffer; and it must include code to move the cursor to the beginning of the buffer.

Here is the complete text of the shortened version of the function:

1
2
3
4
5
6
(defun simplified-beginning-of-buffer ()
"Move point to the beginning of the buffer;
leave mark at previous position."
(interactive)
(push-mark)
(goto-char (point-min)))

Like all function definitions, this definition has five parts following the macro defun:

  1. The name: in this example, simplified-beginning-of-buffer.
  2. A list of the arguments: in this example, an empty list, (),
  3. The documentation string.
  4. The interactive expression.
  5. The body.

In this function definition, the argument list is empty; this means that this function does not require any arguments. (When we look at the definition for the complete function, we will see that it may be passed an optional argument.)

The interactive expression tells Emacs that the function is intended to be used interactively. In this example, interactive does not have an argument because simplified-beginning-of-buffer does not require one.

The body of the function consists of the two lines:

1
2
(push-mark)
(goto-char (point-min))

The first of these lines is the expression, (push-mark). When this expression is evaluated by the Lisp interpreter, it sets a mark at the current position of the cursor, wherever that may be. The position of this mark is saved in the mark ring.

The next line is (goto-char (point-min)). This expression jumps the cursor to the minimum point in the buffer, that is, to the beginning of the buffer (or to the beginning of the accessible portion of the buffer if it is narrowed. See Narrowing and Widening.)

The push-mark command sets a mark at the place where the cursor was located before it was moved to the beginning of the buffer by the (goto-char (point-min)) expression. Consequently, you can, if you wish, go back to where you were originally by typing C-x C-x.

That is all there is to the function definition!

When you are reading code such as this and come upon an unfamiliar function, such as goto-char, you can find out what it does by using the describe-function command. To use this command, type C-h f and then type in the name of the function and press . The describe-function command will print the function’s documentation string in a Help window. For example, the documentation for goto-char is:

1
2
Set point to POSITION, a number or marker.
Beginning of buffer is position (point-min), end is (point-max).

The function’s one argument is the desired position.

(The prompt for describe-function will offer you the symbol under or preceding the cursor, so you can save typing by positioning the cursor right over or after the function and then typing C-h f .)

The end-of-buffer function definition is written in the same way as the beginning-of-buffer definition except that the body of the function contains the expression (goto-char (point-max)) in place of (goto-char (point-min)).

4.3 The Definition of mark-whole-buffer

The mark-whole-buffer function is no harder to understand than the simplified-beginning-of-buffer function. In this case, however, we will look at the complete function, not a shortened version.

The mark-whole-buffer function is not as commonly used as the beginning-of-buffer function, but is useful nonetheless: it marks a whole buffer as a region by putting point at the beginning and a mark at the end of the buffer. It is generally bound to C-x h.

  • mark-whole-buffer overview
  • Body of mark-whole-buffer: Only three lines of code.

An overview of mark-whole-buffer

In GNU Emacs 22, the code for the complete function looks like this:

1
2
3
4
5
6
7
8
9
(defun mark-whole-buffer ()
"Put point at beginning and mark at end of buffer.
You probably should not use this function in Lisp programs;
it is usually a mistake for a Lisp function to use any subroutine
that uses or sets the mark."
(interactive)
(push-mark (point))
(push-mark (point-max) nil t)
(goto-char (point-min)))

Like all other functions, the mark-whole-buffer function fits into the template for a function definition. The template looks like this:

1
2
3
4
(defun name-of-function (argument-list)
"documentation..."
(interactive-expression...)
body...)

Here is how the function works: the name of the function is mark-whole-buffer; it is followed by an empty argument list, ‘()’, which means that the function does not require arguments. The documentation comes next.

The next line is an (interactive) expression that tells Emacs that the function will be used interactively. These details are similar to the simplified-beginning-of-bufferfunction described in the previous section.

4.3.1 Body of mark-whole-buffer

The body of the mark-whole-buffer function consists of three lines of code:

1
2
3
(push-mark (point))
(push-mark (point-max) nil t)
(goto-char (point-min))

The first of these lines is the expression, (push-mark (point)).

This line does exactly the same job as the first line of the body of the simplified-beginning-of-buffer function, which is written (push-mark). In both cases, the Lisp interpreter sets a mark at the current position of the cursor.

I don’t know why the expression in mark-whole-buffer is written (push-mark (point)) and the expression in beginning-of-buffer is written (push-mark). Perhaps whoever wrote the code did not know that the arguments for push-mark are optional and that if push-mark is not passed an argument, the function automatically sets mark at the location of point by default. Or perhaps the expression was written so as to parallel the structure of the next line. In any case, the line causes Emacs to determine the position of point and set a mark there.

In earlier versions of GNU Emacs, the next line of mark-whole-buffer was (push-mark (point-max)). This expression sets a mark at the point in the buffer that has the highest number. This will be the end of the buffer (or, if the buffer is narrowed, the end of the accessible portion of the buffer. See Narrowing and Widening, for more about narrowing.) After this mark has been set, the previous mark, the one set at point, is no longer set, but Emacs remembers its position, just as all other recent marks are always remembered. This means that you can, if you wish, go back to that position by typing C-u C- twice.

In GNU Emacs 22, the (point-max) is slightly more complicated. The line reads

1
(push-mark (point-max) nil t)

The expression works nearly the same as before. It sets a mark at the highest numbered place in the buffer that it can. However, in this version, push-mark has two additional arguments. The second argument to push-mark is nil. This tells the function it should display a message that says “Mark set” when it pushes the mark. The third argument is t. This tells push-mark to activate the mark when Transient Mark mode is turned on. Transient Mark mode highlights the currently active region. It is often turned off.

Finally, the last line of the function is (goto-char (point-min))). This is written exactly the same way as it is written in beginning-of-buffer. The expression moves the cursor to the minimum point in the buffer, that is, to the beginning of the buffer (or to the beginning of the accessible portion of the buffer). As a result of this, point is placed at the beginning of the buffer and mark is set at the end of the buffer. The whole buffer is, therefore, the region.

4.4 The Definition of append-to-buffer

The append-to-buffer command is more complex than the mark-whole-buffer command. What it does is copy the region (that is, the part of the buffer between point and mark) from the current buffer to a specified buffer.

  • append-to-buffer overview
  • append interactive: A two part interactive expression.
  • append-to-buffer body: Incorporates a let expression.
  • append save-excursion: How the save-excursion works.

An Overview of append-to-buffer

The append-to-buffer command uses the insert-buffer-substring function to copy the region. insert-buffer-substring is described by its name: it takes a substring from a buffer, and inserts it into another buffer.

Most of append-to-buffer is concerned with setting up the conditions for insert-buffer-substring to work: the code must specify both the buffer to which the text will go, the window it comes from and goes to, and the region that will be copied.

Here is the complete text of the function:

1
2
3
4
5
6
7
8
9
10
11
12
13
14
15
16
17
18
19
20
21
22
23
(defun append-to-buffer (buffer start end)
"Append to specified buffer the text of the region.
It is inserted into that buffer before its point.

When calling from a program, give three arguments:
BUFFER (or buffer name), START and END.
START and END specify the portion of the current buffer to be copied."
(interactive
(list (read-buffer "Append to buffer: " (other-buffer
(current-buffer) t))
(region-beginning) (region-end)))
(let ((oldbuf (current-buffer)))
(save-excursion
(let* ((append-to (get-buffer-create buffer))
(windows (get-buffer-window-list append-to t t))
point)
(set-buffer append-to)
(setq point (point))
(barf-if-buffer-read-only)
(insert-buffer-substring oldbuf start end)
(dolist (window windows)
(when (= (window-point window) point)
(set-window-point window (point))))))))

The function can be understood by looking at it as a series of filled-in templates.

The outermost template is for the function definition. In this function, it looks like this (with several slots filled in):

1
2
3
4
(defun append-to-buffer (buffer start end)
"documentation..."
(interactive ...)
body...)

The first line of the function includes its name and three arguments. The arguments are the buffer to which the text will be copied, and the start and end of the region in the current buffer that will be copied.

The next part of the function is the documentation, which is clear and complete. As is conventional, the three arguments are written in upper case so you will notice them easily. Even better, they are described in the same order as in the argument list.

Note that the documentation distinguishes between a buffer and its name. (The function can handle either.)

4.4.1 The append-to-buffer Interactive Expression

Since the append-to-buffer function will be used interactively, the function must have an interactive expression. (For a review of interactive, see Making a Function Interactive.) The expression reads as follows:

1
2
3
4
5
6
(interactive
(list (read-buffer
"Append to buffer: "
(other-buffer (current-buffer) t))
(region-beginning)
(region-end)))

This expression is not one with letters standing for parts, as described earlier. Instead, it starts a list with these parts:

The first part of the list is an expression to read the name of a buffer and return it as a string. That is read-buffer. The function requires a prompt as its first argument, ‘“Append to buffer: “’. Its second argument tells the command what value to provide if you don’t specify anything.

In this case that second argument is an expression containing the function other-buffer, an exception, and a ‘t’, standing for true.

The first argument to other-buffer, the exception, is yet another function, current-buffer. That is not going to be returned. The second argument is the symbol for true, t. that tells other-buffer that it may show visible buffers (except in this case, it will not show the current buffer, which makes sense).

The expression looks like this:

1
(other-buffer (current-buffer) t)

The second and third arguments to the list expression are (region-beginning) and (region-end). These two functions specify the beginning and end of the text to be appended.

Originally, the command used the letters ‘B’ and ‘r’. The whole interactive expression looked like this:

1
(interactive "BAppend to buffer: \nr")

But when that was done, the default value of the buffer switched to was invisible. That was not wanted.

(The prompt was separated from the second argument with a newline, ‘\n’. It was followed by an ‘r’ that told Emacs to bind the two arguments that follow the symbol buffer in the function’s argument list (that is, start and end) to the values of point and mark. That argument worked fine.)

4.4.2 The Body of append-to-buffer

The body of the append-to-buffer function begins with let.

As we have seen before (see let), the purpose of a let expression is to create and give initial values to one or more variables that will only be used within the body of the let. This means that such a variable will not be confused with any variable of the same name outside the let expression.

We can see how the let expression fits into the function as a whole by showing a template for append-to-buffer with the let expression in outline:

1
2
3
4
5
(defun append-to-buffer (buffer start end)
"documentation..."
(interactive ...)
(let ((variable value))
body...)

The let expression has three elements:

  1. The symbol let;
  2. A varlist containing, in this case, a single two-element list, (variable value);
  3. The body of the let expression.

In the append-to-buffer function, the varlist looks like this:

1
(oldbuf (current-buffer))

In this part of the let expression, the one variable, oldbuf, is bound to the value returned by the (current-buffer) expression. The variable, oldbuf, is used to keep track of the buffer in which you are working and from which you will copy.

The element or elements of a varlist are surrounded by a set of parentheses so the Lisp interpreter can distinguish the varlist from the body of the let. As a consequence, the two-element list within the varlist is surrounded by a circumscribing set of parentheses. The line looks like this:

1
2
(let ((oldbuf (current-buffer)))
... )

The two parentheses before oldbuf might surprise you if you did not realize that the first parenthesis before oldbuf marks the boundary of the varlist and the second parenthesis marks the beginning of the two-element list, (oldbuf (current-buffer)).

4.4.3 save-excursion in append-to-buffer

The body of the let expression in append-to-buffer consists of a save-excursion expression.

The save-excursion function saves the location of point, and restores it to that position after the expressions in the body of the save-excursion complete execution. In addition,save-excursion keeps track of the original buffer, and restores it. This is how save-excursion is used in append-to-buffer.

Incidentally, it is worth noting here that a Lisp function is normally formatted so that everything that is enclosed in a multi-line spread is indented more to the right than the first symbol. In this function definition, the let is indented more than the defun, and the save-excursion is indented more than the let, like this:

1
2
3
4
5
6
(defun ...
...
...
(let...
(save-excursion
...

This formatting convention makes it easy to see that the lines in the body of the save-excursion are enclosed by the parentheses associated with save-excursion, just as thesave-excursion itself is enclosed by the parentheses associated with the let:

1
2
3
4
5
6
(let ((oldbuf (current-buffer)))
(save-excursion
...
(set-buffer ...)
(insert-buffer-substring oldbuf start end)
...))

The use of the save-excursion function can be viewed as a process of filling in the slots of a template:

1
2
3
4
5
(save-excursion
first-expression-in-body
second-expression-in-body
...
last-expression-in-body)

In this function, the body of the save-excursion contains only one expression, the let* expression. You know about a let function. The let* function is different. It has a ‘*’ in its name. It enables Emacs to set each variable in its varlist in sequence, one after another.

Its critical feature is that variables later in the varlist can make use of the values to which Emacs set variables earlier in the varlist. See The let* expression.

We will skip functions like let* and focus on two: the set-buffer function and the insert-buffer-substring function.

In the old days, the set-buffer expression was simply

1
(set-buffer (get-buffer-create buffer))

but now it is

1
(set-buffer append-to)

append-to is bound to (get-buffer-create buffer) earlier on in the let* expression. That extra binding would not be necessary except for that append-to is used later in the varlist as an argument to get-buffer-window-list.

The append-to-buffer function definition inserts text from the buffer in which you are currently to a named buffer. It happens that insert-buffer-substring does just the reverse—it copies text from another buffer to the current buffer—that is why the append-to-buffer definition starts out with a let that binds the local symbol oldbuf to the value returned by current-buffer.

The insert-buffer-substring expression looks like this:

1
(insert-buffer-substring oldbuf start end)

The insert-buffer-substring function copies a string from the buffer specified as its first argument and inserts the string into the present buffer. In this case, the argument toinsert-buffer-substring is the value of the variable created and bound by the let, namely the value of oldbuf, which was the current buffer when you gave the append-to-buffer command.

After insert-buffer-substring has done its work, save-excursion will restore the action to the original buffer and append-to-buffer will have done its job.

Written in skeletal form, the workings of the body look like this:

1
2
3
4
5
6
7
(let (bind-oldbuf-to-value-of-current-buffer)
(save-excursion ; Keep track of buffer.
change-buffer
insert-substring-from-oldbuf-into-buffer)

change-back-to-original-buffer-when-finished
let-the-local-meaning-of-oldbuf-disappear-when-finished

In summary, append-to-buffer works as follows: it saves the value of the current buffer in the variable called oldbuf. It gets the new buffer (creating one if need be) and switches Emacs’s attention to it. Using the value of oldbuf, it inserts the region of text from the old buffer into the new buffer; and then using save-excursion, it brings you back to your original buffer.

In looking at append-to-buffer, you have explored a fairly complex function. It shows how to use let and save-excursion, and how to change to and come back from another buffer. Many function definitions use let, save-excursion, and set-buffer this way.

4.5 Review

Here is a brief summary of the various functions discussed in this chapter.

  • describe-function

  • describe-variable

    Print the documentation for a function or variable. Conventionally bound to C-h f and C-h v.

  • xref-find-definitions

    Find the file containing the source for a function or variable and switch buffers to it, positioning point at the beginning of the item. Conventionally bound to M-. (that’s a period following the key).

  • save-excursion

    Save the location of point and restore its value after the arguments to save-excursion have been evaluated. Also, remember the current buffer and return to it.

  • push-mark

    Set mark at a location and record the value of the previous mark on the mark ring. The mark is a location in the buffer that will keep its relative position even if text is added to or removed from the buffer.

  • goto-char

    Set point to the location specified by the value of the argument, which can be a number, a marker, or an expression that returns the number of a position, such as (point-min).

  • insert-buffer-substring

    Copy a region of text from a buffer that is passed to the function as an argument and insert the region into the current buffer.

  • mark-whole-buffer

    Mark the whole buffer as a region. Normally bound to C-x h.

  • set-buffer

    Switch the attention of Emacs to another buffer, but do not change the window being displayed. Used when the program rather than a human is to work on a different buffer.

  • get-buffer-create

  • get-buffer

    Find a named buffer or create one if a buffer of that name does not exist. The get-buffer function returns nil if the named buffer does not exist.

4.6 Exercises

  • Write your own simplified-end-of-buffer function definition; then test it to see whether it works.
  • Use if and get-buffer to write a function that prints a message telling you whether a buffer exists.
  • Using xref-find-definitions, find the source for the copy-to-buffer function.

Intro to elisp 3 How To Write Function Definitions

Posted on 2019-06-11 | Comments:

When the Lisp interpreter evaluates a list, it looks to see whether the first symbol on the list has a function definition attached to it; or, put another way, whether the symbol points to a function definition. If it does, the computer carries out the instructions in the definition. A symbol that has a function definition is called, simply, a function (although, properly speaking, the definition is the function and the symbol refers to it.)

  • Primitive Functions
  • defun: The defun macro.
  • Install: Install a function definition.
  • Interactive: Making a function interactive.
  • Interactive Options: Different options for interactive.
  • Permanent Installation: Installing code permanently.
  • let: Creating and initializing local variables.
  • if: What if?
  • else: If–then–else expressions.
  • Truth & Falsehood: What Lisp considers false and true.
  • save-excursion: Keeping track of point and buffer.
  • Review
  • defun Exercises

An Aside about Primitive Functions

All functions are defined in terms of other functions, except for a few primitive functions that are written in the C programming language. When you write functions’ definitions, you will write them in Emacs Lisp and use other functions as your building blocks. Some of the functions you will use will themselves be written in Emacs Lisp (perhaps by you) and some will be primitives written in C. The primitive functions are used exactly like those written in Emacs Lisp and behave like them. They are written in C so we can easily run GNU Emacs on any computer that has sufficient power and can run C.

Let me re-emphasize this: when you write code in Emacs Lisp, you do not distinguish between the use of functions written in C and the use of functions written in Emacs Lisp. The difference is irrelevant. I mention the distinction only because it is interesting to know. Indeed, unless you investigate, you won’t know whether an already-written function is written in Emacs Lisp or C.

3.1 The defun Macro

In Lisp, a symbol such as mark-whole-buffer has code attached to it that tells the computer what to do when the function is called. This code is called the function definition and is created by evaluating a Lisp expression that starts with the symbol defun (which is an abbreviation for define function).

In subsequent sections, we will look at function definitions from the Emacs source code, such as mark-whole-buffer. In this section, we will describe a simple function definition so you can see how it looks. This function definition uses arithmetic because it makes for a simple example. Some people dislike examples using arithmetic; however, if you are such a person, do not despair. Hardly any of the code we will study in the remainder of this introduction involves arithmetic or mathematics. The examples mostly involve text in one way or another.

A function definition has up to five parts following the word defun:

  1. The name of the symbol to which the function definition should be attached.

  2. A list of the arguments that will be passed to the function. If no arguments will be passed to the function, this is an empty list, ().

  3. Documentation describing the function. (Technically optional, but strongly recommended.)

  4. Optionally, an expression to make the function interactive so you can use it by typing

    M-x

    and then the name of the function; or by typing an appropriate key or keychord.

  5. The code that instructs the computer what to do: the body of the function definition.

It is helpful to think of the five parts of a function definition as being organized in a template, with slots for each part:

1
2
3
4
(defun function-name (arguments...)
"optional-documentation..."
(interactive argument-passing-info) ; optional
body...)

As an example, here is the code for a function that multiplies its argument by 7. (This example is not interactive. See Making a Function Interactive, for that information.)

1
2
3
(defun multiply-by-seven (number)
"Multiply NUMBER by seven."
(* 7 number))

This definition begins with a parenthesis and the symbol defun, followed by the name of the function.

The name of the function is followed by a list that contains the arguments that will be passed to the function. This list is called the argument list. In this example, the list has only one element, the symbol, number. When the function is used, the symbol will be bound to the value that is used as the argument to the function.

Instead of choosing the word number for the name of the argument, I could have picked any other name. For example, I could have chosen the word multiplicand. I picked the word “number” because it tells what kind of value is intended for this slot; but I could just as well have chosen the word “multiplicand” to indicate the role that the value placed in this slot will play in the workings of the function. I could have called it foogle, but that would have been a bad choice because it would not tell humans what it means. The choice of name is up to the programmer and should be chosen to make the meaning of the function clear.

Indeed, you can choose any name you wish for a symbol in an argument list, even the name of a symbol used in some other function: the name you use in an argument list is private to that particular definition. In that definition, the name refers to a different entity than any use of the same name outside the function definition. Suppose you have a nick-name “Shorty” in your family; when your family members refer to “Shorty”, they mean you. But outside your family, in a movie, for example, the name “Shorty” refers to someone else. Because a name in an argument list is private to the function definition, you can change the value of such a symbol inside the body of a function without changing its value outside the function. The effect is similar to that produced by a let expression. (See let.)

The argument list is followed by the documentation string that describes the function. This is what you see when you type C-h f and the name of a function. Incidentally, when you write a documentation string like this, you should make the first line a complete sentence since some commands, such as apropos, print only the first line of a multi-line documentation string. Also, you should not indent the second line of a documentation string, if you have one, because that looks odd when you use C-h f (describe-function). The documentation string is optional, but it is so useful, it should be included in almost every function you write.

The third line of the example consists of the body of the function definition. (Most functions’ definitions, of course, are longer than this.) In this function, the body is the list, (* 7 number), which says to multiply the value of number by 7. (In Emacs Lisp, * is the function for multiplication, just as + is the function for addition.)

When you use the multiply-by-seven function, the argument number evaluates to the actual number you want used. Here is an example that shows how multiply-by-seven is used; but don’t try to evaluate this yet!

1
(multiply-by-seven 3)

The symbol number, specified in the function definition in the next section, is bound to the value 3 in the actual use of the function. Note that although number was inside parentheses in the function definition, the argument passed to the multiply-by-seven function is not in parentheses. The parentheses are written in the function definition so the computer can figure out where the argument list ends and the rest of the function definition begins.

If you evaluate this example, you are likely to get an error message. (Go ahead, try it!) This is because we have written the function definition, but not yet told the computer about the definition—we have not yet loaded the function definition in Emacs. Installing a function is the process that tells the Lisp interpreter the definition of the function. Installation is described in the next section.

3.2 Install a Function Definition

If you are reading this inside of Info in Emacs, you can try out the multiply-by-seven function by first evaluating the function definition and then evaluating (multiply-by-seven 3). A copy of the function definition follows. Place the cursor after the last parenthesis of the function definition and type C-x C-e. When you do this, multiply-by-sevenwill appear in the echo area. (What this means is that when a function definition is evaluated, the value it returns is the name of the defined function.) At the same time, this action installs the function definition.

1
2
3
(defun multiply-by-seven (number)
"Multiply NUMBER by seven."
(* 7 number))

By evaluating this defun, you have just installed multiply-by-seven in Emacs. The function is now just as much a part of Emacs as forward-word or any other editing function you use. (multiply-by-seven will stay installed until you quit Emacs. To reload code automatically whenever you start Emacs, see Installing Code Permanently.)

  • Effect of installation
  • Change a defun: How to change a function definition.

The effect of installation

You can see the effect of installing multiply-by-seven by evaluating the following sample. Place the cursor after the following expression and type C-x C-e. The number 21 will appear in the echo area.

1
(multiply-by-seven 3)

If you wish, you can read the documentation for the function by typing C-h f (describe-function) and then the name of the function, multiply-by-seven. When you do this, aHelp window will appear on your screen that says:

1
2
3
4
5
multiply-by-seven is a Lisp function.

(multiply-by-seven NUMBER)

Multiply NUMBER by seven.

(To return to a single window on your screen, type C-x 1.)

3.2.1 Change a Function Definition

If you want to change the code in multiply-by-seven, just rewrite it. To install the new version in place of the old one, evaluate the function definition again. This is how you modify code in Emacs. It is very simple.

As an example, you can change the multiply-by-seven function to add the number to itself seven times instead of multiplying the number by seven. It produces the same answer, but by a different path. At the same time, we will add a comment to the code; a comment is text that the Lisp interpreter ignores, but that a human reader may find useful or enlightening. The comment is that this is the second version.

1
2
3
(defun multiply-by-seven (number)       ; Second version.
"Multiply NUMBER by seven."
(+ number number number number number number number))

The comment follows a semicolon, ‘;’. In Lisp, everything on a line that follows a semicolon is a comment. The end of the line is the end of the comment. To stretch a comment over two or more lines, begin each line with a semicolon.

See Beginning a .emacs File, and Comments, for more about comments.

You can install this version of the multiply-by-seven function by evaluating it in the same way you evaluated the first function: place the cursor after the last parenthesis and type C-x C-e.

In summary, this is how you write code in Emacs Lisp: you write a function; install it; test it; and then make fixes or enhancements and install it again.

3.3 Make a Function Interactive

You make a function interactive by placing a list that begins with the special form interactive immediately after the documentation. A user can invoke an interactive function by typing M-x and then the name of the function; or by typing the keys to which it is bound, for example, by typing C-n for next-line or C-x h for mark-whole-buffer.

Interestingly, when you call an interactive function interactively, the value returned is not automatically displayed in the echo area. This is because you often call an interactive function for its side effects, such as moving forward by a word or line, and not for the value returned. If the returned value were displayed in the echo area each time you typed a key, it would be very distracting.

  • Interactive multiply-by-seven: An overview.
  • multiply-by-seven in detail: The interactive version.

An Interactive multiply-by-seven, An Overview

Both the use of the special form interactive and one way to display a value in the echo area can be illustrated by creating an interactive version of multiply-by-seven.

Here is the code:

1
2
3
4
(defun multiply-by-seven (number)       ; Interactive version.
"Multiply NUMBER by seven."
(interactive "p")
(message "The result is %d" (* 7 number)))

You can install this code by placing your cursor after it and typing C-x C-e. The name of the function will appear in your echo area. Then, you can use this code by typing C-u and a number and then typing M-x multiply-by-seven and pressing . The phrase ‘The result is …’ followed by the product will appear in the echo area.

Speaking more generally, you invoke a function like this in either of two ways:

  1. By typing a prefix argument that contains the number to be passed, and then typing M-x and the name of the function, as with C-u 3 M-x forward-sentence; or,
  2. By typing whatever key or keychord the function is bound to, as with C-u 3 M-e.

Both the examples just mentioned work identically to move point forward three sentences. (Since multiply-by-seven is not bound to a key, it could not be used as an example of key binding.)

(See Some Keybindings, to learn how to bind a command to a key.)

A prefix argument is passed to an interactive function by typing the key followed by a number, for example, M-3 M-e, or by typing C-u and then a number, for example, C-u 3 M-e (if you type C-u without a number, it defaults to 4).

3.4 Different Options for interactive

In the example, multiply-by-seven used "p" as the argument to interactive. This argument told Emacs to interpret your typing either C-u followed by a number or followed by a number as a command to pass that number to the function as its argument. Emacs has more than twenty characters predefined for use with interactive. In almost every case, one of these options will enable you to pass the right information interactively to a function. (See Code Characters for interactive.)

Consider the function zap-to-char. Its interactive expression is

1
(interactive "p\ncZap to char: ")

The first part of the argument to interactive is ‘p’, with which you are already familiar. This argument tells Emacs to interpret a prefix, as a number to be passed to the function. You can specify a prefix either by typing C-u followed by a number or by typing followed by a number. The prefix is the number of specified characters. Thus, if your prefix is three and the specified character is ‘x’, then you will delete all the text up to and including the third next ‘x’. If you do not set a prefix, then you delete all the text up to and including the specified character, but no more.

The ‘c’ tells the function the name of the character to which to delete.

More formally, a function with two or more arguments can have information passed to each argument by adding parts to the string that follows interactive. When you do this, the information is passed to each argument in the same order it is specified in the interactive list. In the string, each part is separated from the next part by a ‘\n’, which is a newline. For example, you can follow ‘p’ with a ‘\n’ and an ‘cZap to char: ’. This causes Emacs to pass the value of the prefix argument (if there is one) and the character.

In this case, the function definition looks like the following, where arg and char are the symbols to which interactive binds the prefix argument and the specified character:

1
2
3
4
(defun name-of-function (arg char)
"documentation..."
(interactive "p\ncZap to char: ")
body-of-function...)

(The space after the colon in the prompt makes it look better when you are prompted. See The Definition of copy-to-buffer, for an example.)

When a function does not take arguments, interactive does not require any. Such a function contains the simple expression (interactive). The mark-whole-buffer function is like this.

Alternatively, if the special letter-codes are not right for your application, you can pass your own arguments to interactive as a list.

See The Definition of append-to-buffer, for an example. See Using Interactive, for a more complete explanation about this technique.

3.5 Install Code Permanently

When you install a function definition by evaluating it, it will stay installed until you quit Emacs. The next time you start a new session of Emacs, the function will not be installed unless you evaluate the function definition again.

At some point, you may want to have code installed automatically whenever you start a new session of Emacs. There are several ways of doing this:

  • If you have code that is just for yourself, you can put the code for the function definition in your .emacs initialization file. When you start Emacs, your .emacs file is automatically evaluated and all the function definitions within it are installed. See Your .emacs File.
  • Alternatively, you can put the function definitions that you want installed in one or more files of their own and use the load function to cause Emacs to evaluate and thereby install each of the functions in the files. See Loading Files.
  • Thirdly, if you have code that your whole site will use, it is usual to put it in a file called site-init.el that is loaded when Emacs is built. This makes the code available to everyone who uses your machine. (See the INSTALL file that is part of the Emacs distribution.)

Finally, if you have code that everyone who uses Emacs may want, you can post it on a computer network or send a copy to the Free Software Foundation. (When you do this, please license the code and its documentation under a license that permits other people to run, copy, study, modify, and redistribute the code and which protects you from having your work taken from you.) If you send a copy of your code to the Free Software Foundation, and properly protect yourself and others, it may be included in the next release of Emacs. In large part, this is how Emacs has grown over the past years, by donations.

3.6 let

The let expression is a special form in Lisp that you will need to use in most function definitions.

let is used to attach or bind a symbol to a value in such a way that the Lisp interpreter will not confuse the variable with a variable of the same name that is not part of the function.

To understand why the let special form is necessary, consider the situation in which you own a home that you generally refer to as “the house”, as in the sentence, “The house needs painting.” If you are visiting a friend and your host refers to “the house”, he is likely to be referring to his house, not yours, that is, to a different house.

If your friend is referring to his house and you think he is referring to your house, you may be in for some confusion. The same thing could happen in Lisp if a variable that is used inside of one function has the same name as a variable that is used inside of another function, and the two are not intended to refer to the same value. The let special form prevents this kind of confusion.

  • Prevent confusion
  • Parts of let Expression
  • Sample let Expression
  • Uninitialized let Variables

let Prevents Confusion

The let special form prevents confusion. let creates a name for a local variable that overshadows any use of the same name outside the let expression. This is like understanding that whenever your host refers to “the house”, he means his house, not yours. (Symbols used in argument lists work the same way. See The defun Macro.)

Local variables created by a let expression retain their value only within the let expression itself (and within expressions called within the let expression); the local variables have no effect outside the let expression.

Another way to think about let is that it is like a setq that is temporary and local. The values set by let are automatically undone when the let is finished. The setting only affects expressions that are inside the bounds of the let expression. In computer science jargon, we would say the binding of a symbol is visible only in functions called in the let form; in Emacs Lisp, scoping is dynamic, not lexical.

let can create more than one variable at once. Also, let gives each variable it creates an initial value, either a value specified by you, or nil. (In the jargon, this is binding the variable to the value.) After let has created and bound the variables, it executes the code in the body of the let, and returns the value of the last expression in the body, as the value of the whole let expression. (“Execute” is a jargon term that means to evaluate a list; it comes from the use of the word meaning “to give practical effect to” (Oxford English Dictionary). Since you evaluate an expression to perform an action, “execute” has evolved as a synonym to “evaluate”.)

3.6.2 Sample let Expression

The following expression creates and gives initial values to the two variables zebra and tiger. The body of the let expression is a list which calls the message function.

1
2
3
4
(let ((zebra "stripes")
(tiger "fierce"))
(message "One kind of animal has %s and another is %s."
zebra tiger))

Here, the varlist is ((zebra "stripes") (tiger "fierce")).

The two variables are zebra and tiger. Each variable is the first element of a two-element list and each value is the second element of its two-element list. In the varlist, Emacs binds the variable zebra to the value "stripes"9, and binds the variable tiger to the value "fierce". In this example, both values are strings. The values could just as well have been another list or a symbol. The body of the let follows after the list holding the variables. In this example, the body is a list that uses the message function to print a string in the echo area.

You may evaluate the example in the usual fashion, by placing the cursor after the last parenthesis and typing C-x C-e. When you do this, the following will appear in the echo area:

1
"One kind of animal has stripes and another is fierce."

As we have seen before, the message function prints its first argument, except for ‘%s’. In this example, the value of the variable zebra is printed at the location of the first ‘%s’ and the value of the variable tiger is printed at the location of the second ‘%s’.

3.6.3 Uninitialized Variables in a let Statement

If you do not bind the variables in a let statement to specific initial values, they will automatically be bound to an initial value of nil, as in the following expression:

1
2
3
4
5
6
7
(let ((birch 3)
pine
fir
(oak 'some))
(message
"Here are %d variables with %s, %s, and %s value."
birch pine fir oak))

Here, the varlist is ((birch 3) pine fir (oak 'some)).

If you evaluate this expression in the usual way, the following will appear in your echo area:

1
"Here are 3 variables with nil, nil, and some value."

In this example, Emacs binds the symbol birch to the number 3, binds the symbols pine and fir to nil, and binds the symbol oak to the value some.

Note that in the first part of the let, the variables pine and fir stand alone as atoms that are not surrounded by parentheses; this is because they are being bound to nil, the empty list. But oak is bound to some and so is a part of the list (oak 'some). Similarly, birch is bound to the number 3 and so is in a list with that number. (Since a number evaluates to itself, the number does not need to be quoted. Also, the number is printed in the message using a ‘%d’ rather than a ‘%s’.) The four variables as a group are put into a list to delimit them from the body of the let.

3.7 The if Special Form

A third special form, in addition to defun and let, is the conditional if. This form is used to instruct the computer to make decisions. You can write function definitions without using if, but it is used often enough, and is important enough, to be included here. It is used, for example, in the code for the function beginning-of-buffer.

The basic idea behind an if, is that if a test is true, then an expression is evaluated. If the test is not true, the expression is not evaluated. For example, you might make a decision such as, “if it is warm and sunny, then go to the beach!”

  • if in more detail

if in more detail

An if expression written in Lisp does not use the word “then”; the test and the action are the second and third elements of the list whose first element is if. Nonetheless, the test part of an if expression is often called the if-part and the second argument is often called the then-part.

Also, when an if expression is written, the true-or-false-test is usually written on the same line as the symbol if, but the action to carry out if the test is true, the then-part, is written on the second and subsequent lines. This makes the if expression easier to read.

1
2
(if true-or-false-test
action-to-carry-out-if-test-is-true)

The true-or-false-test will be an expression that is evaluated by the Lisp interpreter.

Here is an example that you can evaluate in the usual manner. The test is whether the number 5 is greater than the number 4. Since it is, the message ‘5 is greater than 4!’ will be printed.

1
2
(if (> 5 4)                             ; if-part
(message "5 is greater than 4!")) ; then-part

(The function > tests whether its first argument is greater than its second argument and returns true if it is.) Of course, in actual use, the test in an if expression will not be fixed for all time as it is by the expression (> 5 4). Instead, at least one of the variables used in the test will be bound to a value that is not known ahead of time. (If the value were known ahead of time, we would not need to run the test!)

For example, the value may be bound to an argument of a function definition. In the following function definition, the character of the animal is a value that is passed to the function. If the value bound to characteristic is "fierce", then the message, ‘It is a tiger!’ will be printed; otherwise, nil will be returned.

1
2
3
4
5
6
(defun type-of-animal (characteristic)
"Print message in echo area depending on CHARACTERISTIC.
If the CHARACTERISTIC is the string \"fierce\",
then warn of a tiger."
(if (equal characteristic "fierce")
(message "It is a tiger!")))

If you are reading this inside of GNU Emacs, you can evaluate the function definition in the usual way to install it in Emacs, and then you can evaluate the following two expressions to see the results:

1
2
3
(type-of-animal "fierce")

(type-of-animal "striped")

When you evaluate (type-of-animal "fierce"), you will see the following message printed in the echo area: "It is a tiger!"; and when you evaluate (type-of-animal "striped") you will see nil printed in the echo area.

3.7.1 The type-of-animal Function in Detail

Let’s look at the type-of-animal function in detail.

The function definition for type-of-animal was written by filling the slots of two templates, one for a function definition as a whole, and a second for an if expression.

The template for every function that is not interactive is:

1
2
3
(defun name-of-function (argument-list)
"documentation..."
body...)

The parts of the function that match this template look like this:

1
2
3
4
5
(defun type-of-animal (characteristic)
"Print message in echo area depending on CHARACTERISTIC.
If the CHARACTERISTIC is the string \"fierce\",
then warn of a tiger."
body: the if expression)

The name of function is type-of-animal; it is passed the value of one argument. The argument list is followed by a multi-line documentation string. The documentation string is included in the example because it is a good habit to write documentation string for every function definition. The body of the function definition consists of the if expression.

The template for an if expression looks like this:

1
2
(if true-or-false-test
action-to-carry-out-if-the-test-returns-true)

In the type-of-animal function, the code for the if looks like this:

1
2
(if (equal characteristic "fierce")
(message "It is a tiger!")))

Here, the true-or-false-test is the expression:

1
(equal characteristic "fierce")

In Lisp, equal is a function that determines whether its first argument is equal to its second argument. The second argument is the string "fierce" and the first argument is the value of the symbol characteristic—in other words, the argument passed to this function.

In the first exercise of type-of-animal, the argument "fierce" is passed to type-of-animal. Since "fierce" is equal to "fierce", the expression, (equal characteristic "fierce"), returns a value of true. When this happens, the if evaluates the second argument or then-part of the if: (message "It is a tiger!").

On the other hand, in the second exercise of type-of-animal, the argument "striped" is passed to type-of-animal. "striped" is not equal to "fierce", so the then-part is not evaluated and nil is returned by the if expression.

3.8 If–then–else Expressions

An if expression may have an optional third argument, called the else-part, for the case when the true-or-false-test returns false. When this happens, the second argument or then-part of the overall if expression is not evaluated, but the third or else-part is evaluated. You might think of this as the cloudy day alternative for the decision “if it is warm and sunny, then go to the beach, else read a book!”.

The word “else” is not written in the Lisp code; the else-part of an if expression comes after the then-part. In the written Lisp, the else-part is usually written to start on a line of its own and is indented less than the then-part:

1
2
3
(if true-or-false-test
action-to-carry-out-if-the-test-returns-true
action-to-carry-out-if-the-test-returns-false)

For example, the following if expression prints the message ‘4 is not greater than 5!’ when you evaluate it in the usual way:

1
2
3
(if (> 4 5)                               ; if-part
(message "4 falsely greater than 5!") ; then-part
(message "4 is not greater than 5!")) ; else-part

Note that the different levels of indentation make it easy to distinguish the then-part from the else-part. (GNU Emacs has several commands that automatically indent if expressions correctly. See GNU Emacs Helps You Type Lists.)

We can extend the type-of-animal function to include an else-part by simply incorporating an additional part to the if expression.

You can see the consequences of doing this if you evaluate the following version of the type-of-animal function definition to install it and then evaluate the two subsequent expressions to pass different arguments to the function.

1
2
3
4
5
6
7
8
9
10
11
(defun type-of-animal (characteristic)  ; Second version.
"Print message in echo area depending on CHARACTERISTIC.
If the CHARACTERISTIC is the string \"fierce\",
then warn of a tiger; else say it is not fierce."
(if (equal characteristic "fierce")
(message "It is a tiger!")
(message "It is not fierce!")))

(type-of-animal "fierce")

(type-of-animal "striped")

When you evaluate (type-of-animal "fierce"), you will see the following message printed in the echo area: "It is a tiger!"; but when you evaluate (type-of-animal "striped"), you will see "It is not fierce!".

(Of course, if the characteristic were "ferocious", the message "It is not fierce!" would be printed; and it would be misleading! When you write code, you need to take into account the possibility that some such argument will be tested by the if and write your program accordingly.)

3.9 Truth and Falsehood in Emacs Lisp

There is an important aspect to the truth test in an if expression. So far, we have spoken of “true” and “false” as values of predicates as if they were new kinds of Emacs Lisp objects. In fact, “false” is just our old friend nil. Anything else—anything at all—is “true”.

The expression that tests for truth is interpreted as true if the result of evaluating it is a value that is not nil. In other words, the result of the test is considered true if the value returned is a number such as 47, a string such as "hello", or a symbol (other than nil) such as flowers, or a list (so long as it is not empty), or even a buffer!

  • nil explained: nil has two meanings.

An explanation of nil

Before illustrating a test for truth, we need an explanation of nil.

In Emacs Lisp, the symbol nil has two meanings. First, it means the empty list. Second, it means false and is the value returned when a true-or-false-test tests false. nil can be written as an empty list, (), or as nil. As far as the Lisp interpreter is concerned, () and nil are the same. Humans, however, tend to use nil for false and () for the empty list.

In Emacs Lisp, any value that is not nil—is not the empty list—is considered true. This means that if an evaluation returns something that is not an empty list, an if expression will test true. For example, if a number is put in the slot for the test, it will be evaluated and will return itself, since that is what numbers do when evaluated. In this conditional, the ifexpression will test true. The expression tests false only when nil, an empty list, is returned by evaluating the expression.

You can see this by evaluating the two expressions in the following examples.

In the first example, the number 4 is evaluated as the test in the if expression and returns itself; consequently, the then-part of the expression is evaluated and returned: ‘true’ appears in the echo area. In the second example, the nil indicates false; consequently, the else-part of the expression is evaluated and returned: ‘false’ appears in the echo area.

1
2
3
4
5
6
7
(if 4
'true
'false)

(if nil
'true
'false)

Incidentally, if some other useful value is not available for a test that returns true, then the Lisp interpreter will return the symbol t for true. For example, the expression (> 5 4)returns t when evaluated, as you can see by evaluating it in the usual way:

1
(> 5 4)

On the other hand, this function returns nil if the test is false.

1
(> 4 5)

Point and Mark

Before discussing save-excursion, however, it may be useful first to review what point and mark are in GNU Emacs. Point is the current location of the cursor. Wherever the cursor is, that is point. More precisely, on terminals where the cursor appears to be on top of a character, point is immediately before the character. In Emacs Lisp, point is an integer. The first character in a buffer is number one, the second is number two, and so on. The function point returns the current position of the cursor as a number. Each buffer has its own value for point.

The mark is another position in the buffer; its value can be set with a command such as C- (set-mark-command). If a mark has been set, you can use the command C-x C-x(exchange-point-and-mark) to cause the cursor to jump to the mark and set the mark to be the previous position of point. In addition, if you set another mark, the position of the previous mark is saved in the mark ring. Many mark positions can be saved this way. You can jump the cursor to a saved mark by typing C-u C- one or more times.

The part of the buffer between point and mark is called the region. Numerous commands work on the region, including center-region, count-lines-region, kill-region, andprint-region.

The save-excursion special form saves the location of point and restores this position after the code within the body of the special form is evaluated by the Lisp interpreter. Thus, if point were in the beginning of a piece of text and some code moved point to the end of the buffer, the save-excursion would put point back to where it was before, after the expressions in the body of the function were evaluated.

In Emacs, a function frequently moves point as part of its internal workings even though a user would not expect this. For example, count-lines-region moves point. To prevent the user from being bothered by jumps that are both unexpected and (from the user’s point of view) unnecessary, save-excursion is often used to keep point in the location expected by the user. The use of save-excursion is good housekeeping.

To make sure the house stays clean, save-excursion restores the value of point even if something goes wrong in the code inside of it (or, to be more precise and to use the proper jargon, “in case of abnormal exit”). This feature is very helpful.

In addition to recording the value of point, save-excursion keeps track of the current buffer, and restores it, too. This means you can write code that will change the buffer and have save-excursion switch you back to the original buffer. This is how save-excursion is used in append-to-buffer. (See The Definition of append-to-buffer.)

3.10.1 Template for a save-excursion Expression

The template for code using save-excursion is simple:

1
2
(save-excursion
body...)

The body of the function is one or more expressions that will be evaluated in sequence by the Lisp interpreter. If there is more than one expression in the body, the value of the last one will be returned as the value of the save-excursion function. The other expressions in the body are evaluated only for their side effects; and save-excursion itself is used only for its side effect (which is restoring the position of point).

In more detail, the template for a save-excursion expression looks like this:

1
2
3
4
5
6
(save-excursion
first-expression-in-body
second-expression-in-body
third-expression-in-body
...
last-expression-in-body)

An expression, of course, may be a symbol on its own or a list.

In Emacs Lisp code, a save-excursion expression often occurs within the body of a let expression. It looks like this:

1
2
3
(let varlist
(save-excursion
body...))

3.11 Review

In the last few chapters we have introduced a macro and a fair number of functions and special forms. Here they are described in brief, along with a few similar functions that have not been mentioned yet.

  • eval-last-sexp

    Evaluate the last symbolic expression before the current location of point. The value is printed in the echo area unless the function is invoked with an argument; in that case, the output is printed in the current buffer. This command is normally bound to C-x C-e.

  • defun

    Define function. This macro has up to five parts: the name, a template for the arguments that will be passed to the function, documentation, an optional interactive declaration, and the body of the definition.For example, in Emacs the function definition of dired-unmark-all-marks is as follows.(defun dired-unmark-all-marks () "Remove all marks from all files in the Dired buffer." (interactive) (dired-unmark-all-files ?\r))

  • interactive

    Declare to the interpreter that the function can be used interactively. This special form may be followed by a string with one or more parts that pass the information to the arguments of the function, in sequence. These parts may also tell the interpreter to prompt for information. Parts of the string are separated by newlines, ‘\n’.Common code characters are:bThe name of an existing buffer. fThe name of an existing file. pThe numeric prefix argument. (Note that this p is lower case.) rPoint and the mark, as two numeric arguments, smallest first. This is the only code letter that specifies two successive arguments rather than one.See Code Characters for ‘interactive’, for a complete list of code characters.

  • let

    Declare that a list of variables is for use within the body of the let and give them an initial value, either nil or a specified value; then evaluate the rest of the expressions in the body of the let and return the value of the last one. Inside the body of the let, the Lisp interpreter does not see the values of the variables of the same names that are bound outside of the let.For example,(let ((foo (buffer-name)) (bar (buffer-size))) (message "This buffer is %s and has %d characters." foo bar))

  • save-excursion

    Record the values of point and the current buffer before evaluating the body of this special form. Restore the value of point and buffer afterward.For example,(message "We are %d characters into this buffer." (- (point) (save-excursion (goto-char (point-min)) (point))))

  • if

    Evaluate the first argument to the function; if it is true, evaluate the second argument; else evaluate the third argument, if there is one.The if special form is called a conditional. There are other conditionals in Emacs Lisp, but if is perhaps the most commonly used.For example,(if (= 22 emacs-major-version) (message "This is version 22 Emacs") (message "This is not version 22 Emacs"))

  • <

  • >

  • <=

  • >=

    The < function tests whether its first argument is smaller than its second argument. A corresponding function, >, tests whether the first argument is greater than the second. Likewise, <= tests whether the first argument is less than or equal to the second and >= tests whether the first argument is greater than or equal to the second. In all cases, both arguments must be numbers or markers (markers indicate positions in buffers).

  • =

    The = function tests whether two arguments, both numbers or markers, are equal.

  • equal

  • eq

    Test whether two objects are the same. equal uses one meaning of the word “same” and eq uses another: equal returns true if the two objects have a similar structure and contents, such as two copies of the same book. On the other hand, eq, returns true if both arguments are actually the same object.

  • string<

  • string-lessp

  • string=

  • string-equal

    The string-lessp function tests whether its first argument is smaller than the second argument. A shorter, alternative name for the same function (a defalias) is string<.The arguments to string-lessp must be strings or symbols; the ordering is lexicographic, so case is significant. The print names of symbols are used instead of the symbols themselves.An empty string, ‘“”’, a string with no characters in it, is smaller than any string of characters.string-equal provides the corresponding test for equality. Its shorter, alternative name is string=. There are no string test functions that correspond to >, >=, or <=.

  • message

    Print a message in the echo area. The first argument is a string that can contain ‘%s’, ‘%d’, or ‘%c’ to print the value of arguments that follow the string. The argument used by ‘%s’ must be a string or a symbol; the argument used by ‘%d’ must be a number. The argument used by ‘%c’ must be an ascii code number; it will be printed as the character with that ascii code. (Various other %-sequences have not been mentioned.)

  • setq

  • set

    The setq function sets the value of its first argument to the value of the second argument. The first argument is automatically quoted by setq. It does the same for succeeding pairs of arguments. Another function, set, takes only two arguments and evaluates both of them before setting the value returned by its first argument to the value returned by its second argument.

  • buffer-name

    Without an argument, return the name of the buffer, as a string.

  • buffer-file-name

    Without an argument, return the name of the file the buffer is visiting.

  • current-buffer

    Return the buffer in which Emacs is active; it may not be the buffer that is visible on the screen.

  • other-buffer

    Return the most recently selected buffer (other than the buffer passed to other-buffer as an argument and other than the current buffer).

  • switch-to-buffer

    Select a buffer for Emacs to be active in and display it in the current window so users can look at it. Usually bound to C-x b.

  • set-buffer

    Switch Emacs’s attention to a buffer on which programs will run. Don’t alter what the window is showing.

  • buffer-size

    Return the number of characters in the current buffer.

  • point

    Return the value of the current position of the cursor, as an integer counting the number of characters from the beginning of the buffer.

  • point-min

    Return the minimum permissible value of point in the current buffer. This is 1, unless narrowing is in effect.

  • point-max

    Return the value of the maximum permissible value of point in the current buffer. This is the end of the buffer, unless narrowing is in effect.

3.12 Exercises

  • Write a non-interactive function that doubles the value of its argument, a number. Make that function interactive.
  • Write a function that tests whether the current value of fill-column is greater than the argument passed to the function, and if so, prints an appropriate message.

Intro to Elisp 2. Practicing Evaluation

Posted on 2019-06-11 | Comments:

Before learning how to write a function definition in Emacs Lisp, it is useful to spend a little time evaluating various expressions that have already been written. These expressions will be lists with the functions as their first (and often only) element. Since some of the functions associated with buffers are both simple and interesting, we will start with those. In this section, we will evaluate a few of these. In another section, we will study the code of several other buffer-related functions, to see how they were written.

  • How to Evaluate: Typing editing commands or C-x C-e causes evaluation.
  • Buffer Names: Buffers and files are different.
  • Getting Buffers: Getting a buffer itself, not merely its name.
  • Switching Buffers: How to change to another buffer.
  • Buffer Size & Locations: Where point is located and the size of the buffer.
  • Evaluation Exercise

How to Evaluate

Whenever you give an editing command to Emacs Lisp, such as the command to move the cursor or to scroll the screen, you are evaluating an expression, the first element of which is a function. This is how Emacs works.

When you type keys, you cause the Lisp interpreter to evaluate an expression and that is how you get your results. Even typing plain text involves evaluating an Emacs Lisp function, in this case, one that uses self-insert-command, which simply inserts the character you typed. The functions you evaluate by typing keystrokes are called interactivefunctions, or commands; how you make a function interactive will be illustrated in the chapter on how to write function definitions. See Making a Function Interactive.

In addition to typing keyboard commands, we have seen a second way to evaluate an expression: by positioning the cursor after a list and typing C-x C-e. This is what we will do in the rest of this section. There are other ways to evaluate an expression as well; these will be described as we come to them.

Besides being used for practicing evaluation, the functions shown in the next few sections are important in their own right. A study of these functions makes clear the distinction between buffers and files, how to switch to a buffer, and how to determine a location within it.

2.1 Buffer Names

The two functions, buffer-name and buffer-file-name, show the difference between a file and a buffer. When you evaluate the following expression, (buffer-name), the name of the buffer appears in the echo area. When you evaluate (buffer-file-name), the name of the file to which the buffer refers appears in the echo area. Usually, the name returned by (buffer-name) is the same as the name of the file to which it refers, and the name returned by (buffer-file-name) is the full path-name of the file.

A file and a buffer are two different entities. A file is information recorded permanently in the computer (unless you delete it). A buffer, on the other hand, is information inside of Emacs that will vanish at the end of the editing session (or when you kill the buffer). Usually, a buffer contains information that you have copied from a file; we say the buffer is visiting that file. This copy is what you work on and modify. Changes to the buffer do not change the file, until you save the buffer. When you save the buffer, the buffer is copied to the file and is thus saved permanently.

If you are reading this in Info inside of GNU Emacs, you can evaluate each of the following expressions by positioning the cursor after it and typing C-x C-e.

1
2
3
(buffer-name)

(buffer-file-name)

When I do this in Info, the value returned by evaluating (buffer-name) is “info“, and the value returned by evaluating (buffer-file-name) is nil.

On the other hand, while I am writing this document, the value returned by evaluating (buffer-name) is “introduction.texinfo”, and the value returned by evaluating (buffer-file-name) is “/gnu/work/intro/introduction.texinfo”.

The former is the name of the buffer and the latter is the name of the file. In Info, the buffer name is “info“. Info does not point to any file, so the result of evaluating (buffer-file-name) is nil. The symbol nil is from the Latin word for “nothing”; in this case, it means that the buffer is not associated with any file. (In Lisp, nil is also used to mean “false” and is a synonym for the empty list, ().)

When I am writing, the name of my buffer is “introduction.texinfo”. The name of the file to which it points is “/gnu/work/intro/introduction.texinfo”.

(In the expressions, the parentheses tell the Lisp interpreter to treat buffer-name and buffer-file-name as functions; without the parentheses, the interpreter would attempt to evaluate the symbols as variables. See Variables.)

In spite of the distinction between files and buffers, you will often find that people refer to a file when they mean a buffer and vice versa. Indeed, most people say, “I am editing a file,” rather than saying, “I am editing a buffer which I will soon save to a file.” It is almost always clear from context what people mean. When dealing with computer programs, however, it is important to keep the distinction in mind, since the computer is not as smart as a person.

The word “buffer”, by the way, comes from the meaning of the word as a cushion that deadens the force of a collision. In early computers, a buffer cushioned the interaction between files and the computer’s central processing unit. The drums or tapes that held a file and the central processing unit were pieces of equipment that were very different from each other, working at their own speeds, in spurts. The buffer made it possible for them to work together effectively. Eventually, the buffer grew from being an intermediary, a temporary holding place, to being the place where work is done. This transformation is rather like that of a small seaport that grew into a great city: once it was merely the place where cargo was warehoused temporarily before being loaded onto ships; then it became a business and cultural center in its own right.

Not all buffers are associated with files. For example, a scratch buffer does not visit any file. Similarly, a Help buffer is not associated with any file.

In the old days, when you lacked a ~/.emacs file and started an Emacs session by typing the command emacs alone, without naming any files, Emacs started with the scratchbuffer visible. Nowadays, you will see a splash screen. You can follow one of the commands suggested on the splash screen, visit a file, or press q to quit the splash screen and reach the scratch buffer.

If you switch to the scratch buffer, type (buffer-name), position the cursor after it, and then type C-x C-e to evaluate the expression. The name "*scratch*" will be returned and will appear in the echo area. "*scratch*" is the name of the buffer. When you type (buffer-file-name) in the scratch buffer and evaluate that, nil will appear in the echo area, just as it does when you evaluate (buffer-file-name) in Info.

Incidentally, if you are in the scratch buffer and want the value returned by an expression to appear in the scratch buffer itself rather than in the echo area, type C-u C-x C-e instead of C-x C-e. This causes the value returned to appear after the expression. The buffer will look like this:

1
(buffer-name)"*scratch*"

You cannot do this in Info since Info is read-only and it will not allow you to change the contents of the buffer. But you can do this in any buffer you can edit; and when you write code or documentation (such as this book), this feature is very useful.

2.2 Getting Buffers

The buffer-name function returns the name of the buffer; to get the buffer itself, a different function is needed: the current-buffer function. If you use this function in code, what you get is the buffer itself.

A name and the object or entity to which the name refers are different from each other. You are not your name. You are a person to whom others refer by name. If you ask to speak to George and someone hands you a card with the letters ‘G’, ‘e’, ‘o’, ‘r’, ‘g’, and ‘e’ written on it, you might be amused, but you would not be satisfied. You do not want to speak to the name, but to the person to whom the name refers. A buffer is similar: the name of the scratch buffer is scratch, but the name is not the buffer. To get a buffer itself, you need to use a function such as current-buffer.

However, there is a slight complication: if you evaluate current-buffer in an expression on its own, as we will do here, what you see is a printed representation of the name of the buffer without the contents of the buffer. Emacs works this way for two reasons: the buffer may be thousands of lines long—too long to be conveniently displayed; and, another buffer may have the same contents but a different name, and it is important to distinguish between them.

Here is an expression containing the function:

1
(current-buffer)

If you evaluate this expression in Info in Emacs in the usual way, # will appear in the echo area. The special format indicates that the buffer itself is being returned, rather than just its name.

Incidentally, while you can type a number or symbol into a program, you cannot do that with the printed representation of a buffer: the only way to get a buffer itself is with a function such as current-buffer.

A related function is other-buffer. This returns the most recently selected buffer other than the one you are in currently, not a printed representation of its name. If you have recently switched back and forth from the scratch buffer, other-buffer will return that buffer.

You can see this by evaluating the expression:

1
(other-buffer)

You should see # appear in the echo area, or the name of whatever other buffer you switched back from most recently6.

2.3 Switching Buffers

The other-buffer function actually provides a buffer when it is used as an argument to a function that requires one. We can see this by using other-buffer and switch-to-buffer to switch to a different buffer.

But first, a brief introduction to the switch-to-buffer function. When you switched back and forth from Info to the scratch buffer to evaluate (buffer-name), you most likely typed C-x b and then typed scratch7 when prompted in the minibuffer for the name of the buffer to which you wanted to switch. The keystrokes, C-x b, cause the Lisp interpreter to evaluate the interactive function switch-to-buffer. As we said before, this is how Emacs works: different keystrokes call or run different functions. For example, C-f calls forward-char, M-e calls forward-sentence, and so on.

By writing switch-to-buffer in an expression, and giving it a buffer to switch to, we can switch buffers just the way C-x b does:

1
(switch-to-buffer (other-buffer))

The symbol switch-to-buffer is the first element of the list, so the Lisp interpreter will treat it as a function and carry out the instructions that are attached to it. But before doing that, the interpreter will note that other-buffer is inside parentheses and work on that symbol first. other-buffer is the first (and in this case, the only) element of this list, so the Lisp interpreter calls or runs the function. It returns another buffer. Next, the interpreter runs switch-to-buffer, passing to it, as an argument, the other buffer, which is what Emacs will switch to. If you are reading this in Info, try this now. Evaluate the expression. (To get back, type C-x b .)8

In the programming examples in later sections of this document, you will see the function set-buffer more often than switch-to-buffer. This is because of a difference between computer programs and humans: humans have eyes and expect to see the buffer on which they are working on their computer terminals. This is so obvious, it almost goes without saying. However, programs do not have eyes. When a computer program works on a buffer, that buffer does not need to be visible on the screen.

switch-to-buffer is designed for humans and does two different things: it switches the buffer to which Emacs’s attention is directed; and it switches the buffer displayed in the window to the new buffer. set-buffer, on the other hand, does only one thing: it switches the attention of the computer program to a different buffer. The buffer on the screen remains unchanged (of course, normally nothing happens there until the command finishes running).

Also, we have just introduced another jargon term, the word call. When you evaluate a list in which the first symbol is a function, you are calling that function. The use of the term comes from the notion of the function as an entity that can do something for you if you call it—just as a plumber is an entity who can fix a leak if you call him or her.

2.4 Buffer Size and the Location of Point

Finally, let’s look at several rather simple functions, buffer-size, point, point-min, and point-max. These give information about the size of a buffer and the location of point within it.

The function buffer-size tells you the size of the current buffer; that is, the function returns a count of the number of characters in the buffer.

1
(buffer-size)

You can evaluate this in the usual way, by positioning the cursor after the expression and typing C-x C-e.

In Emacs, the current position of the cursor is called point. The expression (point) returns a number that tells you where the cursor is located as a count of the number of characters from the beginning of the buffer up to point.

You can see the character count for point in this buffer by evaluating the following expression in the usual way:

1
(point)

As I write this, the value of point is 65724. The point function is frequently used in some of the examples later in this book.

The value of point depends, of course, on its location within the buffer. If you evaluate point in this spot, the number will be larger:

1
(point)

For me, the value of point in this location is 66043, which means that there are 319 characters (including spaces) between the two expressions. (Doubtless, you will see different numbers, since I will have edited this since I first evaluated point.)

The function point-min is somewhat similar to point, but it returns the value of the minimum permissible value of point in the current buffer. This is the number 1 unless narrowing is in effect. (Narrowing is a mechanism whereby you can restrict yourself, or a program, to operations on just a part of a buffer. See Narrowing and Widening.) Likewise, the function point-max returns the value of the maximum permissible value of point in the current buffer.

2.5 Exercise

Find a file with which you are working and move towards its middle. Find its buffer name, file name, length, and your position in the file.

Intro to elisp 1. List Processing

Posted on 2019-06-11 | Comments:

To the untutored eye, Lisp is a strange programming language. In Lisp code there are parentheses everywhere. Some people even claim that the name stands for “Lots of Isolated Silly Parentheses”. But the claim is unwarranted. Lisp stands for LISt Processing, and the programming language handles lists (and lists of lists) by putting them between parentheses. The parentheses mark the boundaries of the list. Sometimes a list is preceded by an apostrophe ‘’’, called a single-quote in Lisp.1 Lists are the basis of Lisp.

  • Lisp Lists: What are lists?
  • Run a Program: Any list in Lisp is a program ready to run.
  • Making Errors: Generating an error message.
  • Names & Definitions: Names of symbols and function definitions.
  • Lisp Interpreter: What the Lisp interpreter does.
  • Evaluation: Running a program.
  • Variables: Returning a value from a variable.
  • Arguments: Passing information to a function.
  • set & setq: Setting the value of a variable.
  • Summary: The major points.
  • Error Message Exercises

1.1 Lisp Lists

In Lisp, a list looks like this: '(rose violet daisy buttercup). This list is preceded by a single apostrophe. It could just as well be written as follows, which looks more like the kind of list you are likely to be familiar with:

1
2
3
4
'(rose
violet
daisy
buttercup)

The elements of this list are the names of the four different flowers, separated from each other by whitespace and surrounded by parentheses, like flowers in a field with a stone wall around them.

  • Numbers Lists: List have numbers, other lists, in them.
  • Lisp Atoms: Elemental entities.
  • Whitespace in Lists: Formatting lists to be readable.
  • Typing Lists: How GNU Emacs helps you type lists.

Numbers, Lists inside of Lists

Lists can also have numbers in them, as in this list: (+ 2 2). This list has a plus-sign, ‘+’, followed by two ‘2’s, each separated by whitespace.

In Lisp, both data and programs are represented the same way; that is, they are both lists of words, numbers, or other lists, separated by whitespace and surrounded by parentheses. (Since a program looks like data, one program may easily serve as data for another; this is a very powerful feature of Lisp.) (Incidentally, these two parenthetical remarks are notLisp lists, because they contain ‘;’ and ‘.’ as punctuation marks.)

Here is another list, this time with a list inside of it:

1
'(this list has (a list inside of it))

The components of this list are the words ‘this’, ‘list’, ‘has’, and the list ‘(a list inside of it)’. The interior list is made up of the words ‘a’, ‘list’, ‘inside’, ‘of’, ‘it’.

1.1.1 Lisp Atoms

In Lisp, what we have been calling words are called atoms. This term comes from the historical meaning of the word atom, which means “indivisible”. As far as Lisp is concerned, the words we have been using in the lists cannot be divided into any smaller parts and still mean the same thing as part of a program; likewise with numbers and single character symbols like ‘+’. On the other hand, unlike an ancient atom, a list can be split into parts. (See car cdr & cons Fundamental Functions.)

In a list, atoms are separated from each other by whitespace. They can be right next to a parenthesis.

Technically speaking, a list in Lisp consists of parentheses surrounding atoms separated by whitespace or surrounding other lists or surrounding both atoms and other lists. A list can have just one atom in it or have nothing in it at all. A list with nothing in it looks like this: (), and is called the empty list. Unlike anything else, an empty list is considered both an atom and a list at the same time.

The printed representation of both atoms and lists are called symbolic expressions or, more concisely, s-expressions. The word expression by itself can refer to either the printed representation, or to the atom or list as it is held internally in the computer. Often, people use the term expression indiscriminately. (Also, in many texts, the word form is used as a synonym for expression.)

Incidentally, the atoms that make up our universe were named such when they were thought to be indivisible; but it has been found that physical atoms are not indivisible. Parts can split off an atom or it can fission into two parts of roughly equal size. Physical atoms were named prematurely, before their truer nature was found. In Lisp, certain kinds of atom, such as an array, can be separated into parts; but the mechanism for doing this is different from the mechanism for splitting a list. As far as list operations are concerned, the atoms of a list are unsplittable.

As in English, the meanings of the component letters of a Lisp atom are different from the meaning the letters make as a word. For example, the word for the South American sloth, the ‘ai’, is completely different from the two words, ‘a’, and ‘i’.

There are many kinds of atom in nature but only a few in Lisp: for example, numbers, such as 37, 511, or 1729, and symbols, such as ‘+’, ‘foo’, or ‘forward-line’. The words we have listed in the examples above are all symbols. In everyday Lisp conversation, the word “atom” is not often used, because programmers usually try to be more specific about what kind of atom they are dealing with. Lisp programming is mostly about symbols (and sometimes numbers) within lists. (Incidentally, the preceding three word parenthetical remark is a proper list in Lisp, since it consists of atoms, which in this case are symbols, separated by whitespace and enclosed by parentheses, without any non-Lisp punctuation.)

Text between double quotation marks—even sentences or paragraphs—is also an atom. Here is an example:

1
'(this list includes "text between quotation marks.")

In Lisp, all of the quoted text including the punctuation mark and the blank spaces is a single atom. This kind of atom is called a string (for “string of characters”) and is the sort of thing that is used for messages that a computer can print for a human to read. Strings are a different kind of atom than numbers or symbols and are used differently.

1.1.2 Whitespace in Lists

The amount of whitespace in a list does not matter. From the point of view of the Lisp language,

1
2
'(this list
looks like this)

is exactly the same as this:

1
'(this list looks like this)

Both examples show what to Lisp is the same list, the list made up of the symbols ‘this’, ‘list’, ‘looks’, ‘like’, and ‘this’ in that order.

Extra whitespace and newlines are designed to make a list more readable by humans. When Lisp reads the expression, it gets rid of all the extra whitespace (but it needs to have at least one space between atoms in order to tell them apart.)

Odd as it seems, the examples we have seen cover almost all of what Lisp lists look like! Every other list in Lisp looks more or less like one of these examples, except that the list may be longer and more complex. In brief, a list is between parentheses, a string is between quotation marks, a symbol looks like a word, and a number looks like a number. (For certain situations, square brackets, dots and a few other special characters may be used; however, we will go quite far without them.)

1.1.3 GNU Emacs Helps You Type Lists

When you type a Lisp expression in GNU Emacs using either Lisp Interaction mode or Emacs Lisp mode, you have available to you several commands to format the Lisp expression so it is easy to read. For example, pressing the key automatically indents the line the cursor is on by the right amount. A command to properly indent the code in a region is customarily bound to M-C-. Indentation is designed so that you can see which elements of a list belong to which list—elements of a sub-list are indented more than the elements of the enclosing list.

In addition, when you type a closing parenthesis, Emacs momentarily jumps the cursor back to the matching opening parenthesis, so you can see which one it is. This is very useful, since every list you type in Lisp must have its closing parenthesis match its opening parenthesis. (See Major Modes, for more information about Emacs’s modes.)

1.2 Run a Program

A list in Lisp—any list—is a program ready to run. If you run it (for which the Lisp jargon is evaluate), the computer will do one of three things: do nothing except return to you the list itself; send you an error message; or, treat the first symbol in the list as a command to do something. (Usually, of course, it is the last of these three things that you really want!)

The single apostrophe, ', that I put in front of some of the example lists in preceding sections is called a quote; when it precedes a list, it tells Lisp to do nothing with the list, other than take it as it is written. But if there is no quote preceding a list, the first item of the list is special: it is a command for the computer to obey. (In Lisp, these commands are called functions.) The list (+ 2 2) shown above did not have a quote in front of it, so Lisp understands that the + is an instruction to do something with the rest of the list: add the numbers that follow.

If you are reading this inside of GNU Emacs in Info, here is how you can evaluate such a list: place your cursor immediately after the right hand parenthesis of the following list and then type C-x C-e:

1
(+ 2 2)

You will see the number 4 appear in the echo area2. (What you have just done is evaluate the list. The echo area is the line at the bottom of the screen that displays or echoes text.) Now try the same thing with a quoted list: place the cursor right after the following list and type C-x C-e:

1
'(this is a quoted list)

You will see (this is a quoted list) appear in the echo area.

In both cases, what you are doing is giving a command to the program inside of GNU Emacs called the Lisp interpreter—giving the interpreter a command to evaluate the expression. The name of the Lisp interpreter comes from the word for the task done by a human who comes up with the meaning of an expression—who interprets it.

You can also evaluate an atom that is not part of a list—one that is not surrounded by parentheses; again, the Lisp interpreter translates from the humanly readable expression to the language of the computer. But before discussing this (see Variables), we will discuss what the Lisp interpreter does when you make an error.

1.3 Generate an Error Message

Partly so you won’t worry if you do it accidentally, we will now give a command to the Lisp interpreter that generates an error message. This is a harmless activity; and indeed, we will often try to generate error messages intentionally. Once you understand the jargon, error messages can be informative. Instead of being called “error” messages, they should be called “help” messages. They are like signposts to a traveler in a strange country; deciphering them can be hard, but once understood, they can point the way.

The error message is generated by a built-in GNU Emacs debugger. We will enter the debugger. You get out of the debugger by typing q.

What we will do is evaluate a list that is not quoted and does not have a meaningful command as its first element. Here is a list almost exactly the same as the one we just used, but without the single-quote in front of it. Position the cursor right after it and type C-x C-e:

1
(this is an unquoted list)

A Backtrace window will open up and you should see the following in it:

1
2
3
4
5
6
7
8
9
10
---------- Buffer: *Backtrace* ----------
Debugger entered--Lisp error: (void-function this)
(this is an unquoted list)
eval((this is an unquoted list) nil)
elisp--eval-last-sexp(nil)
eval-last-sexp(nil)
funcall-interactively(eval-last-sexp nil)
call-interactively(eval-last-sexp nil nil)
command-execute(eval-last-sexp)
---------- Buffer: *Backtrace* ----------

Your cursor will be in this window (you may have to wait a few seconds before it becomes visible). To quit the debugger and make the debugger window go away, type:

1
q

Please type q right now, so you become confident that you can get out of the debugger. Then, type C-x C-e again to re-enter it.

Based on what we already know, we can almost read this error message.

You read the Backtrace buffer from the bottom up; it tells you what Emacs did. When you typed C-x C-e, you made an interactive call to the command eval-last-sexp. evalis an abbreviation for “evaluate” and sexp is an abbreviation for “symbolic expression”. The command means “evaluate last symbolic expression”, which is the expression just before your cursor.

Each line above tells you what the Lisp interpreter evaluated next. The most recent action is at the top. The buffer is called the Backtrace buffer because it enables you to track Emacs backwards.

At the top of the Backtrace buffer, you see the line:

1
Debugger entered--Lisp error: (void-function this)

The Lisp interpreter tried to evaluate the first atom of the list, the word ‘this’. It is this action that generated the error message ‘void-function this’.

The message contains the words ‘void-function’ and ‘this’.

The word ‘function’ was mentioned once before. It is a very important word. For our purposes, we can define it by saying that a function is a set of instructions to the computer that tell the computer to do something.

Now we can begin to understand the error message: ‘void-function this’. The function (that is, the word ‘this’) does not have a definition of any set of instructions for the computer to carry out.

The slightly odd word, ‘void-function’, is designed to cover the way Emacs Lisp is implemented, which is that when a symbol does not have a function definition attached to it, the place that should contain the instructions is void.

On the other hand, since we were able to add 2 plus 2 successfully, by evaluating (+ 2 2), we can infer that the symbol + must have a set of instructions for the computer to obey and those instructions must be to add the numbers that follow the +.

It is possible to prevent Emacs entering the debugger in cases like this. We do not explain how to do that here, but we will mention what the result looks like, because you may encounter a similar situation if there is a bug in some Emacs code that you are using. In such cases, you will see only one line of error message; it will appear in the echo area and look like this:

1
Symbol's function definition is void: this

The message goes away as soon as you type a key, even just to move the cursor.

We know the meaning of the word ‘Symbol’. It refers to the first atom of the list, the word ‘this’. The word ‘function’ refers to the instructions that tell the computer what to do. (Technically, the symbol tells the computer where to find the instructions, but this is a complication we can ignore for the moment.)

The error message can be understood: ‘Symbol’s function definition is void: this’. The symbol (that is, the word ‘this’) lacks instructions for the computer to carry out.

1.4 Symbol Names and Function Definitions

We can articulate another characteristic of Lisp based on what we have discussed so far—an important characteristic: a symbol, like +, is not itself the set of instructions for the computer to carry out. Instead, the symbol is used, perhaps temporarily, as a way of locating the definition or set of instructions. What we see is the name through which the instructions can be found. Names of people work the same way. I can be referred to as ‘Bob’; however, I am not the letters ‘B’, ‘o’, ‘b’ but am, or was, the consciousness consistently associated with a particular life-form. The name is not me, but it can be used to refer to me.

In Lisp, one set of instructions can be attached to several names. For example, the computer instructions for adding numbers can be linked to the symbol plus as well as to the symbol + (and are in some dialects of Lisp). Among humans, I can be referred to as ‘Robert’ as well as ‘Bob’ and by other words as well.

On the other hand, a symbol can have only one function definition attached to it at a time. Otherwise, the computer would be confused as to which definition to use. If this were the case among people, only one person in the world could be named ‘Bob’. However, the function definition to which the name refers can be changed readily. (See Install a Function Definition.)

Since Emacs Lisp is large, it is customary to name symbols in a way that identifies the part of Emacs to which the function belongs. Thus, all the names for functions that deal with Texinfo start with ‘texinfo-’ and those for functions that deal with reading mail start with ‘rmail-’.

1.5 The Lisp Interpreter

Based on what we have seen, we can now start to figure out what the Lisp interpreter does when we command it to evaluate a list. First, it looks to see whether there is a quote before the list; if there is, the interpreter just gives us the list. On the other hand, if there is no quote, the interpreter looks at the first element in the list and sees whether it has a function definition. If it does, the interpreter carries out the instructions in the function definition. Otherwise, the interpreter prints an error message.

This is how Lisp works. Simple. There are added complications which we will get to in a minute, but these are the fundamentals. Of course, to write Lisp programs, you need to know how to write function definitions and attach them to names, and how to do this without confusing either yourself or the computer.

  • Complications: Variables, Special forms, Lists within.
  • Byte Compiling: Specially processing code for speed.

Complications

Now, for the first complication. In addition to lists, the Lisp interpreter can evaluate a symbol that is not quoted and does not have parentheses around it. The Lisp interpreter will attempt to determine the symbol’s value as a variable. This situation is described in the section on variables. (See Variables.)

The second complication occurs because some functions are unusual and do not work in the usual manner. Those that don’t are called special forms. They are used for special jobs, like defining a function, and there are not many of them. In the next few chapters, you will be introduced to several of the more important special forms.

As well as special forms, there are also macros. A macro is a construct defined in Lisp, which differs from a function in that it translates a Lisp expression into another expression that is to be evaluated in place of the original expression. (See Lisp macro.)

For the purposes of this introduction, you do not need to worry too much about whether something is a special form, macro, or ordinary function. For example, if is a special form (see if), but when is a macro (see Lisp macro). In earlier versions of Emacs, defun was a special form, but now it is a macro (see defun). It still behaves in the same way.

The final complication is this: if the function that the Lisp interpreter is looking at is not a special form, and if it is part of a list, the Lisp interpreter looks to see whether the list has a list inside of it. If there is an inner list, the Lisp interpreter first figures out what it should do with the inside list, and then it works on the outside list. If there is yet another list embedded inside the inner list, it works on that one first, and so on. It always works on the innermost list first. The interpreter works on the innermost list first, to evaluate the result of that list. The result may be used by the enclosing expression.

Otherwise, the interpreter works left to right, from one expression to the next.

1.5.1 Byte Compiling

One other aspect of interpreting: the Lisp interpreter is able to interpret two kinds of entity: humanly readable code, on which we will focus exclusively, and specially processed code, called byte compiled code, which is not humanly readable. Byte compiled code runs faster than humanly readable code.

You can transform humanly readable code into byte compiled code by running one of the compile commands such as byte-compile-file. Byte compiled code is usually stored in a file that ends with a .elc extension rather than a .el extension. You will see both kinds of file in the emacs/lisp directory; the files to read are those with .el extensions.

As a practical matter, for most things you might do to customize or extend Emacs, you do not need to byte compile; and I will not discuss the topic here. See Byte Compilation, for a full description of byte compilation.

1.6 Evaluation

When the Lisp interpreter works on an expression, the term for the activity is called evaluation. We say that the interpreter “evaluates the expression”. I’ve used this term several times before. The word comes from its use in everyday language, “to ascertain the value or amount of; to appraise”, according to Webster’s New Collegiate Dictionary.

  • How the Interpreter Acts: Returns and Side Effects…
  • Evaluating Inner Lists: Lists within lists…

How the Lisp Interpreter Acts

After evaluating an expression, the Lisp interpreter will most likely return the value that the computer produces by carrying out the instructions it found in the function definition, or perhaps it will give up on that function and produce an error message. (The interpreter may also find itself tossed, so to speak, to a different function or it may attempt to repeat continually what it is doing for ever and ever in an infinite loop. These actions are less common; and we can ignore them.) Most frequently, the interpreter returns a value.

At the same time the interpreter returns a value, it may do something else as well, such as move a cursor or copy a file; this other kind of action is called a side effect. Actions that we humans think are important, such as printing results, are often side effects to the Lisp interpreter. It is fairly easy to learn to use side effects.

In summary, evaluating a symbolic expression most commonly causes the Lisp interpreter to return a value and perhaps carry out a side effect; or else produce an error.

1.6.1 Evaluating Inner Lists

If evaluation applies to a list that is inside another list, the outer list may use the value returned by the first evaluation as information when the outer list is evaluated. This explains why inner expressions are evaluated first: the values they return are used by the outer expressions.

We can investigate this process by evaluating another addition example. Place your cursor after the following expression and type C-x C-e:

1
(+ 2 (+ 3 3))

The number 8 will appear in the echo area.

What happens is that the Lisp interpreter first evaluates the inner expression, (+ 3 3), for which the value 6 is returned; then it evaluates the outer expression as if it were written (+ 2 6), which returns the value 8. Since there are no more enclosing expressions to evaluate, the interpreter prints that value in the echo area.

Now it is easy to understand the name of the command invoked by the keystrokes C-x C-e: the name is eval-last-sexp. The letters sexp are an abbreviation for “symbolic expression”, and eval is an abbreviation for “evaluate”. The command evaluates the last symbolic expression.

As an experiment, you can try evaluating the expression by putting the cursor at the beginning of the next line immediately following the expression, or inside the expression.

Here is another copy of the expression:

1
(+ 2 (+ 3 3))

If you place the cursor at the beginning of the blank line that immediately follows the expression and type C-x C-e, you will still get the value 8 printed in the echo area. Now try putting the cursor inside the expression. If you put it right after the next to last parenthesis (so it appears to sit on top of the last parenthesis), you will get a 6 printed in the echo area! This is because the command evaluates the expression (+ 3 3).

Now put the cursor immediately after a number. Type C-x C-e and you will get the number itself. In Lisp, if you evaluate a number, you get the number itself—this is how numbers differ from symbols. If you evaluate a list starting with a symbol like +, you will get a value returned that is the result of the computer carrying out the instructions in the function definition attached to that name. If a symbol by itself is evaluated, something different happens, as we will see in the next section.

1.7 Variables

In Emacs Lisp, a symbol can have a value attached to it just as it can have a function definition attached to it. The two are different. The function definition is a set of instructions that a computer will obey. A value, on the other hand, is something, such as number or a name, that can vary (which is why such a symbol is called a variable). The value of a symbol can be any expression in Lisp, such as a symbol, number, list, or string. A symbol that has a value is often called a variable.

A symbol can have both a function definition and a value attached to it at the same time. Or it can have just one or the other. The two are separate. This is somewhat similar to the way the name Cambridge can refer to the city in Massachusetts and have some information attached to the name as well, such as “great programming center”.

Another way to think about this is to imagine a symbol as being a chest of drawers. The function definition is put in one drawer, the value in another, and so on. What is put in the drawer holding the value can be changed without affecting the contents of the drawer holding the function definition, and vice versa.

  • fill-column Example
  • Void Function: The error message for a symbol without a function.
  • Void Variable: The error message for a symbol without a value.

1.7.1 Error Message for a Symbol Without a Function

When we evaluated fill-column to find its value as a variable, we did not place parentheses around the word. This is because we did not intend to use it as a function name.

If fill-column were the first or only element of a list, the Lisp interpreter would attempt to find the function definition attached to it. But fill-column has no function definition. Try evaluating this:

1
(fill-column)

You will create a Backtrace buffer that says:

1
2
3
4
5
6
7
8
9
10
---------- Buffer: *Backtrace* ----------
Debugger entered--Lisp error: (void-function fill-column)
(fill-column)
eval((fill-column) nil)
elisp--eval-last-sexp(nil)
eval-last-sexp(nil)
funcall-interactively(eval-last-sexp nil)
call-interactively(eval-last-sexp nil nil)
command-execute(eval-last-sexp)
---------- Buffer: *Backtrace* ----------

(Remember, to quit the debugger and make the debugger window go away, type q in the Backtrace buffer.)

1.7.2 Error Message for a Symbol Without a Value

If you attempt to evaluate a symbol that does not have a value bound to it, you will receive an error message. You can see this by experimenting with our 2 plus 2 addition. In the following expression, put your cursor right after the +, before the first number 2, type C-x C-e:

1
(+ 2 2)

In GNU Emacs 22, you will create a Backtrace buffer that says:

1
2
3
4
5
6
7
8
9
---------- Buffer: *Backtrace* ----------
Debugger entered--Lisp error: (void-variable +)
eval(+)
elisp--eval-last-sexp(nil)
eval-last-sexp(nil)
funcall-interactively(eval-last-sexp nil)
call-interactively(eval-last-sexp nil nil)
command-execute(eval-last-sexp)
---------- Buffer: *Backtrace* ----------

(Again, you can quit the debugger by typing q in the Backtrace buffer.)

This backtrace is different from the very first error message we saw, which said, ‘Debugger entered–Lisp error: (void-function this)’. In this case, the function does not have a value as a variable; while in the other error message, the function (the word ‘this’) did not have a definition.

In this experiment with the +, what we did was cause the Lisp interpreter to evaluate the + and look for the value of the variable instead of the function definition. We did this by placing the cursor right after the symbol rather than after the parenthesis of the enclosing list as we did before. As a consequence, the Lisp interpreter evaluated the preceding s-expression, which in this case was + by itself.

Since + does not have a value bound to it, just the function definition, the error message reported that the symbol’s value as a variable was void.

1.8 Arguments

To see how information is passed to functions, let’s look again at our old standby, the addition of two plus two. In Lisp, this is written as follows:

1
(+ 2 2)

If you evaluate this expression, the number 4 will appear in your echo area. What the Lisp interpreter does is add the numbers that follow the +.

The numbers added by + are called the arguments of the function +. These numbers are the information that is given to or passed to the function.

The word “argument” comes from the way it is used in mathematics and does not refer to a disputation between two people; instead it refers to the information presented to the function, in this case, to the +. In Lisp, the arguments to a function are the atoms or lists that follow the function. The values returned by the evaluation of these atoms or lists are passed to the function. Different functions require different numbers of arguments; some functions require none at all.3

  • Data types: Types of data passed to a function.
  • Args as Variable or List: An argument can be the value of a variable or list.
  • Variable Number of Arguments: Some functions may take a variable number of arguments.
  • Wrong Type of Argument: Passing an argument of the wrong type to a function.
  • message: A useful function for sending messages.

1.8.1 Arguments’ Data Types

The type of data that should be passed to a function depends on what kind of information it uses. The arguments to a function such as + must have values that are numbers, since +adds numbers. Other functions use different kinds of data for their arguments.

For example, the concat function links together or unites two or more strings of text to produce a string. The arguments are strings. Concatenating the two character strings abc, def produces the single string abcdef. This can be seen by evaluating the following:

1
(concat "abc" "def")

The value produced by evaluating this expression is "abcdef".

A function such as substring uses both a string and numbers as arguments. The function returns a part of the string, a substring of the first argument. This function takes three arguments. Its first argument is the string of characters, the second and third arguments are numbers that indicate the beginning (inclusive) and end (exclusive) of the substring. The numbers are a count of the number of characters (including spaces and punctuation) from the beginning of the string. Note that the characters in a string are numbered from zero, not one.

For example, if you evaluate the following:

1
(substring "The quick brown fox jumped." 16 19)

you will see "fox" appear in the echo area. The arguments are the string and the two numbers.

Note that the string passed to substring is a single atom even though it is made up of several words separated by spaces. Lisp counts everything between the two quotation marks as part of the string, including the spaces. You can think of the substring function as a kind of atom smasher since it takes an otherwise indivisible atom and extracts a part. However, substring is only able to extract a substring from an argument that is a string, not from another type of atom such as a number or symbol.

1.8.3 Variable Number of Arguments

Some functions, such as concat, + or *, take any number of arguments. (The * is the symbol for multiplication.) This can be seen by evaluating each of the following expressions in the usual way. What you will see in the echo area is printed in this text after ‘⇒’, which you may read as “evaluates to”.

In the first set, the functions have no arguments:

1
2
3
(+)       ⇒ 0

(*) ⇒ 1

In this set, the functions have one argument each:

1
2
3
(+ 3)     ⇒ 3

(* 3) ⇒ 3

In this set, the functions have three arguments each:

1
2
3
(+ 3 4 5) ⇒ 12

(* 3 4 5) ⇒ 60

1.8.4 Using the Wrong Type Object as an Argument

When a function is passed an argument of the wrong type, the Lisp interpreter produces an error message. For example, the + function expects the values of its arguments to be numbers. As an experiment we can pass it the quoted symbol hello instead of a number. Position the cursor after the following expression and type C-x C-e:

1
(+ 2 'hello)

When you do this you will generate an error message. What has happened is that + has tried to add the 2 to the value returned by 'hello, but the value returned by 'hello is the symbol hello, not a number. Only numbers can be added. So + could not carry out its addition.

You will create and enter a Backtrace buffer that says:

1
2
3
4
5
6
7
8
9
10
11
---------- Buffer: *Backtrace* ----------
Debugger entered--Lisp error:
(wrong-type-argument number-or-marker-p hello)
+(2 hello)
eval((+ 2 'hello) nil)
elisp--eval-last-sexp(t)
eval-last-sexp(nil)
funcall-interactively(eval-print-last-sexp nil)
call-interactively(eval-print-last-sexp nil nil)
command-execute(eval-print-last-sexp)
---------- Buffer: *Backtrace* ----------

As usual, the error message tries to be helpful and makes sense after you learn how to read it.4

The first part of the error message is straightforward; it says ‘wrong type argument’. Next comes the mysterious jargon word ‘number-or-marker-p’. This word is trying to tell you what kind of argument the + expected.

The symbol number-or-marker-p says that the Lisp interpreter is trying to determine whether the information presented it (the value of the argument) is a number or a marker (a special object representing a buffer position). What it does is test to see whether the + is being given numbers to add. It also tests to see whether the argument is something called a marker, which is a specific feature of Emacs Lisp. (In Emacs, locations in a buffer are recorded as markers. When the mark is set with the C-@ or C- command, its position is kept as a marker. The mark can be considered a number—the number of characters the location is from the beginning of the buffer.) In Emacs Lisp, + can be used to add the numeric value of marker positions as numbers.

The ‘p’ of number-or-marker-p is the embodiment of a practice started in the early days of Lisp programming. The ‘p’ stands for “predicate”. In the jargon used by the early Lisp researchers, a predicate refers to a function to determine whether some property is true or false. So the ‘p’ tells us that number-or-marker-p is the name of a function that determines whether it is true or false that the argument supplied is a number or a marker. Other Lisp symbols that end in ‘p’ include zerop, a function that tests whether its argument has the value of zero, and listp, a function that tests whether its argument is a list.

Finally, the last part of the error message is the symbol hello. This is the value of the argument that was passed to +. If the addition had been passed the correct type of object, the value passed would have been a number, such as 37, rather than a symbol like hello. But then you would not have got the error message.

1.8.5 The message Function

Like +, the message function takes a variable number of arguments. It is used to send messages to the user and is so useful that we will describe it here.

A message is printed in the echo area. For example, you can print a message in your echo area by evaluating the following list:

1
(message "This message appears in the echo area!")

The whole string between double quotation marks is a single argument and is printed in toto. (Note that in this example, the message itself will appear in the echo area within double quotes; that is because you see the value returned by the message function. In most uses of message in programs that you write, the text will be printed in the echo area as a side-effect, without the quotes. See multiply-by-seven in detail, for an example of this.)

However, if there is a ‘%s’ in the quoted string of characters, the message function does not print the ‘%s’ as such, but looks to the argument that follows the string. It evaluates the second argument and prints the value at the location in the string where the ‘%s’ is.

You can see this by positioning the cursor after the following expression and typing C-x C-e:

1
(message "The name of this buffer is: %s." (buffer-name))

In Info, "The name of this buffer is: *info*." will appear in the echo area. The function buffer-name returns the name of the buffer as a string, which the message function inserts in place of %s.

To print a value as an integer, use ‘%d’ in the same way as ‘%s’. For example, to print a message in the echo area that states the value of the fill-column, evaluate the following:

1
(message "The value of fill-column is %d." fill-column)

On my system, when I evaluate this list, "The value of fill-column is 72." appears in my echo area5.

If there is more than one ‘%s’ in the quoted string, the value of the first argument following the quoted string is printed at the location of the first ‘%s’ and the value of the second argument is printed at the location of the second ‘%s’, and so on.

For example, if you evaluate the following,

1
2
(message "There are %d %s in the office!"
(- fill-column 14) "pink elephants")

a rather whimsical message will appear in your echo area. On my system it says, "There are 58 pink elephants in the office!".

The expression (- fill-column 14) is evaluated and the resulting number is inserted in place of the ‘%d’; and the string in double quotes, "pink elephants", is treated as a single argument and inserted in place of the ‘%s’. (That is to say, a string between double quotes evaluates to itself, like a number.)

Finally, here is a somewhat complex example that not only illustrates the computation of a number, but also shows how you can use an expression within an expression to generate the text that is substituted for ‘%s’:

1
2
3
4
5
6
(message "He saw %d %s"
(- fill-column 32)
(concat "red "
(substring
"The quick brown foxes jumped." 16 21)
" leaping."))

In this example, message has three arguments: the string, "He saw %d %s", the expression, (- fill-column 32), and the expression beginning with the function concat. The value resulting from the evaluation of (- fill-column 32) is inserted in place of the ‘%d’; and the value returned by the expression beginning with concat is inserted in place of the ‘%s’.

When your fill column is 70 and you evaluate the expression, the message "He saw 38 red foxes leaping." appears in your echo area.

1.9 Setting the Value of a Variable

There are several ways by which a variable can be given a value. One of the ways is to use either the function set or the function setq. Another way is to use let (see let). (The jargon for this process is to bind a variable to a value.)

The following sections not only describe how set and setq work but also illustrate how arguments are passed.

  • Using set: Setting values.
  • Using setq: Setting a quoted value.
  • Counting: Using setq to count.

1.9.1 Using set

To set the value of the symbol flowers to the list '(rose violet daisy buttercup), evaluate the following expression by positioning the cursor after the expression and typing C-x C-e.

1
(set 'flowers '(rose violet daisy buttercup))

The list (rose violet daisy buttercup) will appear in the echo area. This is what is returned by the set function. As a side effect, the symbol flowers is bound to the list; that is, the symbol flowers, which can be viewed as a variable, is given the list as its value. (This process, by the way, illustrates how a side effect to the Lisp interpreter, setting the value, can be the primary effect that we humans are interested in. This is because every Lisp function must return a value if it does not get an error, but it will only have a side effect if it is designed to have one.)

After evaluating the set expression, you can evaluate the symbol flowers and it will return the value you just set. Here is the symbol. Place your cursor after it and type C-x C-e.

1
flowers

When you evaluate flowers, the list (rose violet daisy buttercup) appears in the echo area.

Incidentally, if you evaluate 'flowers, the variable with a quote in front of it, what you will see in the echo area is the symbol itself, flowers. Here is the quoted symbol, so you can try this:

1
'flowers

Note also, that when you use set, you need to quote both arguments to set, unless you want them evaluated. Since we do not want either argument evaluated, neither the variableflowers nor the list (rose violet daisy buttercup), both are quoted. (When you use set without quoting its first argument, the first argument is evaluated before anything else is done. If you did this and flowers did not have a value already, you would get an error message that the ‘Symbol’s value as variable is void’; on the other hand, if flowersdid return a value after it was evaluated, the set would attempt to set the value that was returned. There are situations where this is the right thing for the function to do; but such situations are rare.)

1.9.3 Counting

Here is an example that shows how to use setq in a counter. You might use this to count how many times a part of your program repeats itself. First set a variable to zero; then add one to the number each time the program repeats itself. To do this, you need a variable that serves as a counter, and two expressions: an initial setq expression that sets the counter variable to zero; and a second setq expression that increments the counter each time it is evaluated.

1
2
3
4
5
(setq counter 0)                ; Let's call this the initializer.

(setq counter (+ counter 1)) ; This is the incrementer.

counter ; This is the counter.

(The text following the ‘;’ are comments. See Change a Function Definition.)

If you evaluate the first of these expressions, the initializer, (setq counter 0), and then evaluate the third expression, counter, the number 0 will appear in the echo area. If you then evaluate the second expression, the incrementer, (setq counter (+ counter 1)), the counter will get the value 1. So if you again evaluate counter, the number 1 will appear in the echo area. Each time you evaluate the second expression, the value of the counter will be incremented.

When you evaluate the incrementer, (setq counter (+ counter 1)), the Lisp interpreter first evaluates the innermost list; this is the addition. In order to evaluate this list, it must evaluate the variable counter and the number 1. When it evaluates the variable counter, it receives its current value. It passes this value and the number 1 to the + which adds them together. The sum is then returned as the value of the inner list and passed to the setq which sets the variable counter to this new value. Thus, the value of the variable, counter, is changed.

1.10 Summary

Learning Lisp is like climbing a hill in which the first part is the steepest. You have now climbed the most difficult part; what remains becomes easier as you progress onwards.

In summary,

  • Lisp programs are made up of expressions, which are lists or single atoms.
  • Lists are made up of zero or more atoms or inner lists, separated by whitespace and surrounded by parentheses. A list can be empty.
  • Atoms are multi-character symbols, like forward-paragraph, single character symbols like +, strings of characters between double quotation marks, or numbers.
  • A number evaluates to itself.
  • A string between double quotes also evaluates to itself.
  • When you evaluate a symbol by itself, its value is returned.
  • When you evaluate a list, the Lisp interpreter looks at the first symbol in the list and then at the function definition bound to that symbol. Then the instructions in the function definition are carried out.
  • A single-quote ‘’’ tells the Lisp interpreter that it should return the following expression as written, and not evaluate it as it would if the quote were not there.
  • Arguments are the information passed to a function. The arguments to a function are computed by evaluating the rest of the elements of the list of which the function is the first element.
  • A function always returns a value when it is evaluated (unless it gets an error); in addition, it may also carry out some action that is a side effect. In many cases, a function’s primary purpose is to create a side effect.

Intro to elisp 0. preface

Posted on 2019-06-11 | Comments:

Most of the GNU Emacs integrated environment is written in the programming language called Emacs Lisp. The code written in this programming language is the software—the sets of instructions—that tell the computer what to do when you give it commands. Emacs is designed so that you can write new code in Emacs Lisp and easily install it as an extension to the editor.

(GNU Emacs is sometimes called an “extensible editor”, but it does much more than provide editing capabilities. It is better to refer to Emacs as an “extensible computing environment”. However, that phrase is quite a mouthful. It is easier to refer to Emacs simply as an editor. Moreover, everything you do in Emacs—find the Mayan date and phases of the moon, simplify polynomials, debug code, manage files, read letters, write books—all these activities are kinds of editing in the most general sense of the word.)

  • Why: Why learn Emacs Lisp?
  • On Reading this Text: Read, gain familiarity, pick up habits….
  • Who You Are: For whom this is written.
  • Lisp History
  • Note for Novices: You can read this as a novice.
  • Thank You

Why Study Emacs Lisp?

Although Emacs Lisp is usually thought of in association only with Emacs, it is a full computer programming language. You can use Emacs Lisp as you would any other programming language.

Perhaps you want to understand programming; perhaps you want to extend Emacs; or perhaps you want to become a programmer. This introduction to Emacs Lisp is designed to get you started: to guide you in learning the fundamentals of programming, and more importantly, to show you how you can teach yourself to go further.

On Reading this Text

All through this document, you will see little sample programs you can run inside of Emacs. If you read this document in Info inside of GNU Emacs, you can run the programs as they appear. (This is easy to do and is explained when the examples are presented.) Alternatively, you can read this introduction as a printed book while sitting beside a computer running Emacs. (This is what I like to do; I like printed books.) If you don’t have a running Emacs beside you, you can still read this book, but in this case, it is best to treat it as a novel or as a travel guide to a country not yet visited: interesting, but not the same as being there.

Much of this introduction is dedicated to walkthroughs or guided tours of code used in GNU Emacs. These tours are designed for two purposes: first, to give you familiarity with real, working code (code you use every day); and, second, to give you familiarity with the way Emacs works. It is interesting to see how a working environment is implemented. Also, I hope that you will pick up the habit of browsing through source code. You can learn from it and mine it for ideas. Having GNU Emacs is like having a dragon’s cave of treasures.

In addition to learning about Emacs as an editor and Emacs Lisp as a programming language, the examples and guided tours will give you an opportunity to get acquainted with Emacs as a Lisp programming environment. GNU Emacs supports programming and provides tools that you will want to become comfortable using, such as M-. (the key which invokes the xref-find-definitions command). You will also learn about buffers and other objects that are part of the environment. Learning about these features of Emacs is like learning new routes around your home town.

Finally, I hope to convey some of the skills for using Emacs to learn aspects of programming that you don’t know. You can often use Emacs to help you understand what puzzles you or to find out how to do something new. This self-reliance is not only a pleasure, but an advantage.

For Whom This is Written

This text is written as an elementary introduction for people who are not programmers. If you are a programmer, you may not be satisfied with this primer. The reason is that you may have become expert at reading reference manuals and be put off by the way this text is organized.

An expert programmer who reviewed this text said to me:

I prefer to learn from reference manuals. I “dive into” each paragraph, and “come up for air” between paragraphs.

When I get to the end of a paragraph, I assume that subject is done, finished, that I know everything I need (with the possible exception of the case when the next paragraph starts talking about it in more detail). I expect that a well written reference manual will not have a lot of redundancy, and that it will have excellent pointers to the (one) place where the information I want is.

This introduction is not written for this person!

Firstly, I try to say everything at least three times: first, to introduce it; second, to show it in context; and third, to show it in a different context, or to review it.

Secondly, I hardly ever put all the information about a subject in one place, much less in one paragraph. To my way of thinking, that imposes too heavy a burden on the reader. Instead I try to explain only what you need to know at the time. (Sometimes I include a little extra information so you won’t be surprised later when the additional information is formally introduced.)

When you read this text, you are not expected to learn everything the first time. Frequently, you need make only a nodding acquaintance with some of the items mentioned. My hope is that I have structured the text and given you enough hints that you will be alert to what is important, and concentrate on it.

You will need to dive into some paragraphs; there is no other way to read them. But I have tried to keep down the number of such paragraphs. This book is intended as an approachable hill, rather than as a daunting mountain.

This introduction to Programming in Emacs Lisp has a companion document, The GNU Emacs Lisp Reference Manual. The reference manual has more detail than this introduction. In the reference manual, all the information about one topic is concentrated in one place. You should turn to it if you are like the programmer quoted above. And, of course, after you have read this Introduction, you will find the Reference Manual useful when you are writing your own programs.

Lisp History

Lisp was first developed in the late 1950s at the Massachusetts Institute of Technology for research in artificial intelligence. The great power of the Lisp language makes it superior for other purposes as well, such as writing editor commands and integrated environments.

GNU Emacs Lisp is largely inspired by Maclisp, which was written at MIT in the 1960s. It is somewhat inspired by Common Lisp, which became a standard in the 1980s. However, Emacs Lisp is much simpler than Common Lisp. (The standard Emacs distribution contains an optional extensions file, cl.el, that adds many Common Lisp features to Emacs Lisp.)

A Note for Novices

If you don’t know GNU Emacs, you can still read this document profitably. However, I recommend you learn Emacs, if only to learn to move around your computer screen. You can teach yourself how to use Emacs with the built-in tutorial. To use it, type C-h t. (This means you press and release the key and the h at the same time, and then press and release t.)

Also, I often refer to one of Emacs’s standard commands by listing the keys which you press to invoke the command and then giving the name of the command in parentheses, like this: M-C-\ (indent-region). What this means is that the indent-region command is customarily invoked by typing M-C-. (You can, if you wish, change the keys that are typed to invoke the command; this is called rebinding. See Keymaps.) The abbreviation M-C-\ means that you type your key, key and \ key all at the same time. (On many modern keyboards the key is labeled .) Sometimes a combination like this is called a keychord, since it is similar to the way you play a chord on a piano. If your keyboard does not have a key, the key prefix is used in place of it. In this case, M-C-\ means that you press and release your key and then type the key and the \ key at the same time. But usually M-C-\ means press the key along with the key that is labeled and, at the same time, press the \ key.

In addition to typing a lone keychord, you can prefix what you type with C-u, which is called the universal argument. The C-u keychord passes an argument to the subsequent command. Thus, to indent a region of plain text by 6 spaces, mark the region, and then type C-u 6 M-C-. (If you do not specify a number, Emacs either passes the number 4 to the command or otherwise runs the command differently than it would otherwise.) See Numeric Arguments.

If you are reading this in Info using GNU Emacs, you can read through this whole document just by pressing the space bar, . (To learn about Info, type C-h i and then select Info.)

A note on terminology: when I use the word Lisp alone, I often am referring to the various dialects of Lisp in general, but when I speak of Emacs Lisp, I am referring to GNU Emacs Lisp in particular.

Thank You

My thanks to all who helped me with this book. My especial thanks to Jim Blandy, Noah Friedman, Jim Kingdon, Roland McGrath, Frank Ritter, Randy Smith, Richard M. Stallman, and Melissa Weisshaus. My thanks also go to both Philip Johnson and David Stampe for their patient encouragement. My mistakes are my own.

Robert J. Chassell

bob@gnu.org

12…4

Gabriel

32 posts
16 categories
30 tags
GitHub
© 2019 Gabriel
Powered by Hexo v3.8.0
|
Theme – NexT.Mist v7.1.1